This section helps users assign administrative rights in accordance with the business's organizational chart and create accounts with corresponding rights.
Concepts
The Administrative feature allows users to create additional users (user accounts) and grants various types of roles to use features on the software.
- Account: is an account for an employee of a business using the software. MOBIO recommends that users do not log in to the same account at the same time on many different computers. An account can be assigned multiple permission groups.
- Roles: is a group of permissions to access and manipulate features on the MOBIO system. Permission groups help businesses easily assign permissions to accounts in different departments to use the features that are right for them.
- Admin account: is the default account that always has all the features included in MOBIO’s product package.
Role settings
This feature will allow create Roles with permissions to use different features following the business’s operating model.
Step 1: Access features.
(1) Select the Switch product icon.
(2) Select Company Account.
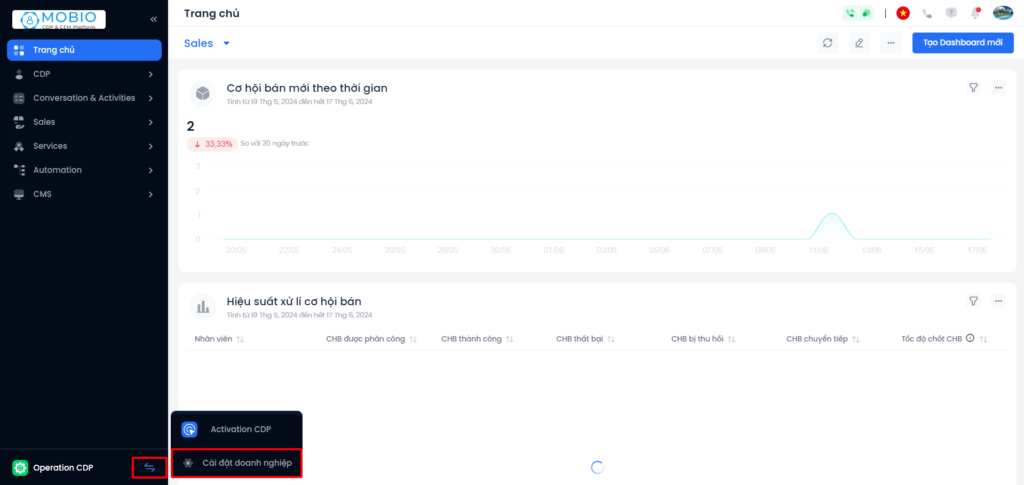
Step 2: Access Administration → Select Role Settings.
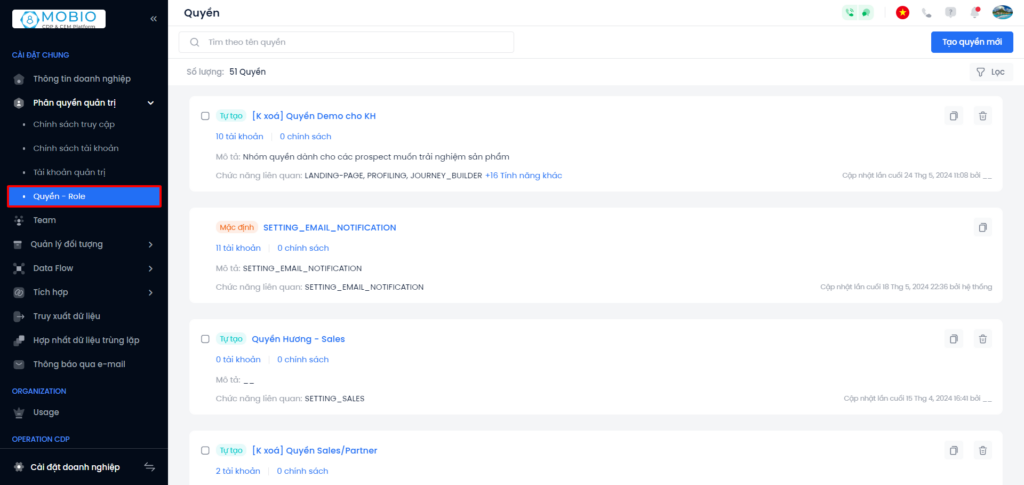
Create new permission
Step 1: Click Create new permission, the screen displays a popup window.
Step 2: Fill in general information, including Role Name and Description. Click Continue to move to the next step.

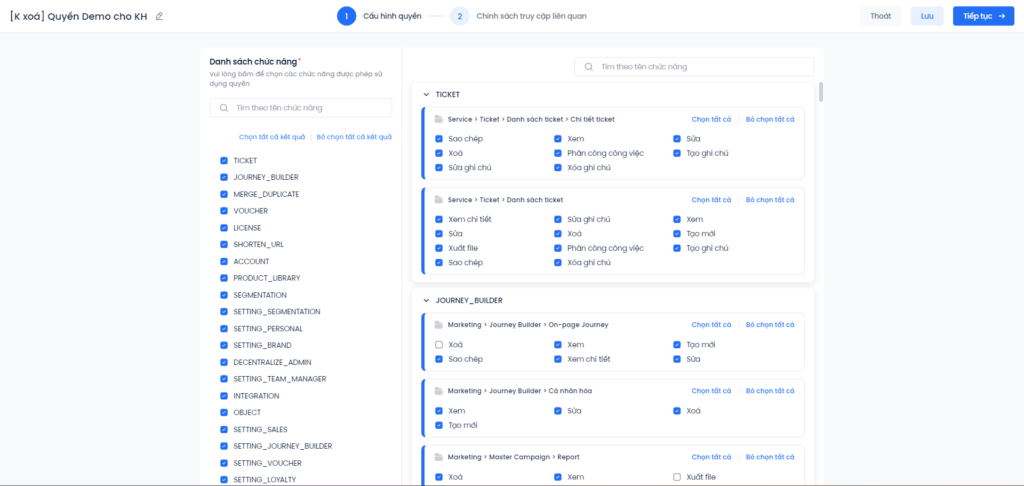
Step 3: At the Role configuration tab, select the functions allowed for each module on the MOBIO system. Each function can include 4 basic rights: create, view, edit, and delete.
- Account: account authorization
- Marketing: include Omni-channel Journey, Landing Page, Ads, Popup builder, and SMS Brandname.
- Sales: module Sales
- Toolkits: domain verification instructions, Dashboard configuration, filter configuration
- Tags: includes profile tag and job classification tag
- Chat tool: configure Web live chat
- Social: Online & Social Network module
- Statistics: Statistics section, including Voucher reports and post-transaction evaluation
- Mobio App: manage Mobile App features integrated with MOBIO
- Loyalty policy: Loyalty module
- Profiling: module CDP
- Call Center: Switchboard module
- Product Library: manage product information
- Ticket: module Ticket
- Dashboard: home page
- Voucher
- Portal
- Brand and Location: Brand and Location section
- Team Manager: Team management
Step 4: Click Exit, Save, or Continue to move to the next step.
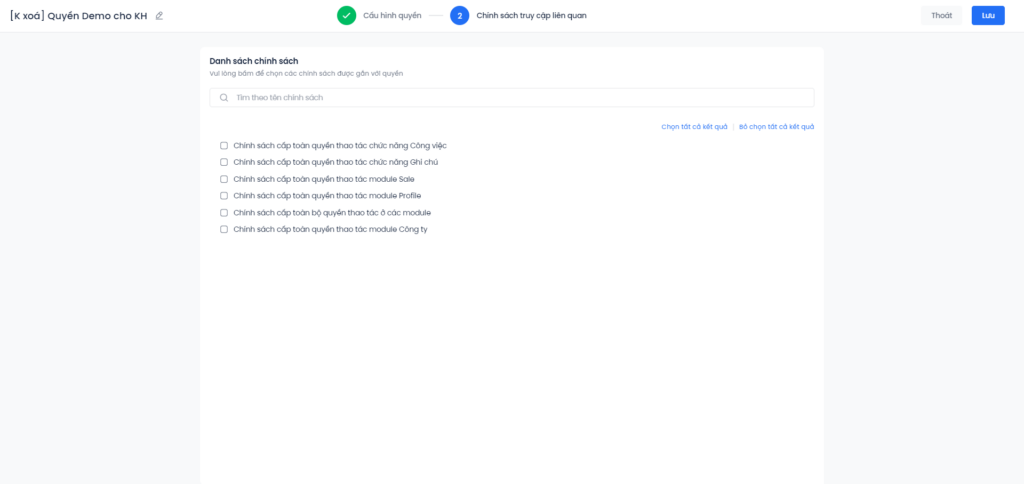
Step 5: At the Associated access policy tab, click to select the policies associated with team permissions.
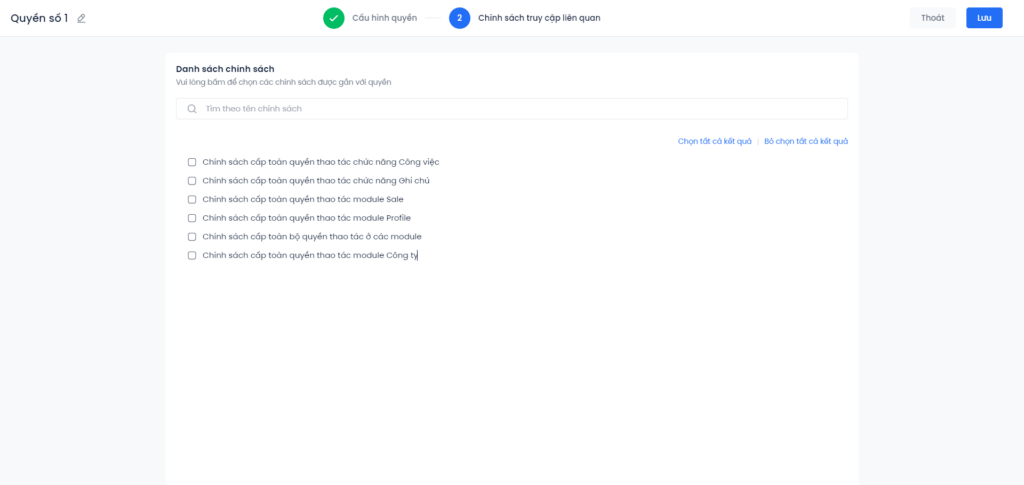
Step 6: Click Exit or Save to finish creating a new permission group.
Edit permission
Step 1: In the list of permissions, click on the name of the permission group you want to edit. Select Edit.
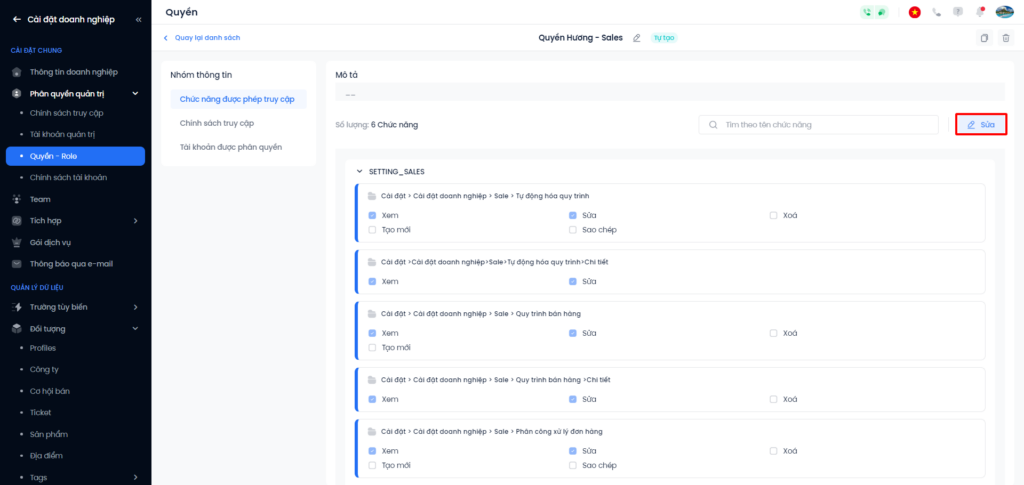
Step 2: At the Role configuration tab , users update the editing information. Click Exit, Save, or Continue to move to the next step.
Step 3: At the Associated access policy tab , users update the editing information. Click Exit or Save to finish editing the permission group.
Delete permission
At the permission group you want to delete, click the Delete icon. The interface will display a pop-up window asking for final confirmation before deleting, click Delete or Cancel.
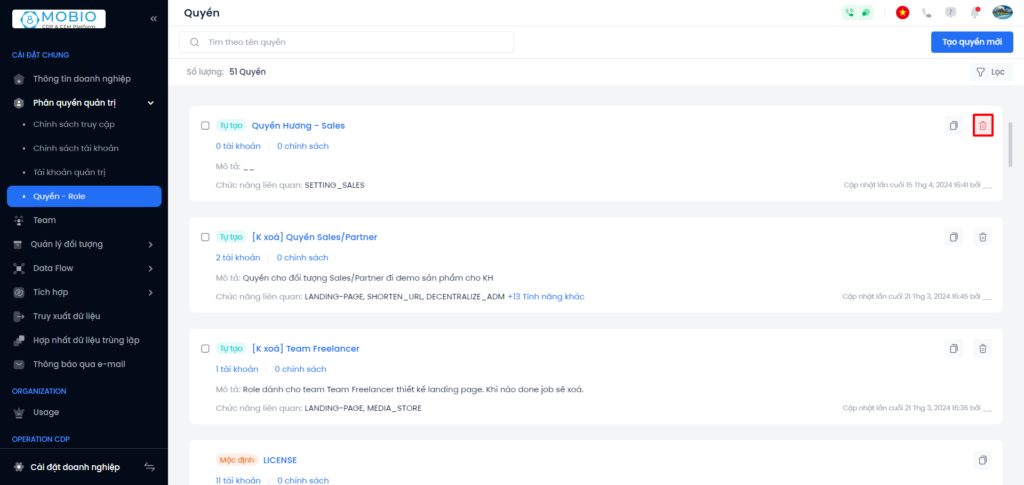
Note: Deleting a permission group will also remove the permission group from all currently assigned accounts.
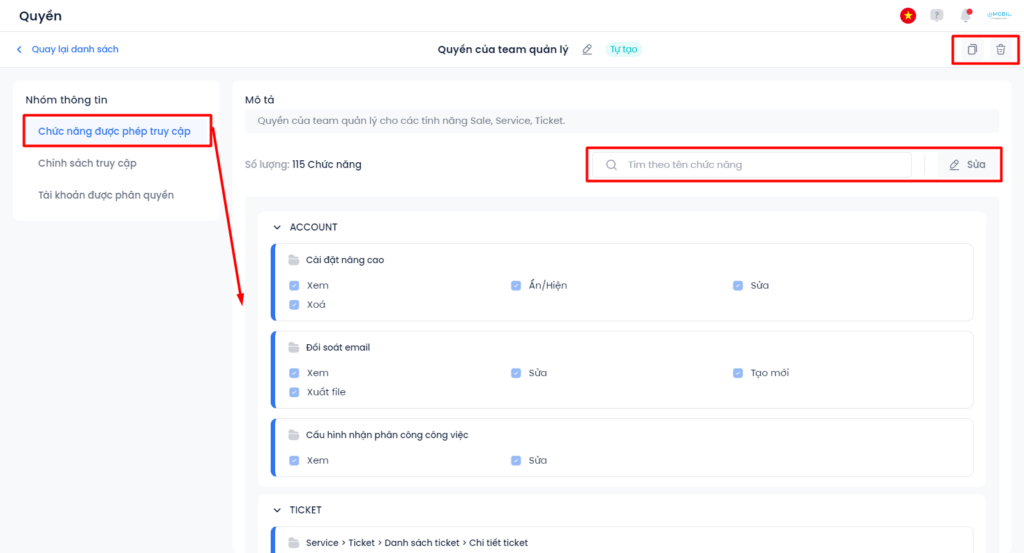
View permission details
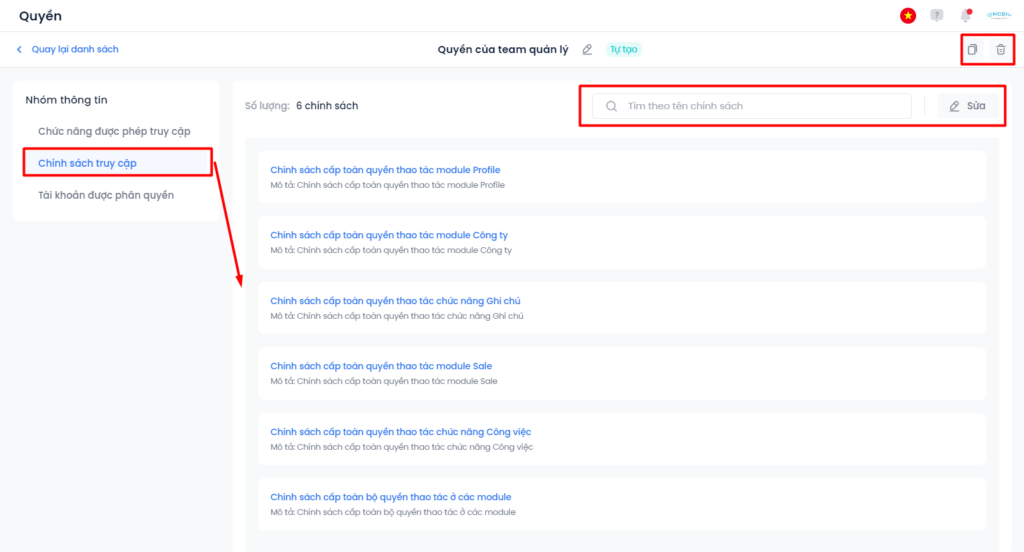
See the Accessible function
In the accessible function information area, users will be able to view the functions assigned to the permission group. Besides, users can perform actions to edit, search the permission group.
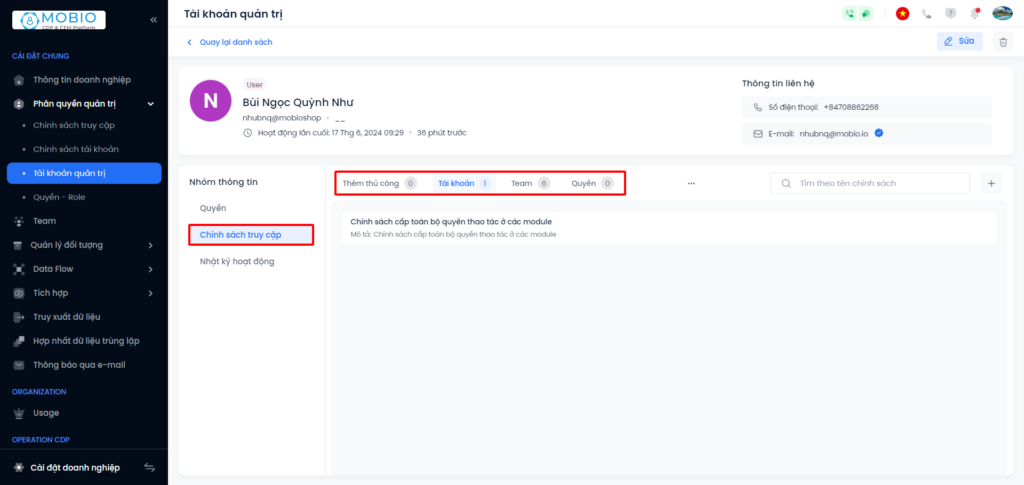
See Access control policy
In the Access control policy area, users will be able to view the policies assigned to the permission group. Besides, users can perform actions to edit, search and remove policies from the permission group.
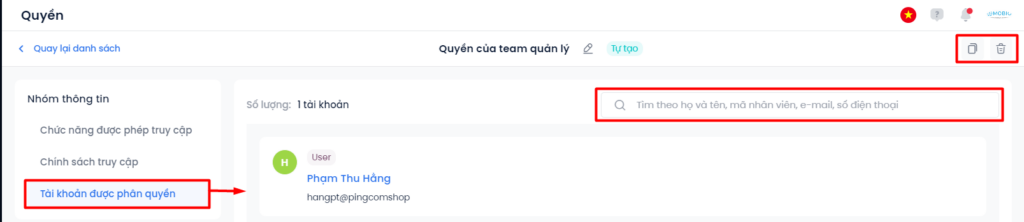
View authorized accounts
In the Authorized Account area, users will be able to view accounts assigned to permission groups. Besides, users can perform actions to edit, search, and remove accounts from the permission group.
Account Settings
Step 1: Access features.
(1) Select the Switch product icon.
(2) Select Company Account.
Step 2: Select Administration → Select Account Settings.
Select the information to display in the list
Step 1: Click Select display information → popup window display.
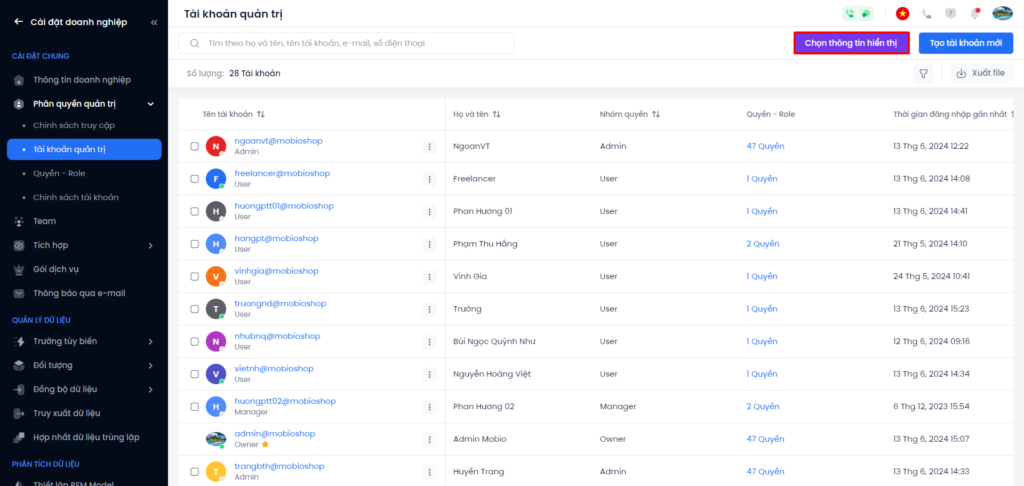
Step 2: Select (or deselect) the user information fields you want to display in the account list.
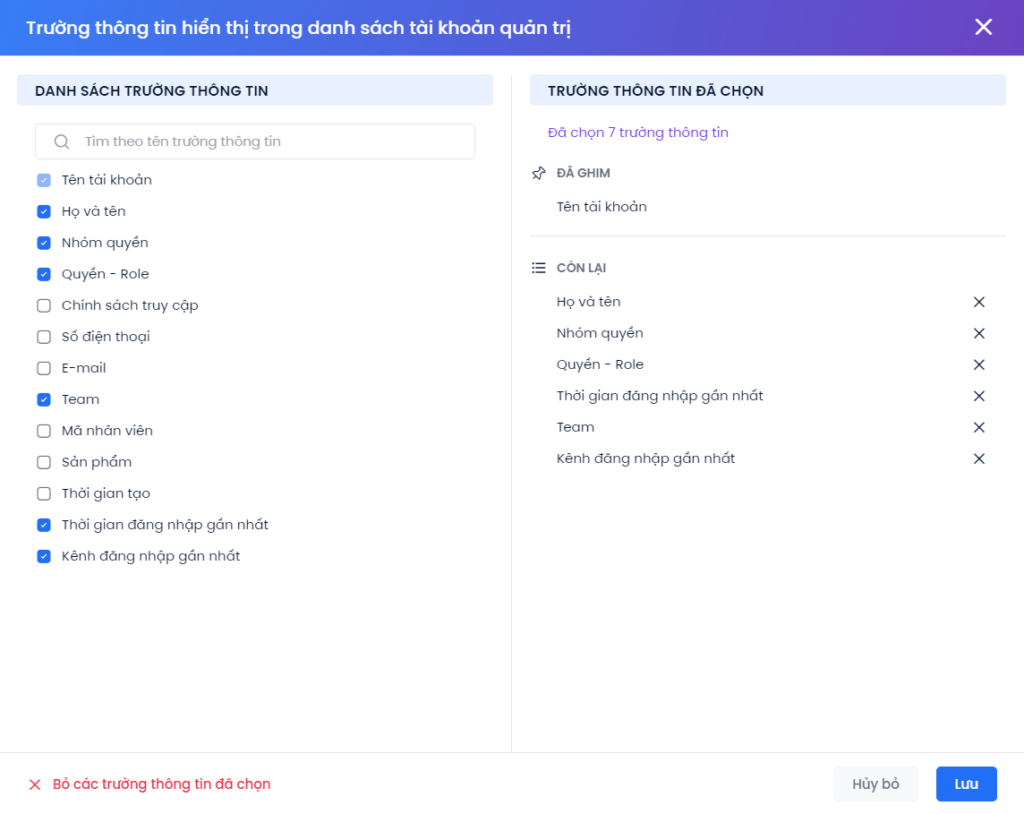
Step 3: Click Cancel or Save to complete the operation.
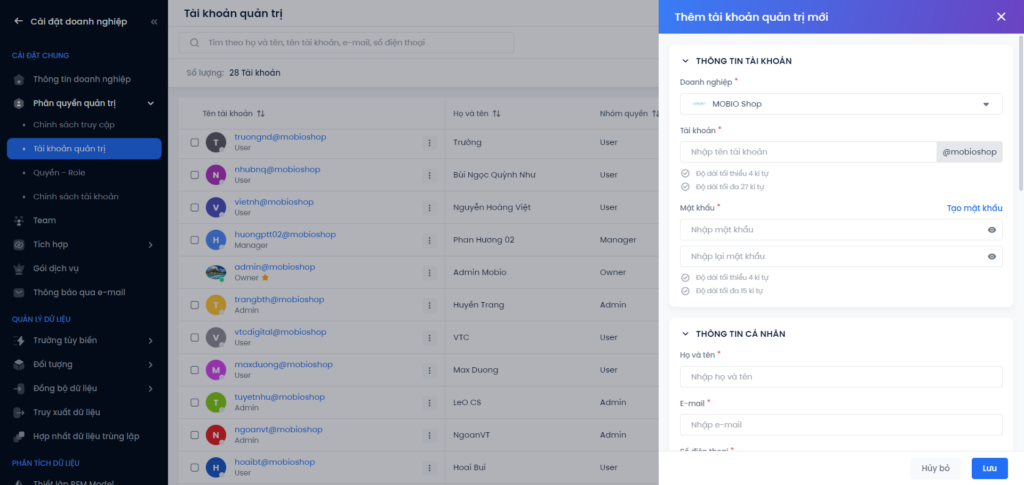
Add new account
Step 1: Click Create new account → the popup window will appear.
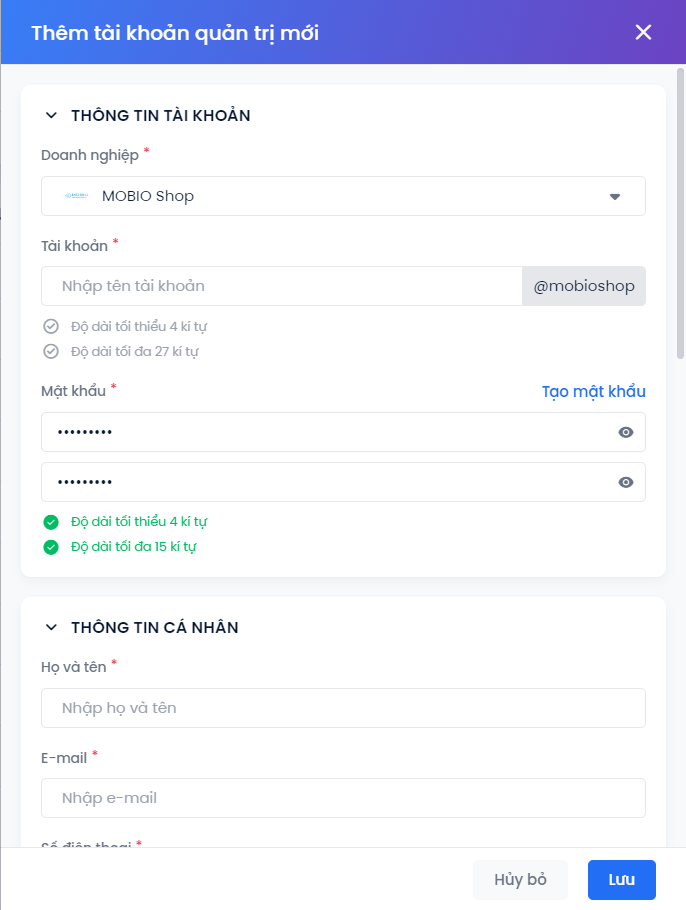
Step 2: Fill in general information.
Step 3: Set a password.
- Method 1: Set your own password with accompanying notes.
- Method 2: Generate password automatically from the system.
Step 4: Select permission.
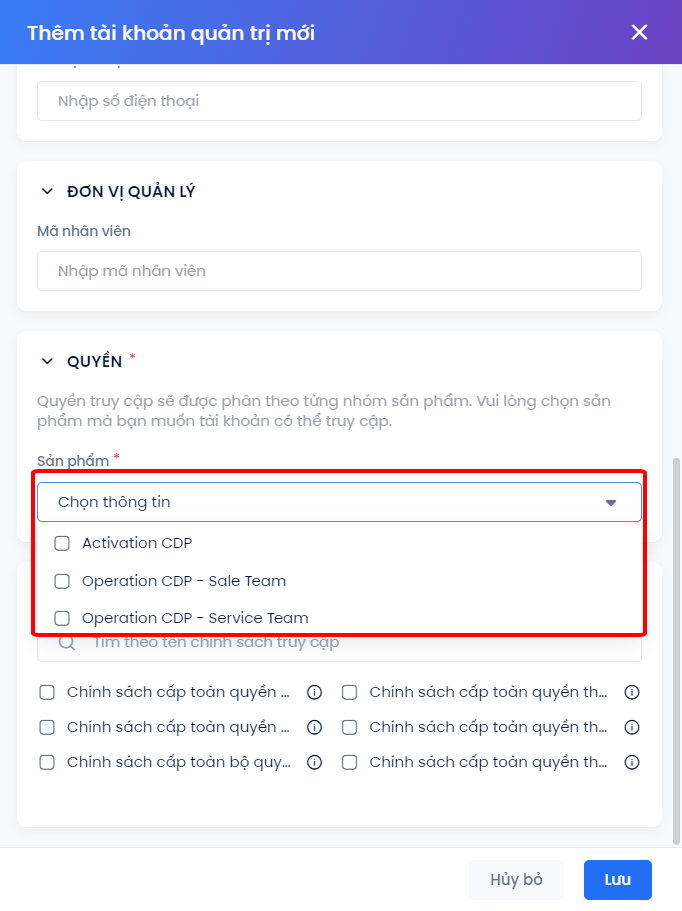
Select Product Infomation and Role
Step 5: Click Save or Cancel. Access rights are divided into product groups that the account can access.
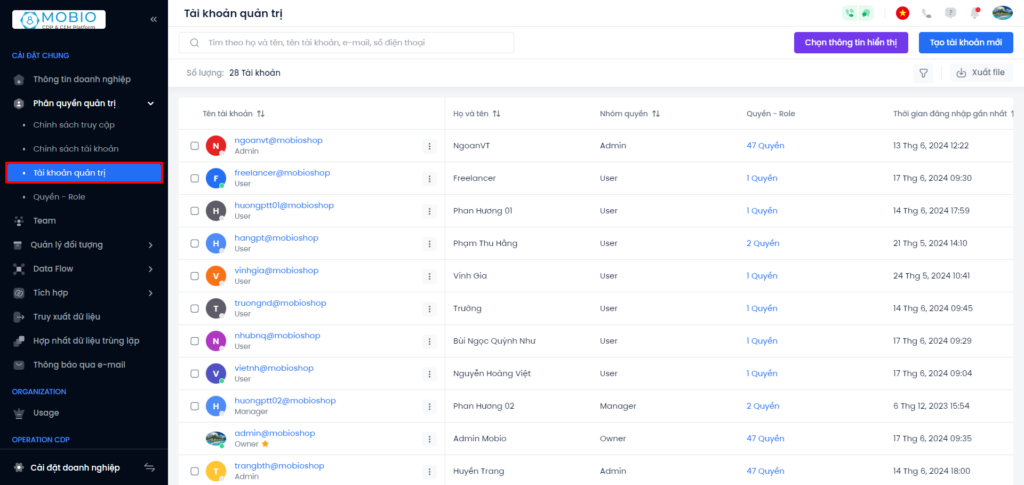
View account details
In the account list, click directly on the account name you want to view → the screen switches to the account’s detailed information page.
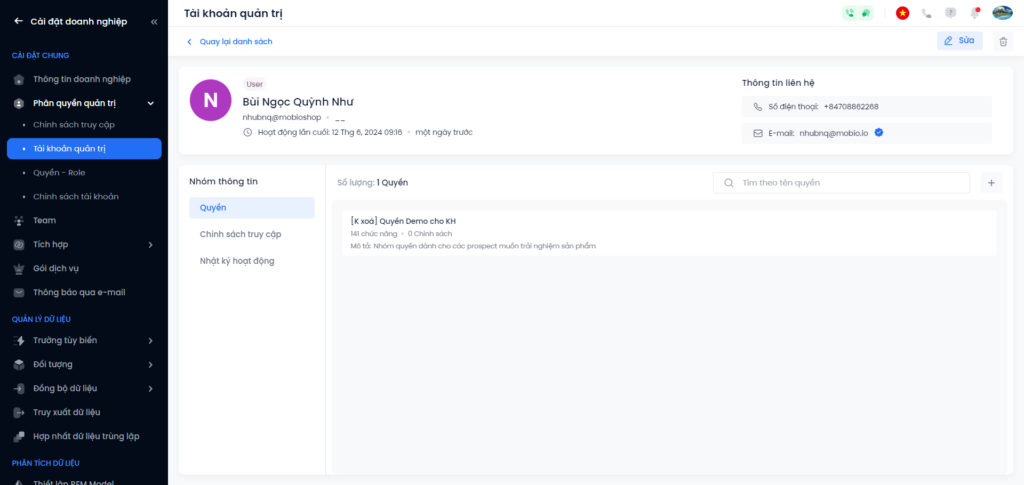
Here, users can view account status (online/offline), last login time, and contact information.
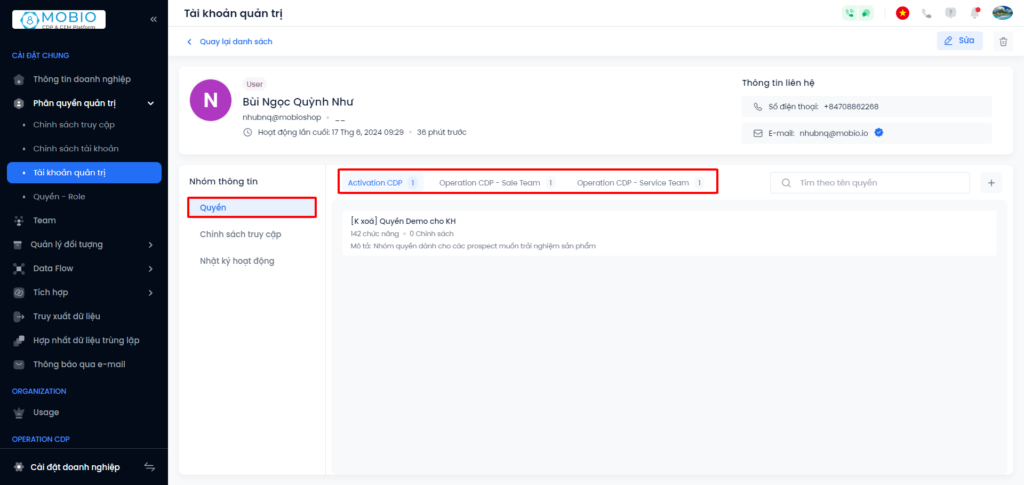
Users select Information Group to view details: Role, Access Control Policy, Activity Log.
- Role: Access rights are divided into each product group that the account can access.
- Access control policy: Select the cards one by one to view detailed information about the account’s access policy.
- Activity log : Users can view the account’s activity log over a custom period.
Note: The system only stores activity within the most recent 3 months.

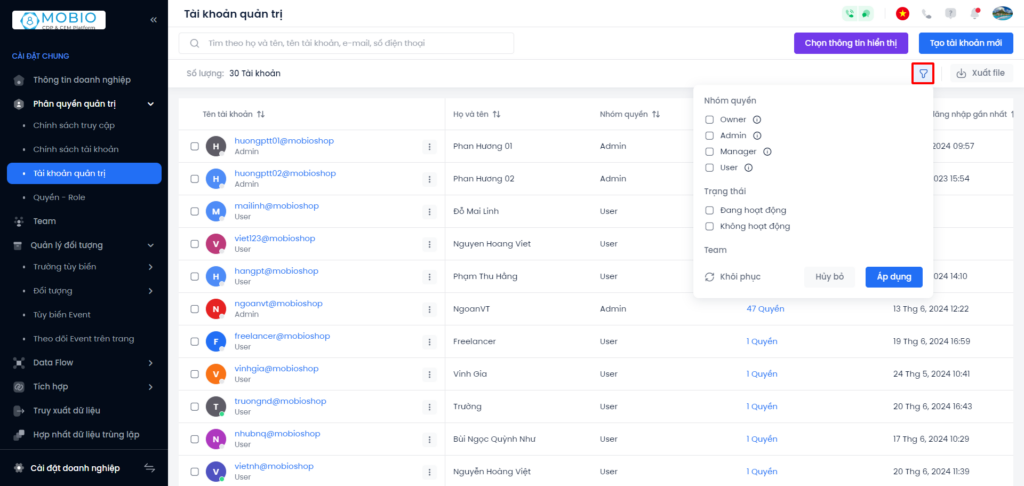
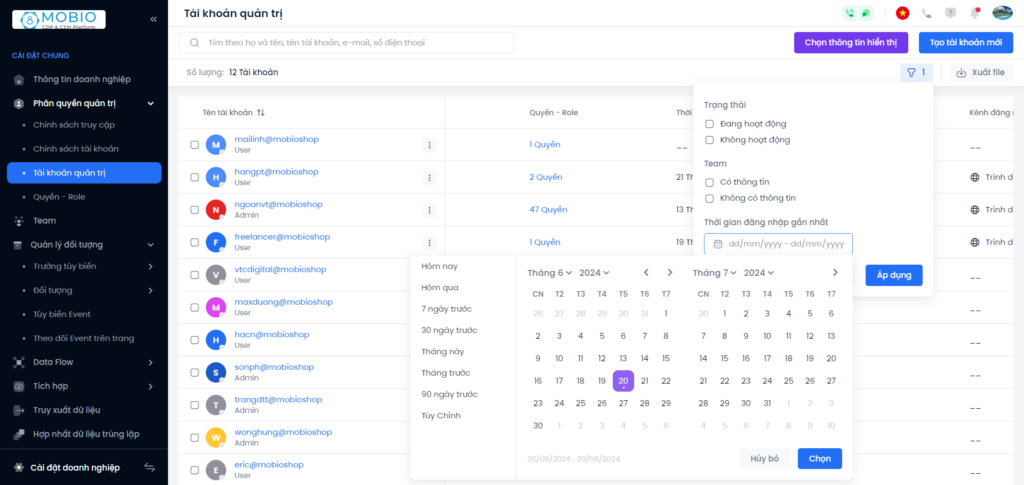
Account filter
In the account list, click the filter icon → select the desired filtering criteria.
- Role: Select one or more permission groups to view accounts that belong to the permission group.
- Status: Select a status to view the account as Active/Inactive.
- Team :
– Information available: Select Team to view accounts belonging to the selected team.
– No information: Select to view accounts that do not belong to any team. - Last login time : Select the time to view accounts that have logged in during the selected time period.
Edit account
At the account you want to edit, click on the three-dot icon → select Edit popup window display interface to edit the account (cannot edit Business & Account Name) → click Save or Cancel .

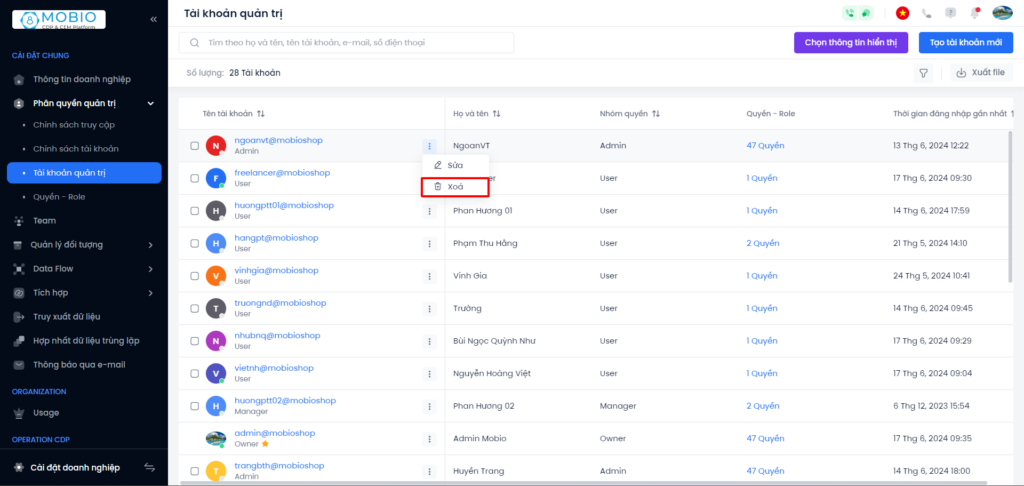
Delete the account
At the account you want to delete, click on the three-dot icon → select Delete → the interface displays a popup window asking for final confirmation before deletion → click Delete or Cancel.
Deleting an account will also remove the account from all currently assigned content.
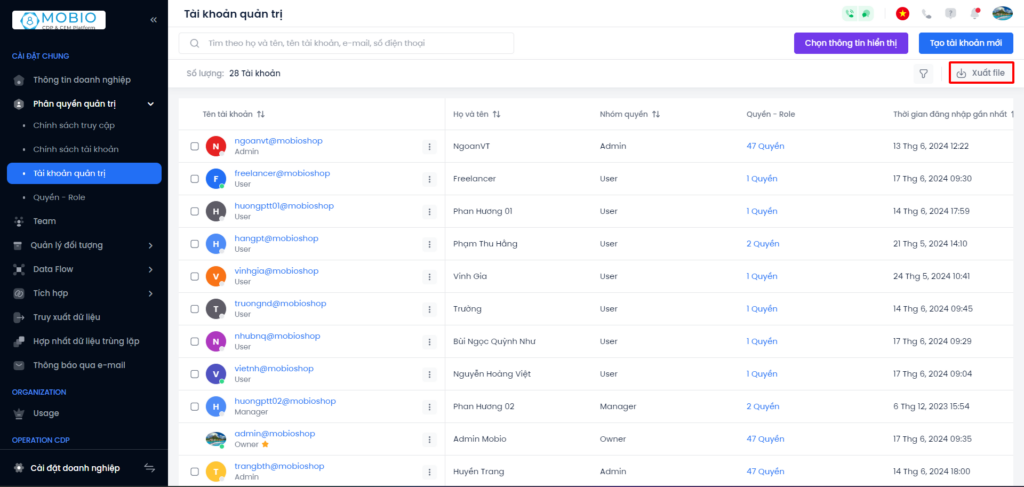
Download account list
Click Export file to download the excel file list of accounts.
Policy Settings
This feature will allow configuration of password setup rules, required characters and length of account name and password password.
Step 1: Access features.
(1) Select the Switch product icon.
(2) Select Company Account.
Step 2: Select Administration → Select Policy Settings.
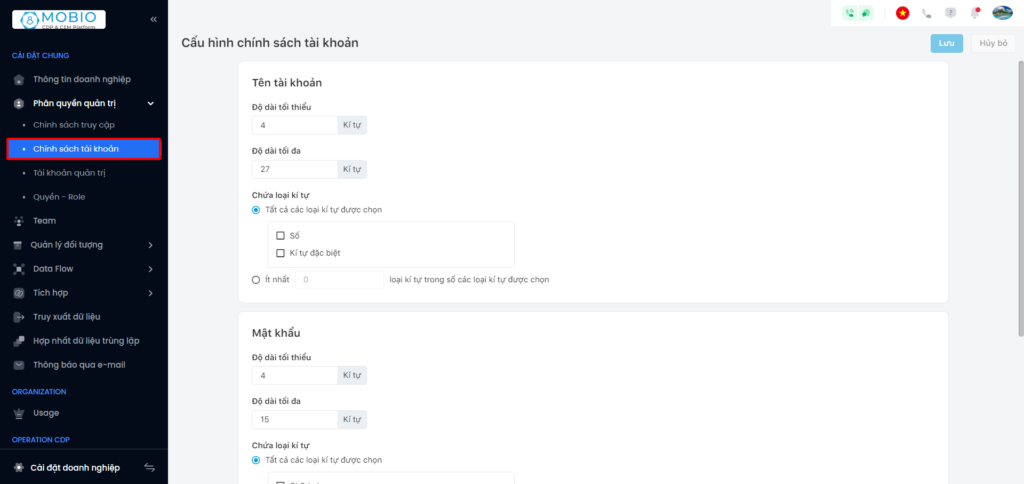
Step 3: Fill in information about character limit and account login settings.
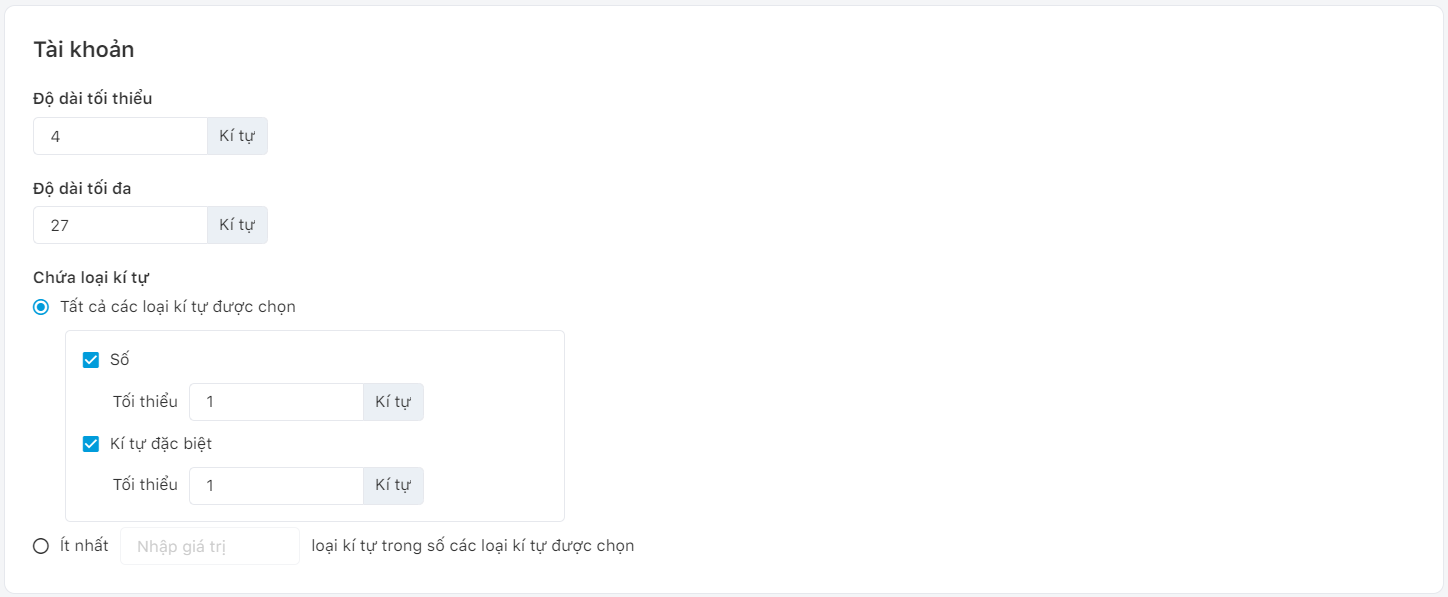
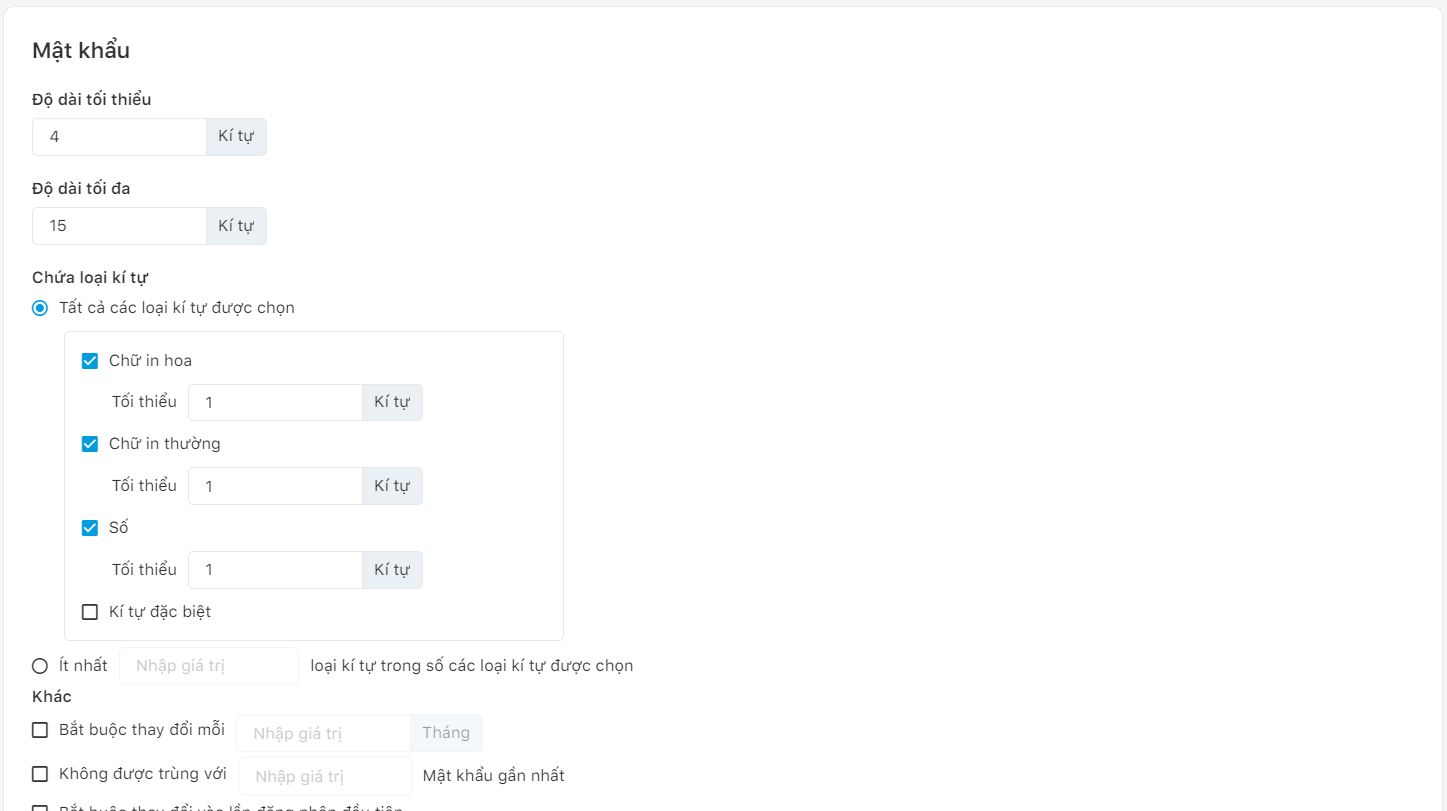
Complete account policy configuration.