The sales pipeline determines the sales volume and sales rate for each product in accordance with the business strategy
Set up a Sales Pipeline
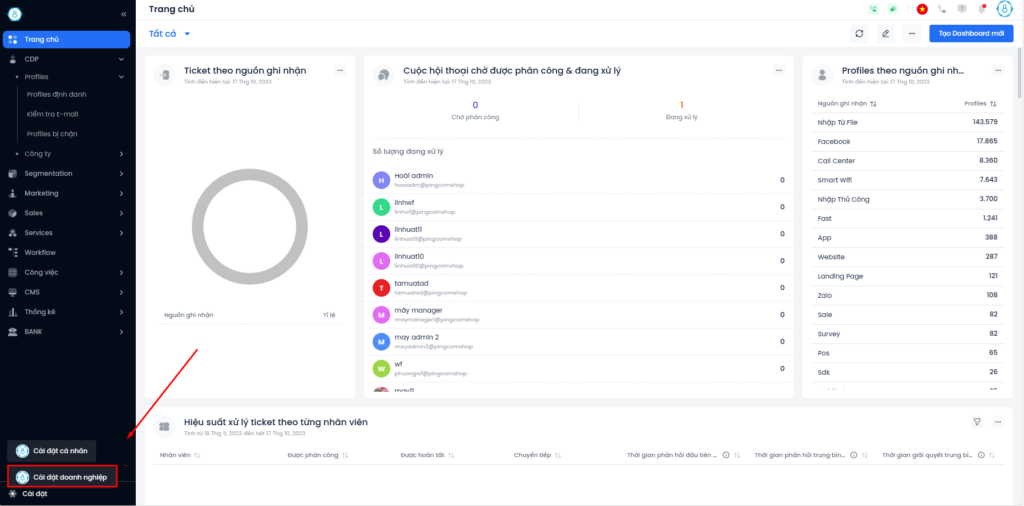
To access the feature, on the menu bar in the bottom left corner of the screen, users select Settings → Company Account.
Create a Sales pipeline
Sales pipeline include steps to perform a sales sequence. The sales pipeline varies depending on the product group and customer.
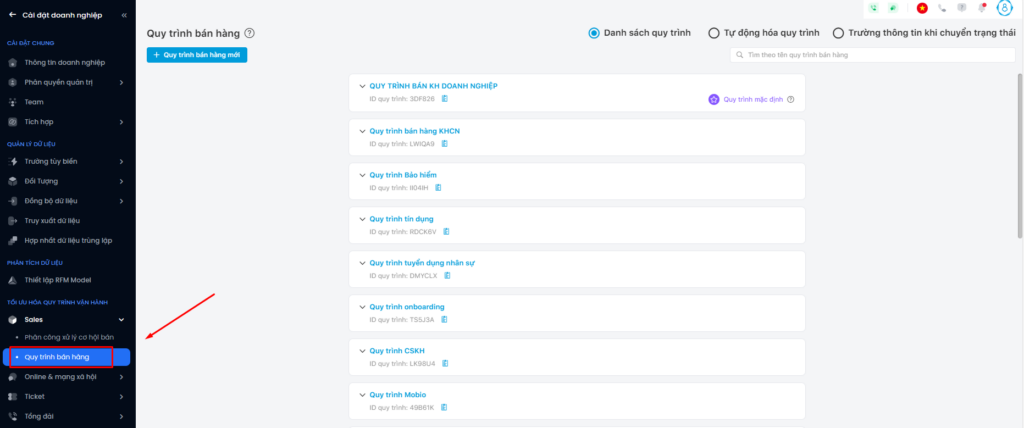
Step 1: User accesses Sales → Select Sales Pipeline → select + Add Sales Pipeline.
Step 2: Add a new sales pipeline.
- Select a sales pipeline template (create a new template or choose from an existing template).
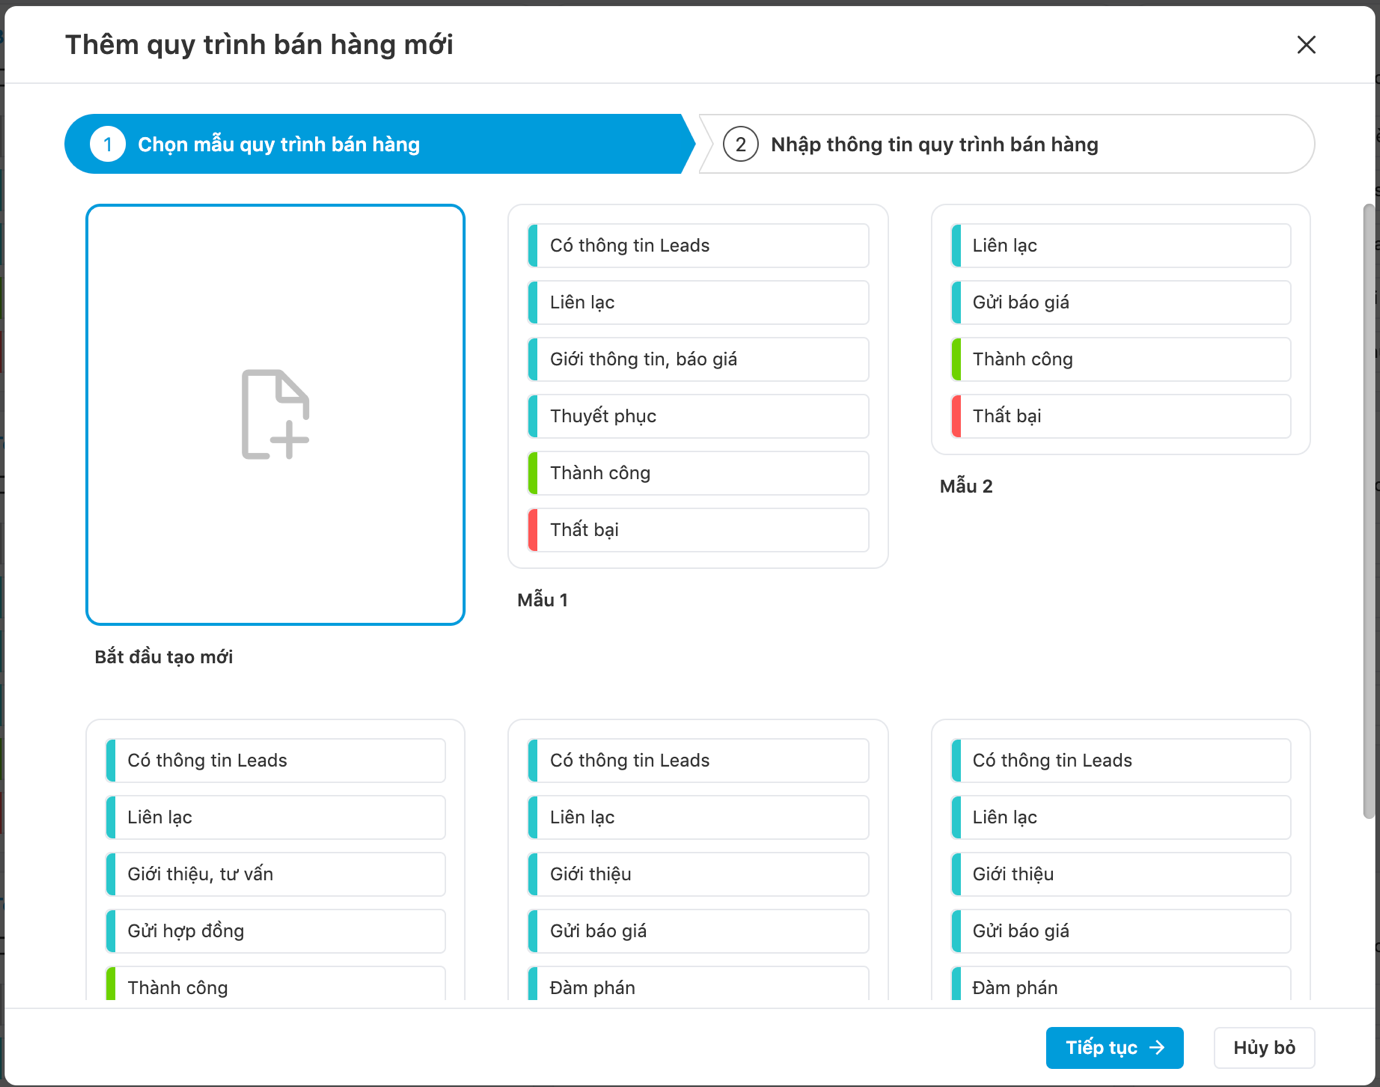
- Enter the required information in the sales pipeline:
+ Sales pipeline name: Press the tick to select the sales pipeline as the default process.
Note: There is only 01 default sales pipeline at a time.
Oppty can be created manually or automatically.
In case of creating an Oppty automatically:
– If there is no information about the product that Profiles (Leads) are interested in, the Oppty will be created and assigned according to the default Sales Pipeline.
– If there is information, the Oppty will be created and assigned according to the Sales Pipeline with the corresponding product.
+ Description
+ Opportunity status: steps in the sales pipeline. Press + Add New to add a step to the pipeline.

Note: The system allows for the creation of up to 15 steps in the Sales Pipeline.
Step 3: Click Save to add a new sales process.
After successfully creating a sales pipeline, users can search for sales pipelines on the search tool bar.

Edit and delete sales pipeline
Step 1: Move the mouse cursor to the sales pipeline that needs to be edited/deleted.
Step 2: Click on the icon
– Pencil icon to edit the sales pipeline.
– Trash can icon to delete the sales pipeline.

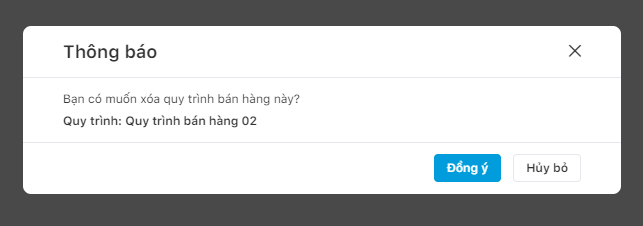
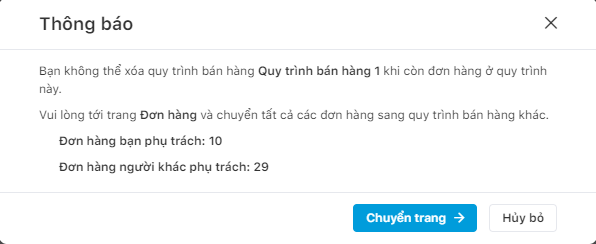
Note: When you choose to delete a sales pipeline, a popup screen displays warning users that they can’t delete when an Oppty is in this pipeline.
Default sales pipeline
When a Lead is assigned automatically, the system uses the default sales pipeline to assign in case the Lead doesn’t have enough information to include in a particular sales pipeline.

Opportunity automation
Opportunity automation aims to shorten the user’s operation time and automatically set up the Oppty fulfillment process between steps, departments, and individuals. Conditions for implementing the automation need to be conditional on the occurrence of events and subsequent actions.
Create opportunity automation
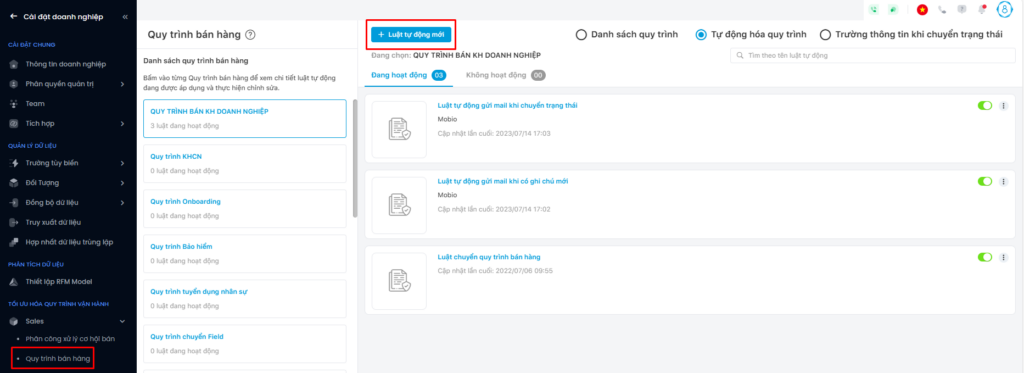
Step 1: The user accesses the Sales → select Sales Pipeline → select Opportunity Automation.
Step 2: Select Sales pipeline.
Step 3: Select + New Automation to add an automation rule.
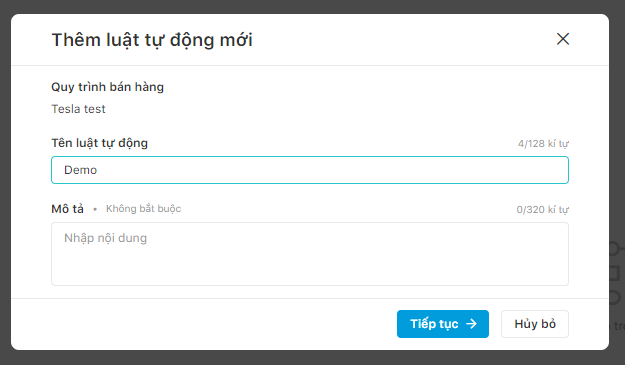
Step 4: Fill in the information to add the new automation rule → Click Continue.
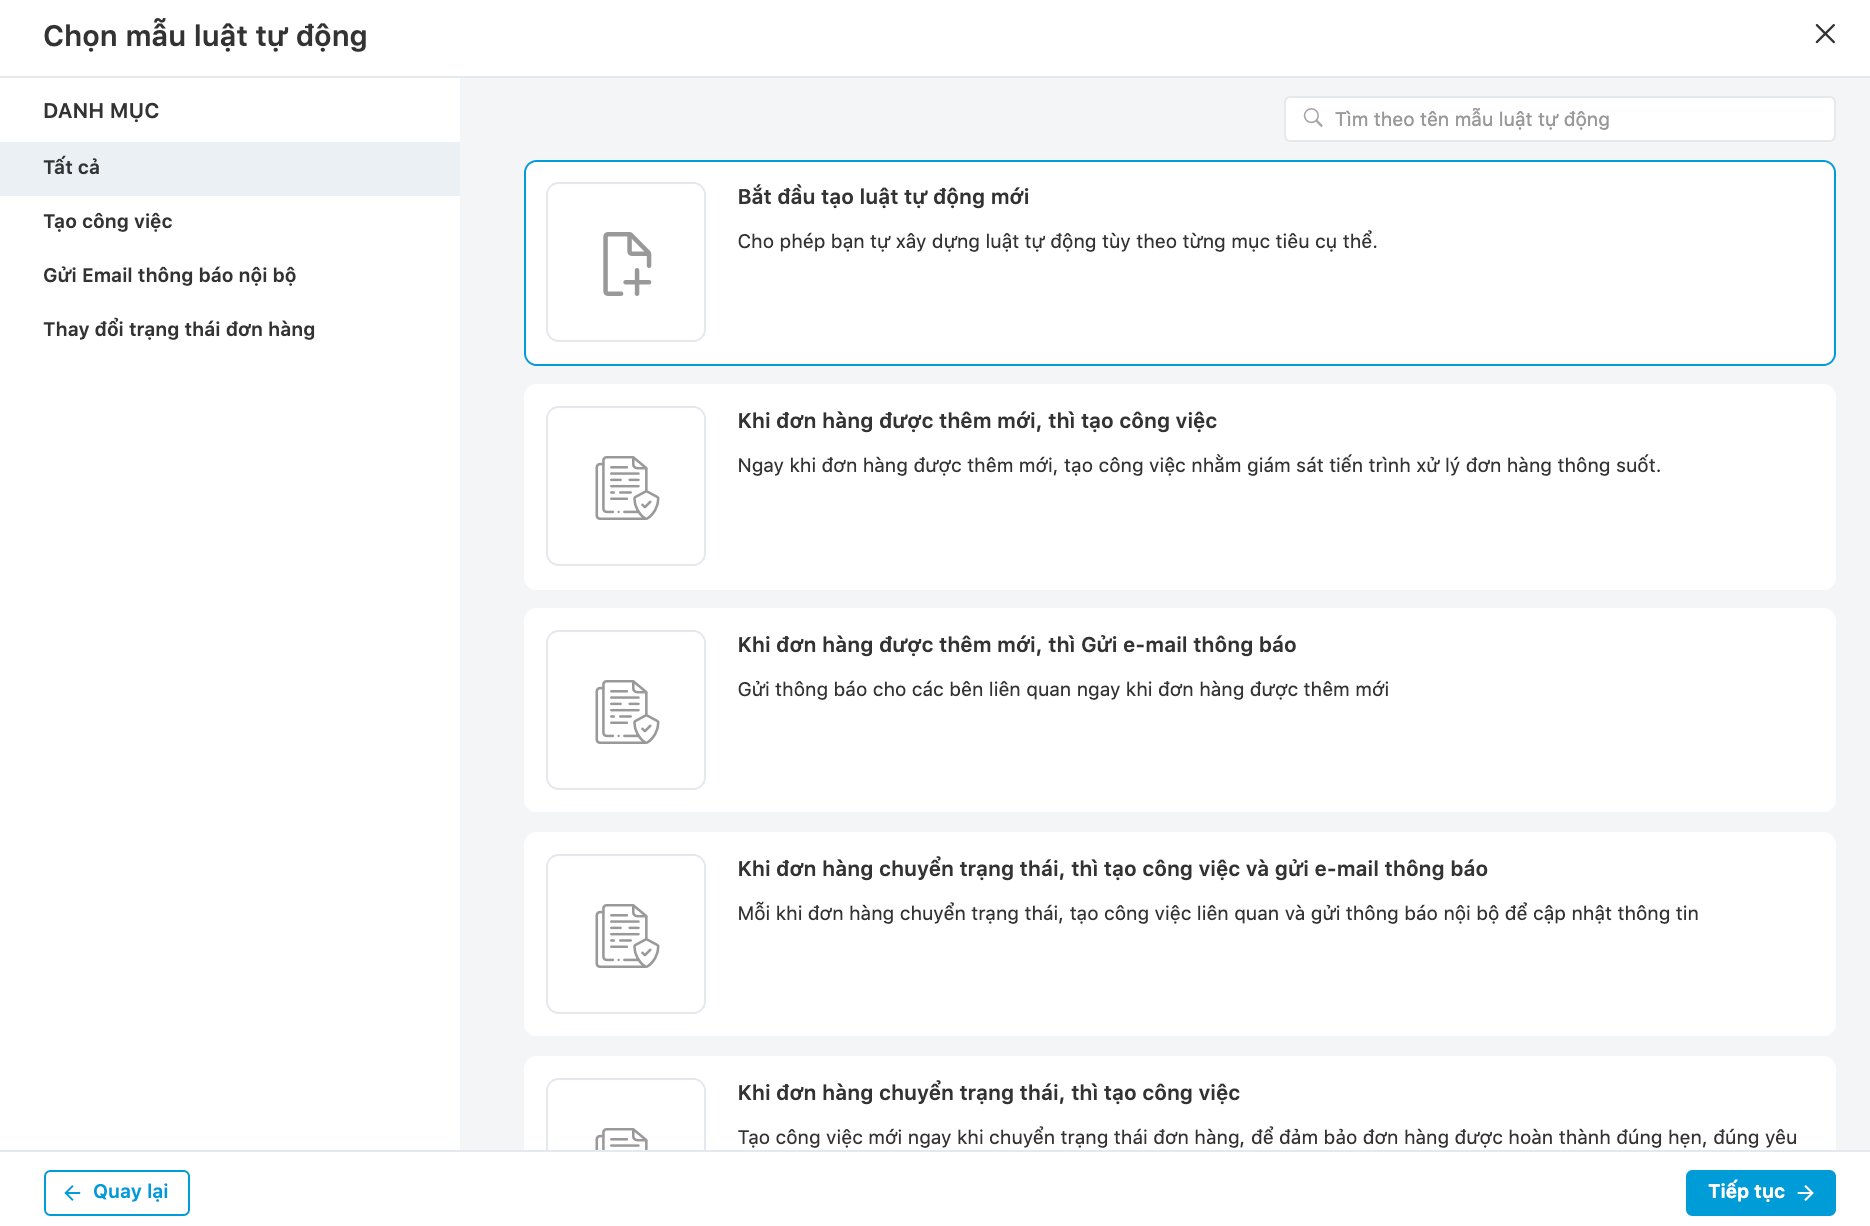
Step 5: Choose an automation rule according to an existing template or create a new one.
Step 6: Configure automation rule according to the If… then… conditions
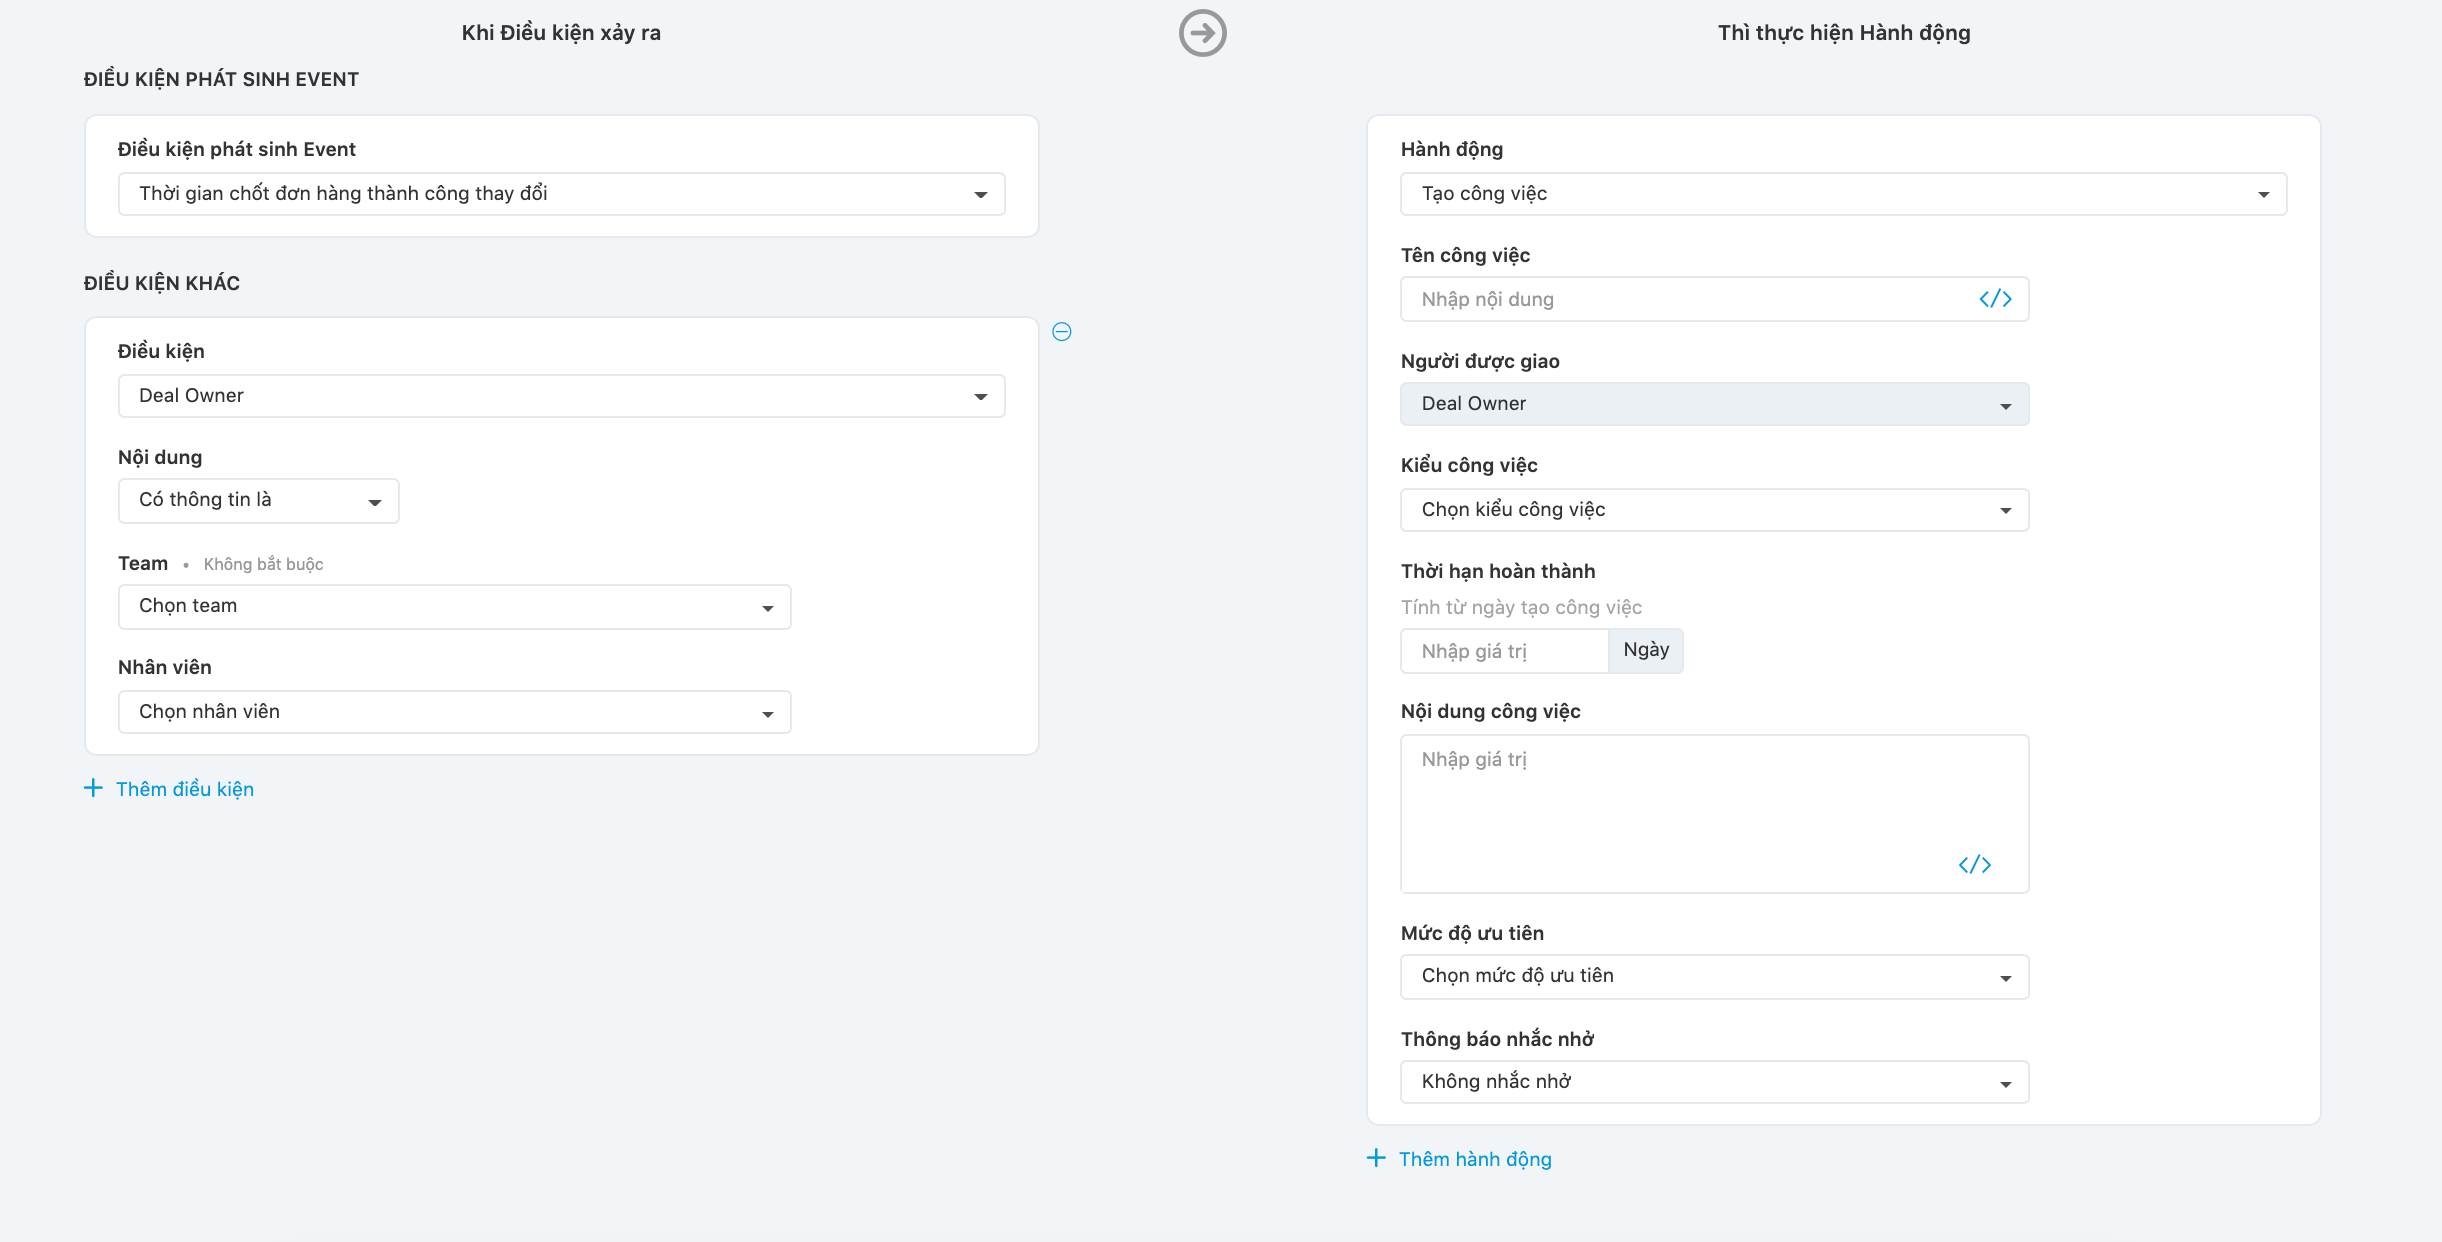
Step 7: Click Save to complete the opportunity automation rule
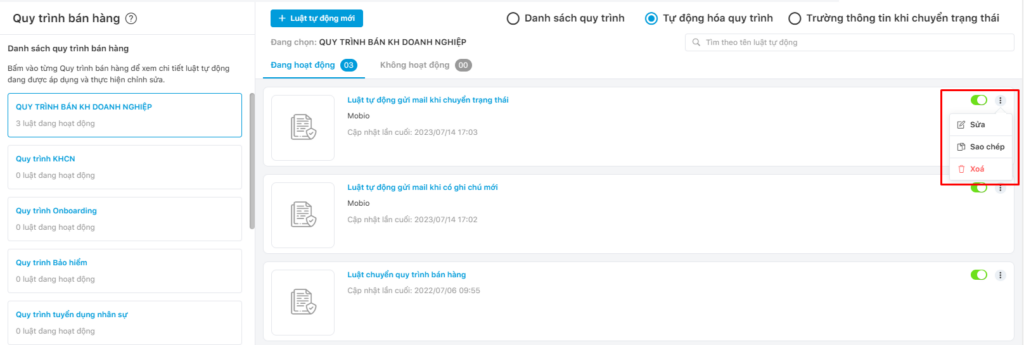
Edit, delete and copy automation rule
Step 1: Select the sales pipeline.
Step 2: Select the automation rule to edit/delete/copy.
Step 3: Select icon:
- Pencil icon for automation rule correction
- Copy icon to copy the automation rule
- Trash can icon for automation rule removal.
Configuration when a state changes
When changing the status of an Oppty, for example from “Contact to Customer” to “Quote“, from “Quote” to “Success“… then at each transfer step, the admin account can configure the user to fill in any information field before the transfer.
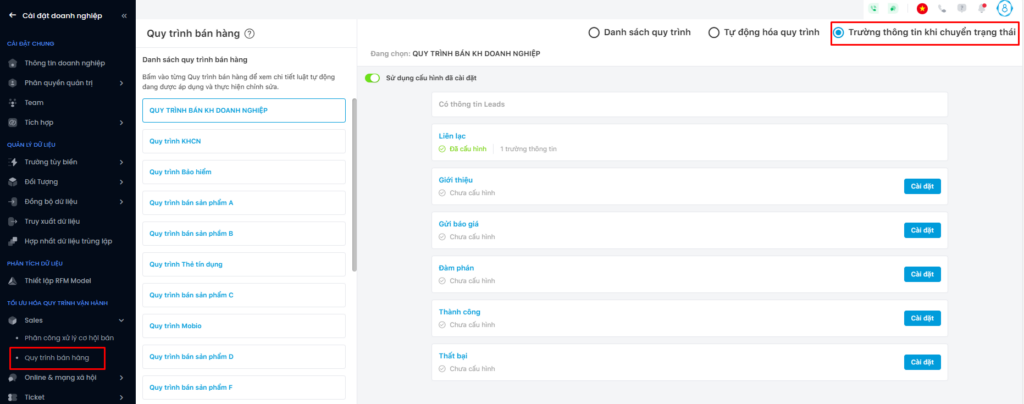
Step 1: The user accesses Sales → select Sales Pipelines → then select Configuration when a state changes.
Step 2: Select the Sales Pipeline that you want to apply the configuration to.
Step 3: At each step in the pipeline, press Settings to add the required information when moving to that step. For example, before transferring an Oppty to the “Failure” step, the user is required to fill in the Reason for failure. Then here admin clicks Settings in the Failure step.

The system displays a screen asking for information to be entered before switching an Oppty status.

- Filling out information fields
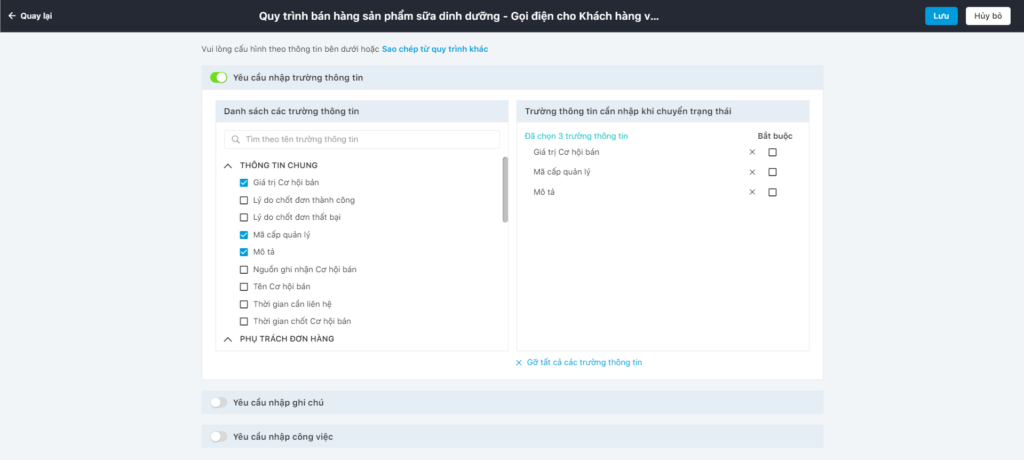
- Filling out information notes

- Filling out information tasks

After configuration, if the user switches steps without filling in the required information, the system displays a reminder popup as shown in the photo below:

