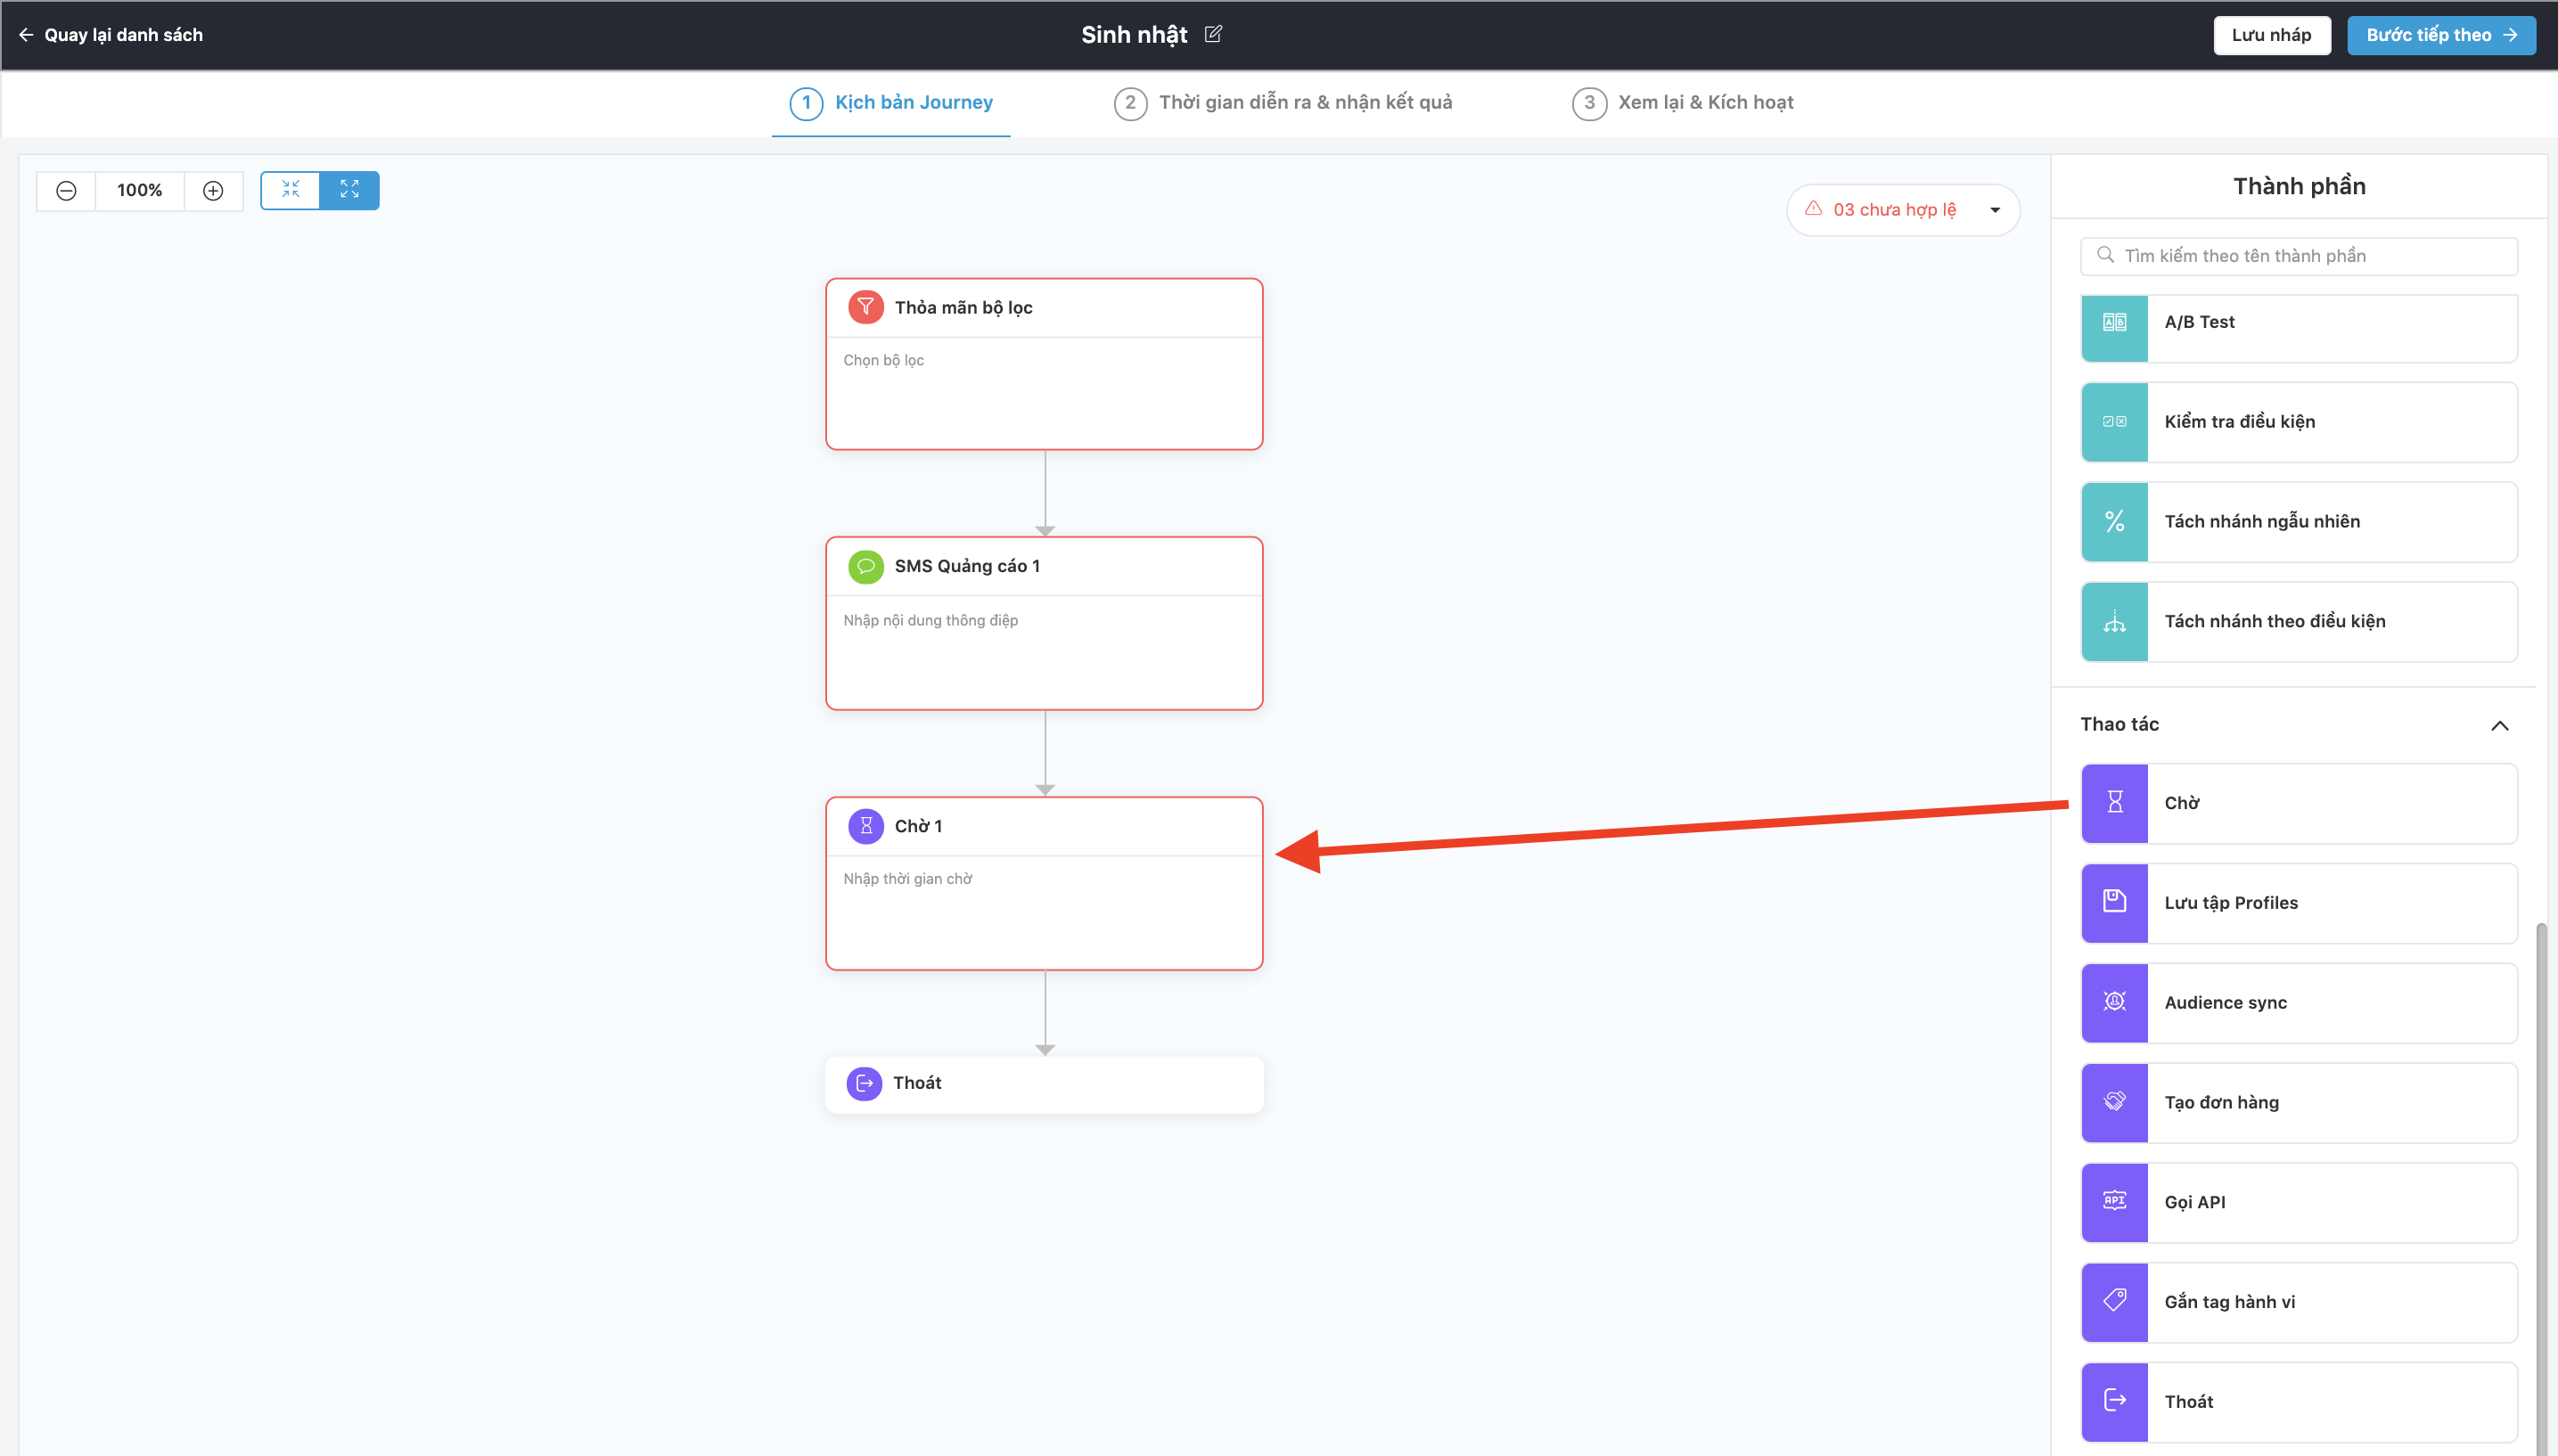
Wait Block
Step 1: Drag and drop the Wait block into the Journey.
Step 2: Configure the Wait block according to the Journey goal.
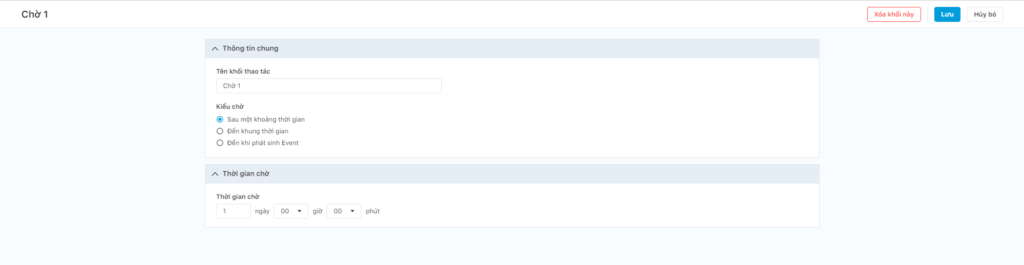
- Fill in the Operation node name.
- Select Delay type and configure the timeout.
+ After a period of time:
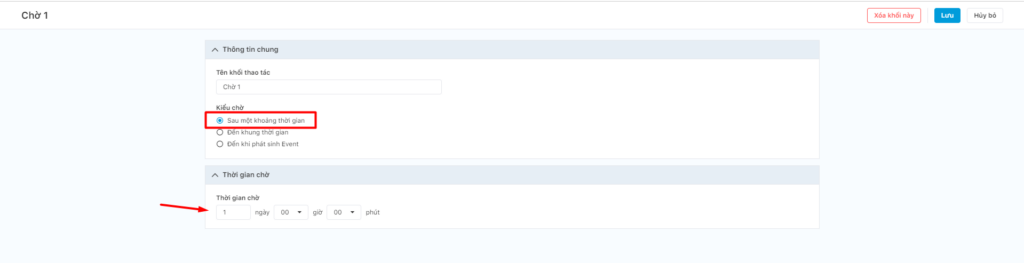
For the “After a period of time” type, users can set up after the waiting time, Profiles will move to the next step of the journey.
Note: The timeout should be compatible with the end time of the Journey Builder campaign.
+ Until a specific time frame:
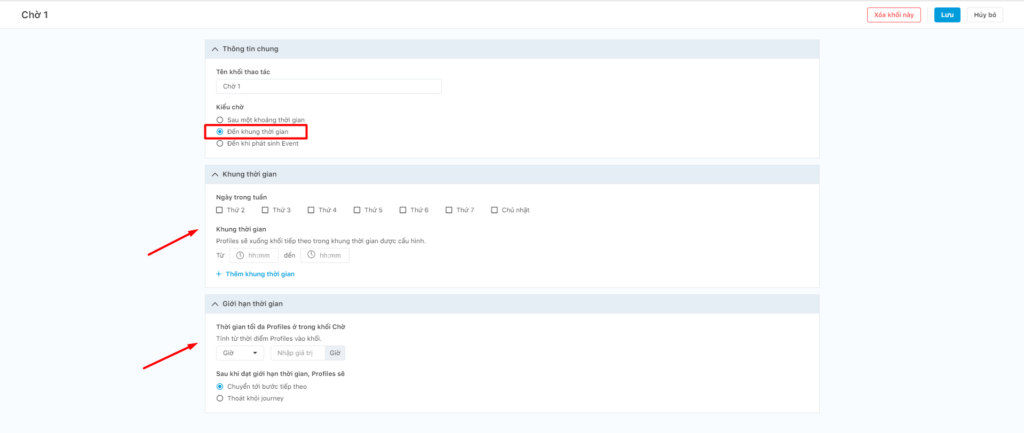
For the “Until a specific time frame” type, users can set up a waiting time for one or several certain periods of the week. Profiles will be located at the wait block and continue the Journey to the next block in the configured timeframe.
In some special cases, there is a possibility that Profiles will be stuck in the wait block and cannot continue within the specified time frame. To ensure that stuck Profiles can still follow the journey of Journey Builder, users need to set a maximum time limit for the wait block.
From the moment Profiles enter the wait block, if it is not possible to follow the specified time frame, those Profiles will:
- Skip to the next step after the configuration time.
- Exit the Journey.
Note: The timeout should be compatible with the end time of the Journey Builder campaign.
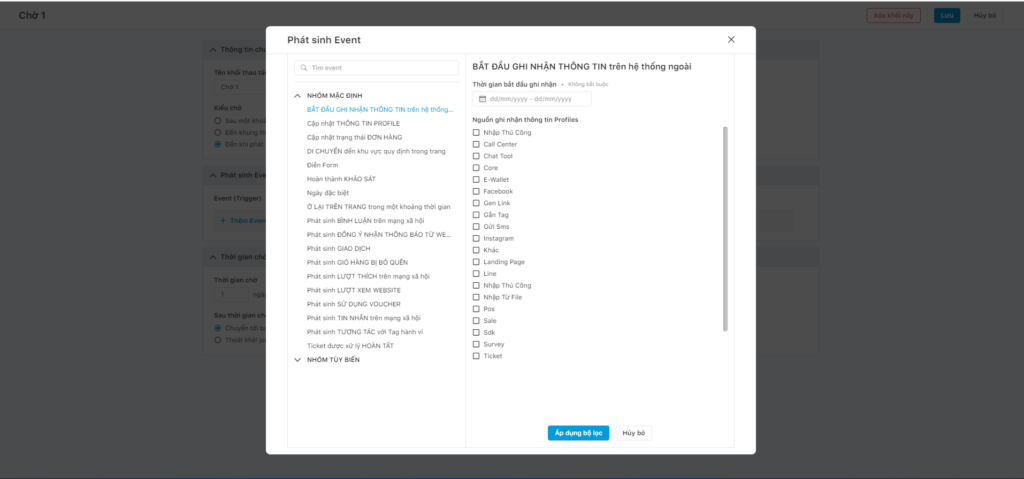
+ Until event happens:
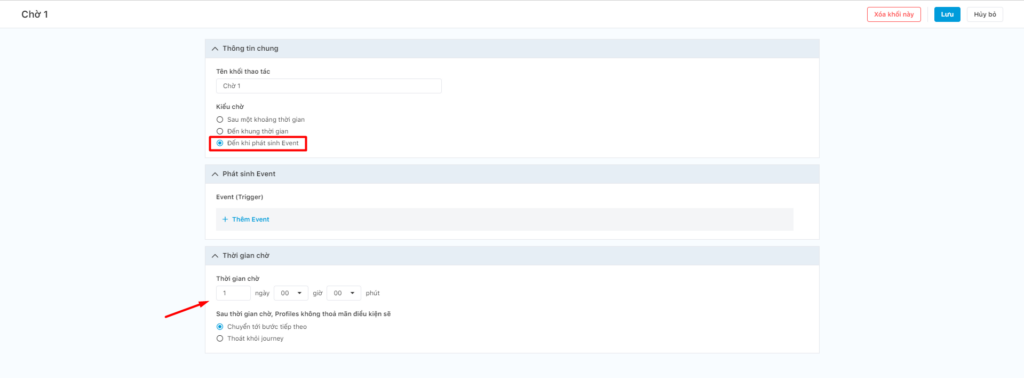
For the “Until event happens” type, Profiles will be located in the Wait block as configured. When an event occurs, Profiles will go down to the next blocks of the journey.
In case Profiles does not generate an event, to ensure that those can continue the journey of the Journey Builder, users need to set a maximum time limit for the wait block.
From the moment Profiles enter the wait block, if no event occurs, they will:
- Skip to the next step after the configuration time.
- Exit the Journey.
Note: The timeout should be compatible with the end time of the Journey Builder campaign.
Step 3. Click Save to complete the configuration for the wait block.
Save Profiles list
Step 1: Drag and drop the Save Profiles list block into the Journey.
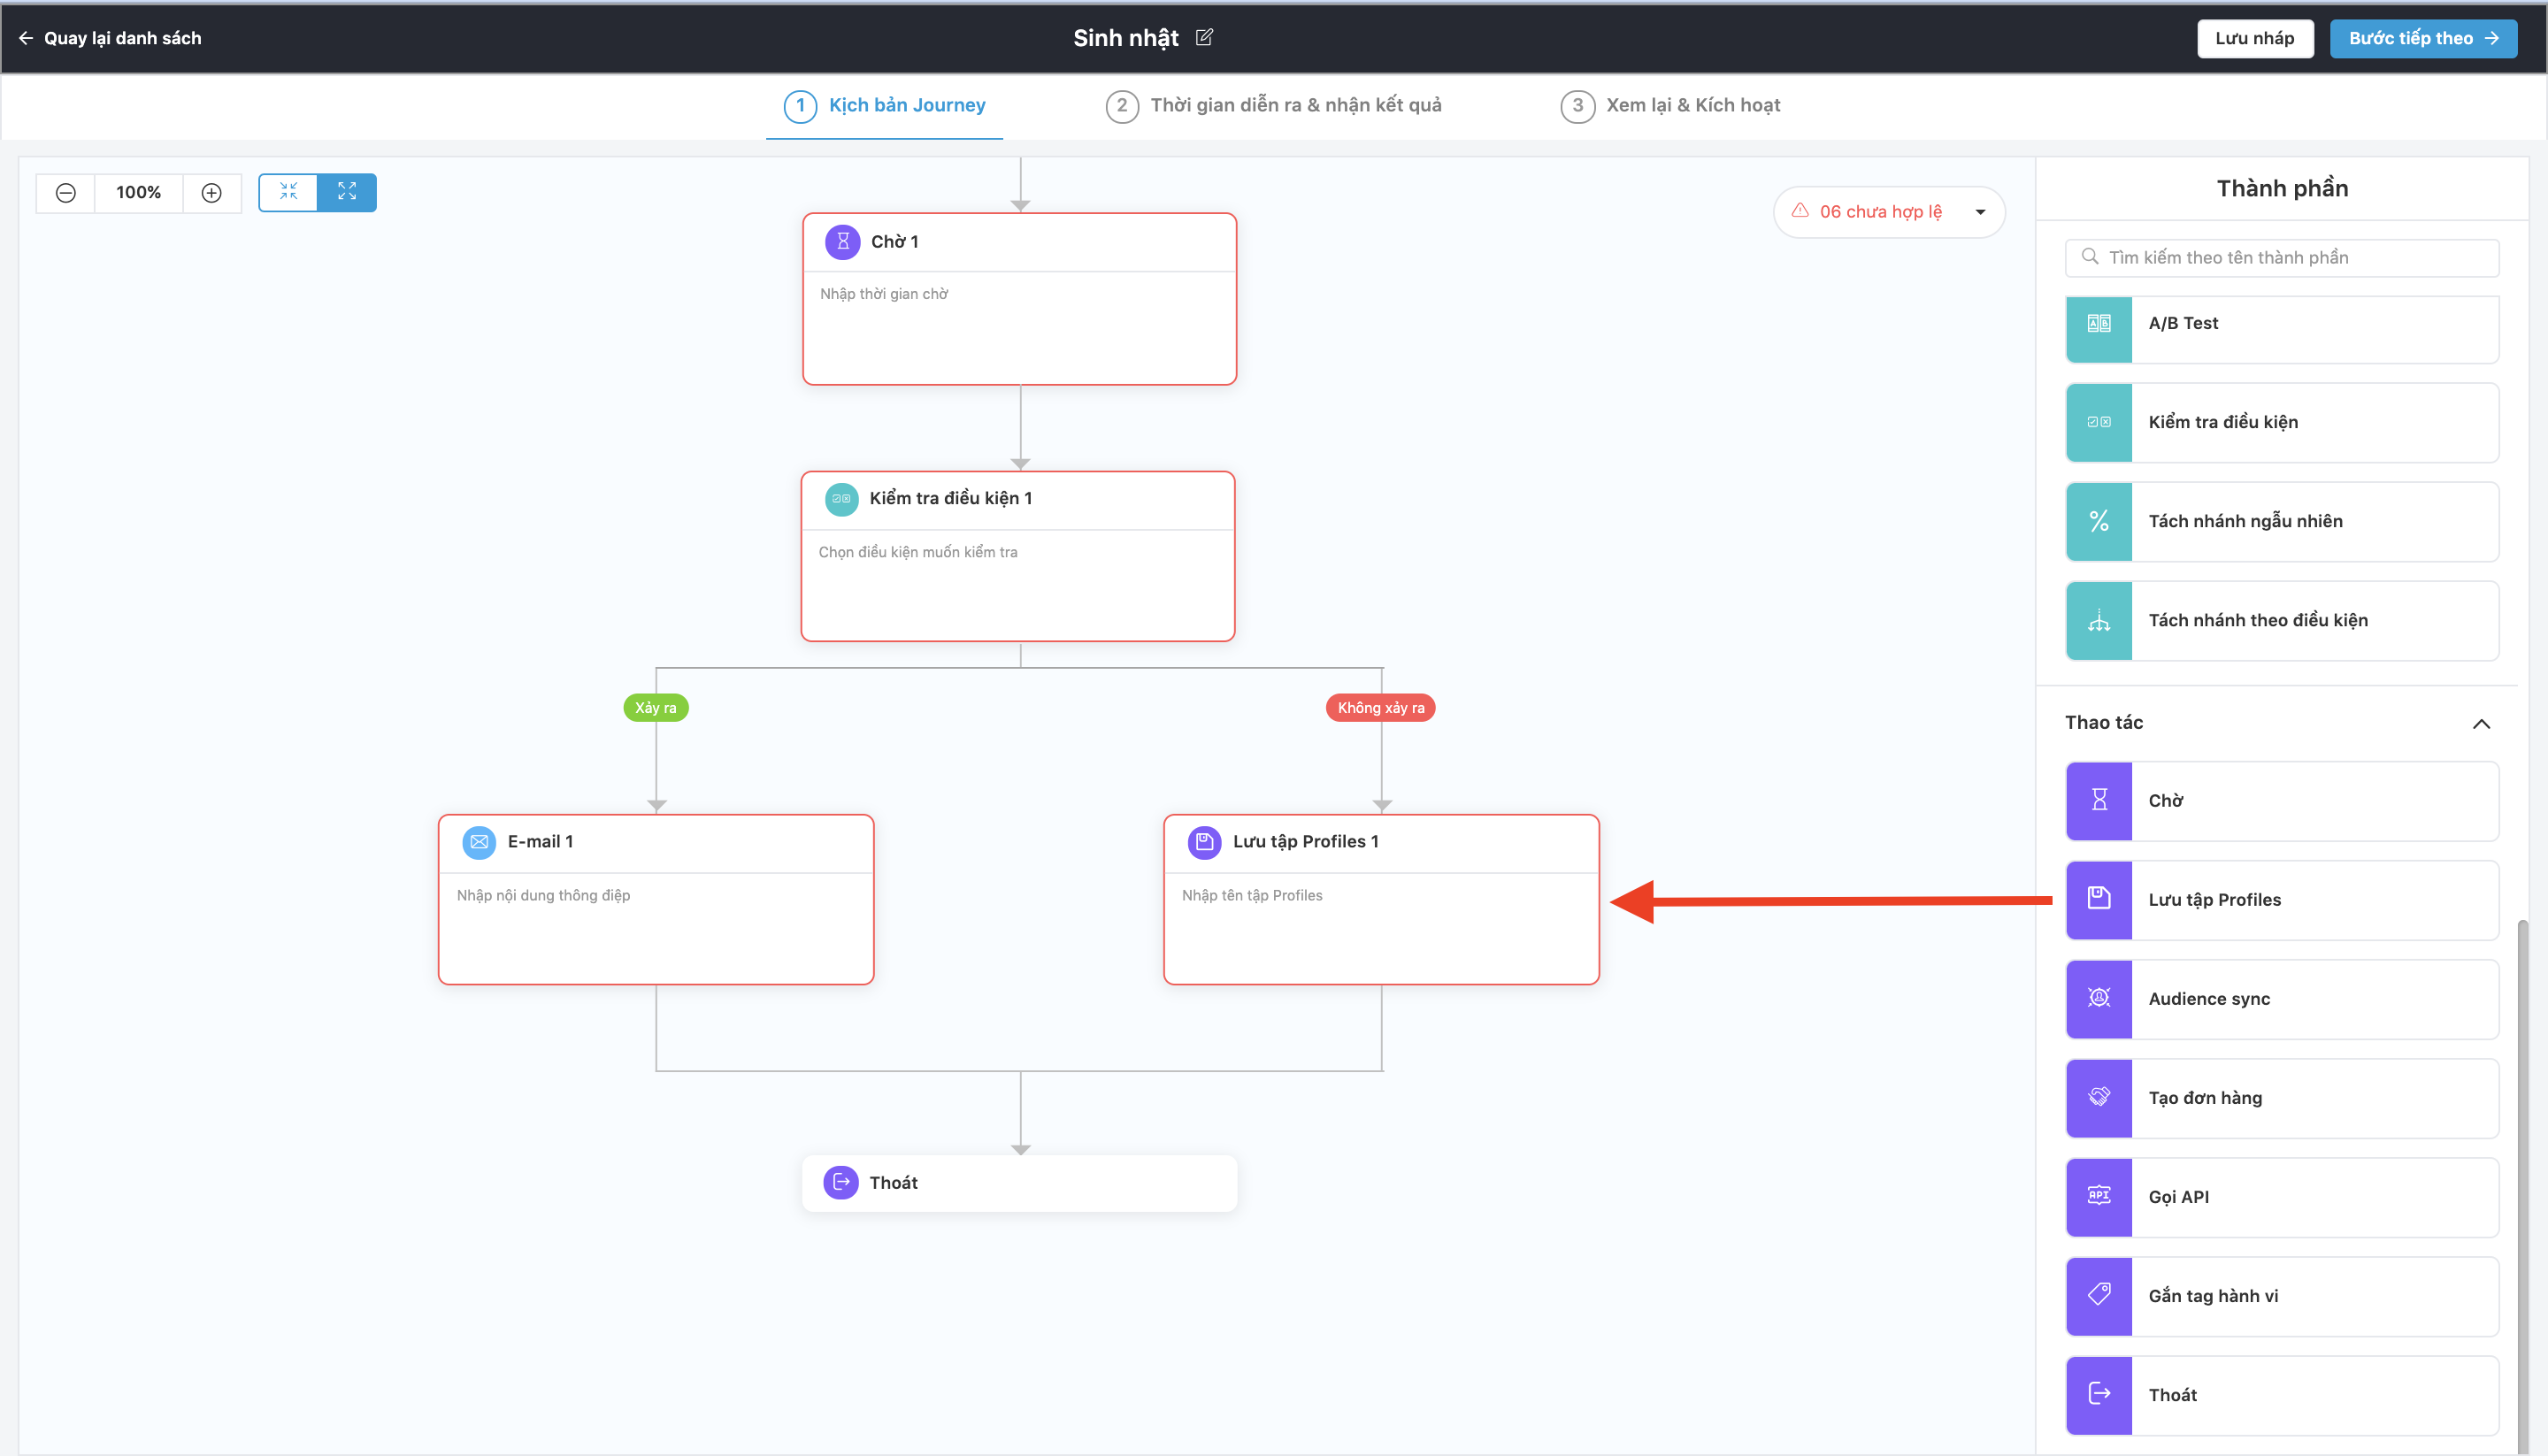
Step 2: Configure the Save Profiles list block according to the goal in the Journey.

- Fill in the name of the Save Profiles list block.
- Fill in the Profile list name.
Step 3. Click Save.
Tagging behavior
Step 1: Drag and drop the Tagging behavior block.
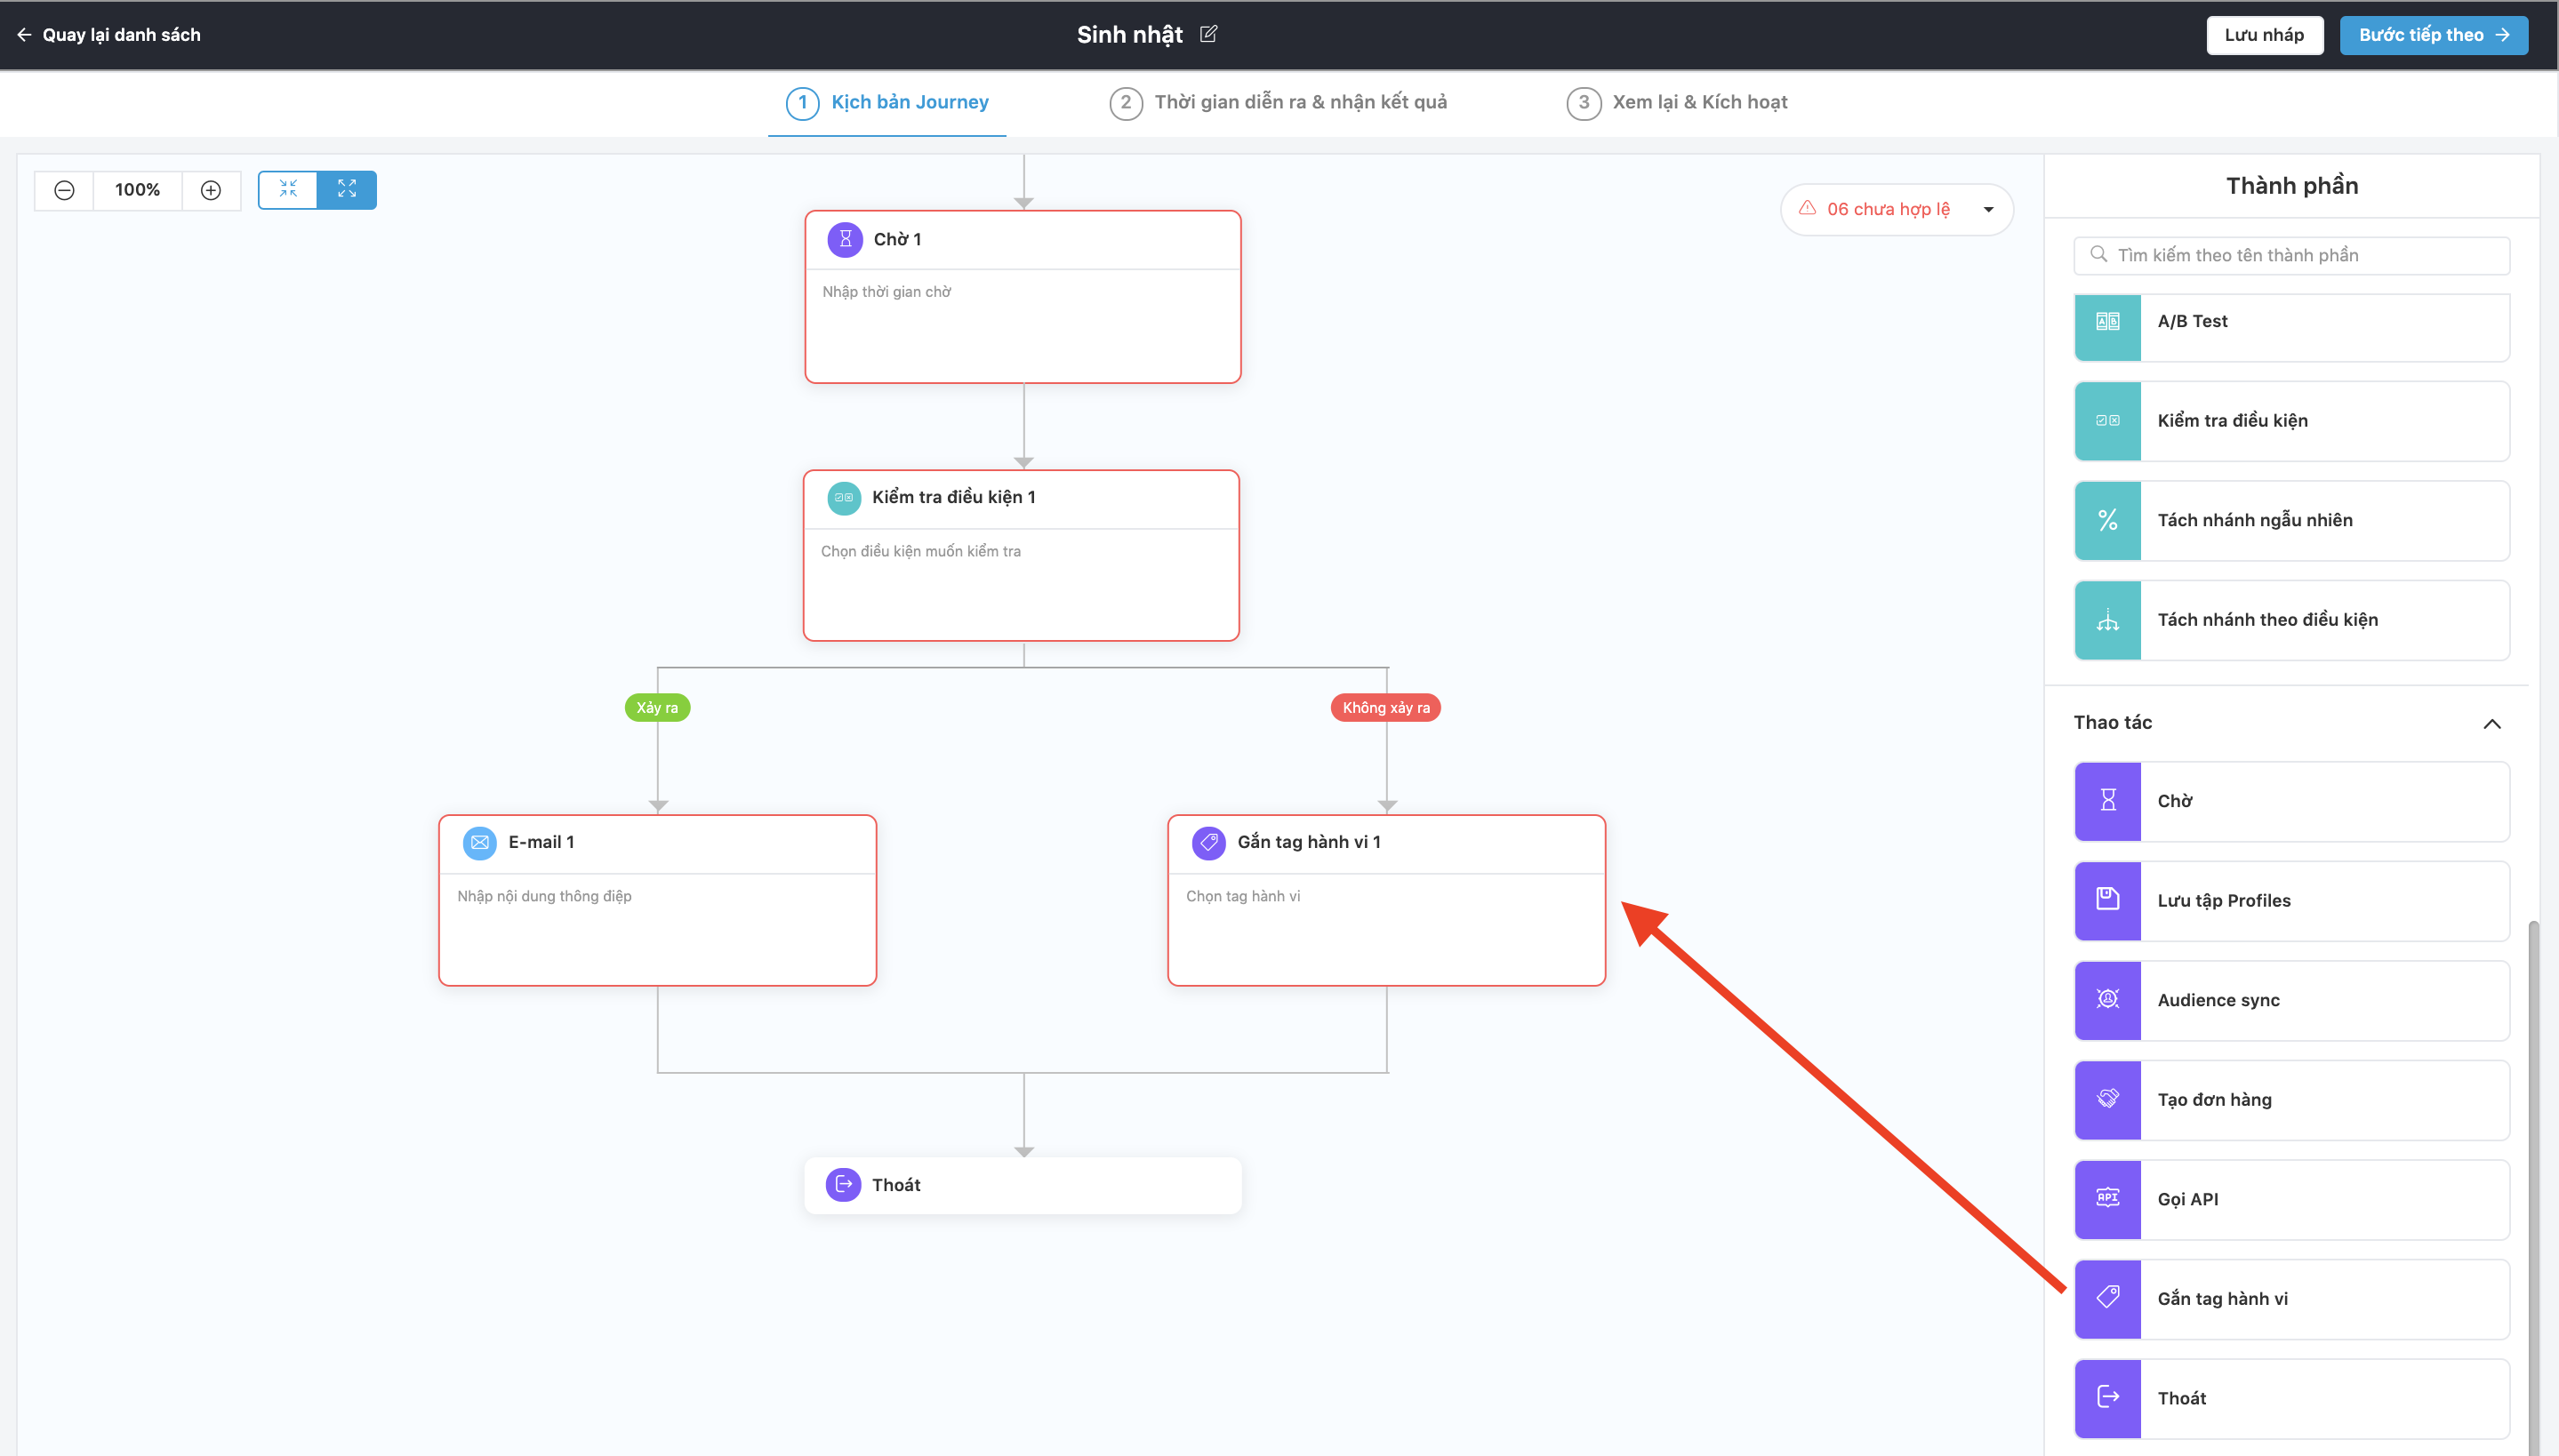
Step 2: Configure the Tagging behavior block in the Journey.
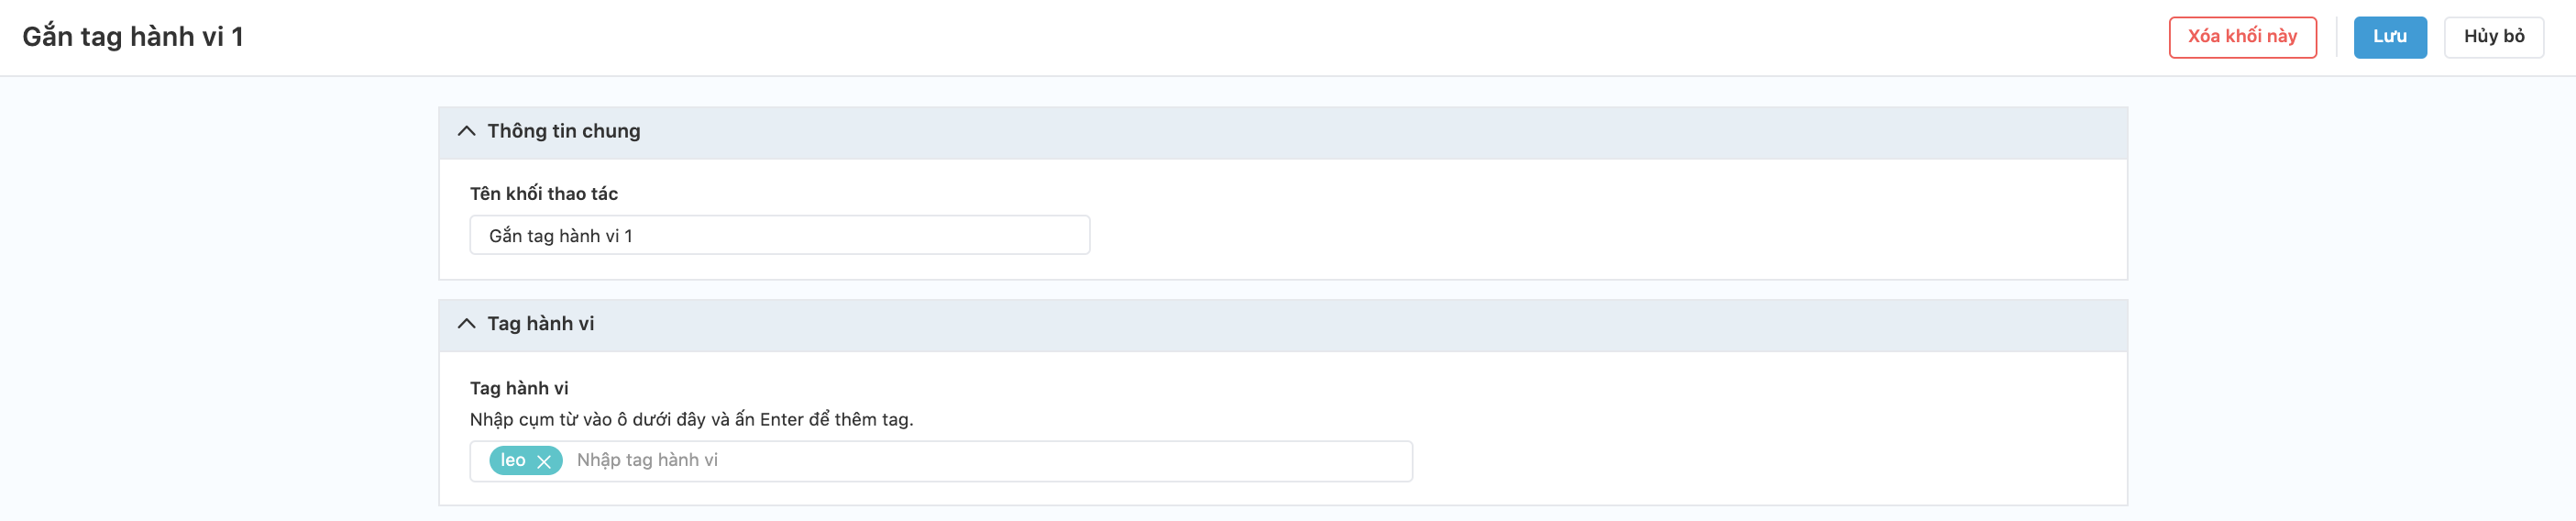
- Fill in the Operation node name.
- Fill in the Behavior Tag: Enter the phrase in the box and press Enter to create the tag.
Step 3: Click Save.
Audience sync
The purpose of the Audience sync block is that when Profiles in the block have at least 1 of the 3 fields of phone number, email, and social ID, they will be synchronized via the Ads Automation Module. Once the data has been processed, this target audience will be automatically updated to the Audience Manager of the selected ad account.
Step 1: Drag and drop the Audience sync block.
Step 2: Configure the Audience sync block according to the goal of the Journey.
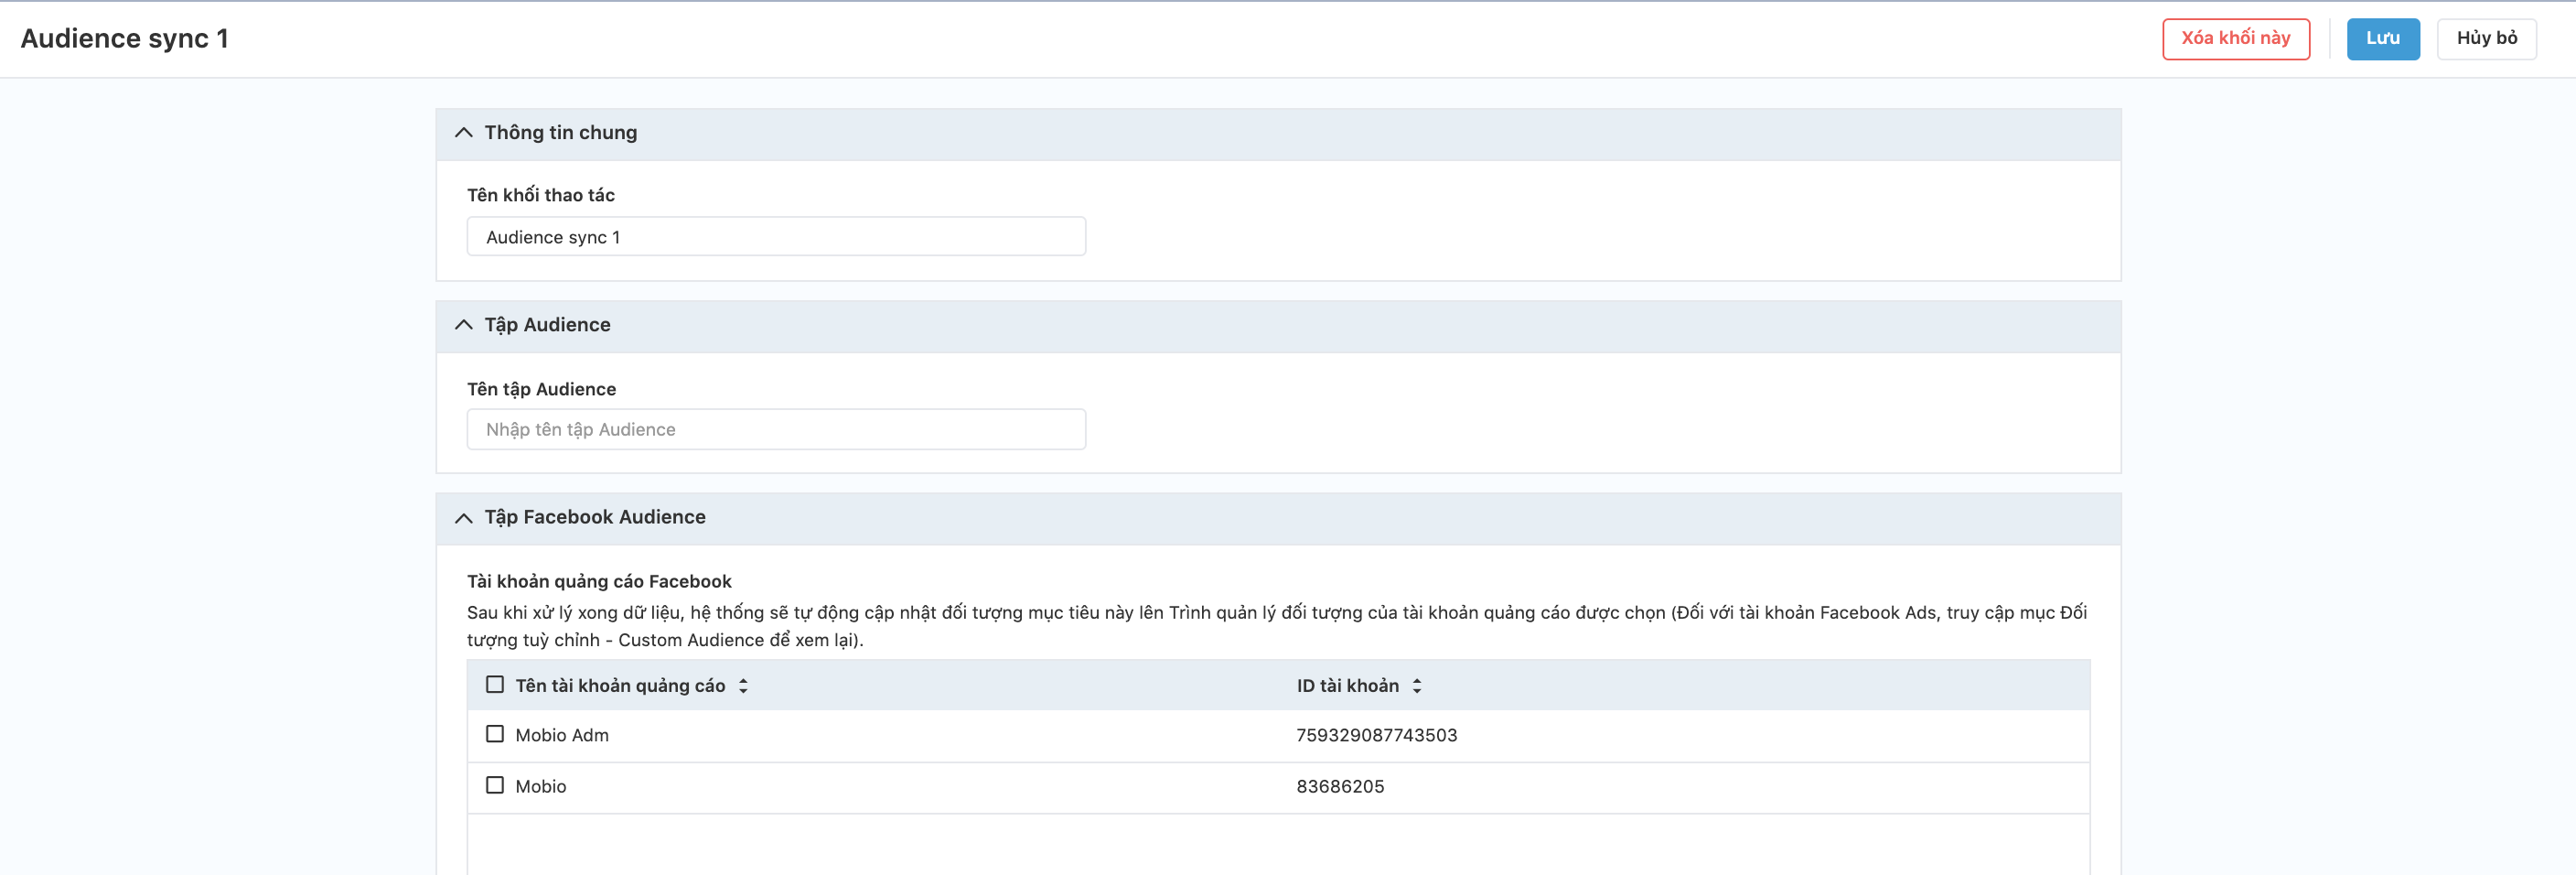
- Fill in the Audience sync block name
- Enter an Audience sync set name
- Select Facebook Ads Account (when the business has connected Ads Automation to the system).
Step 3: Click Save.
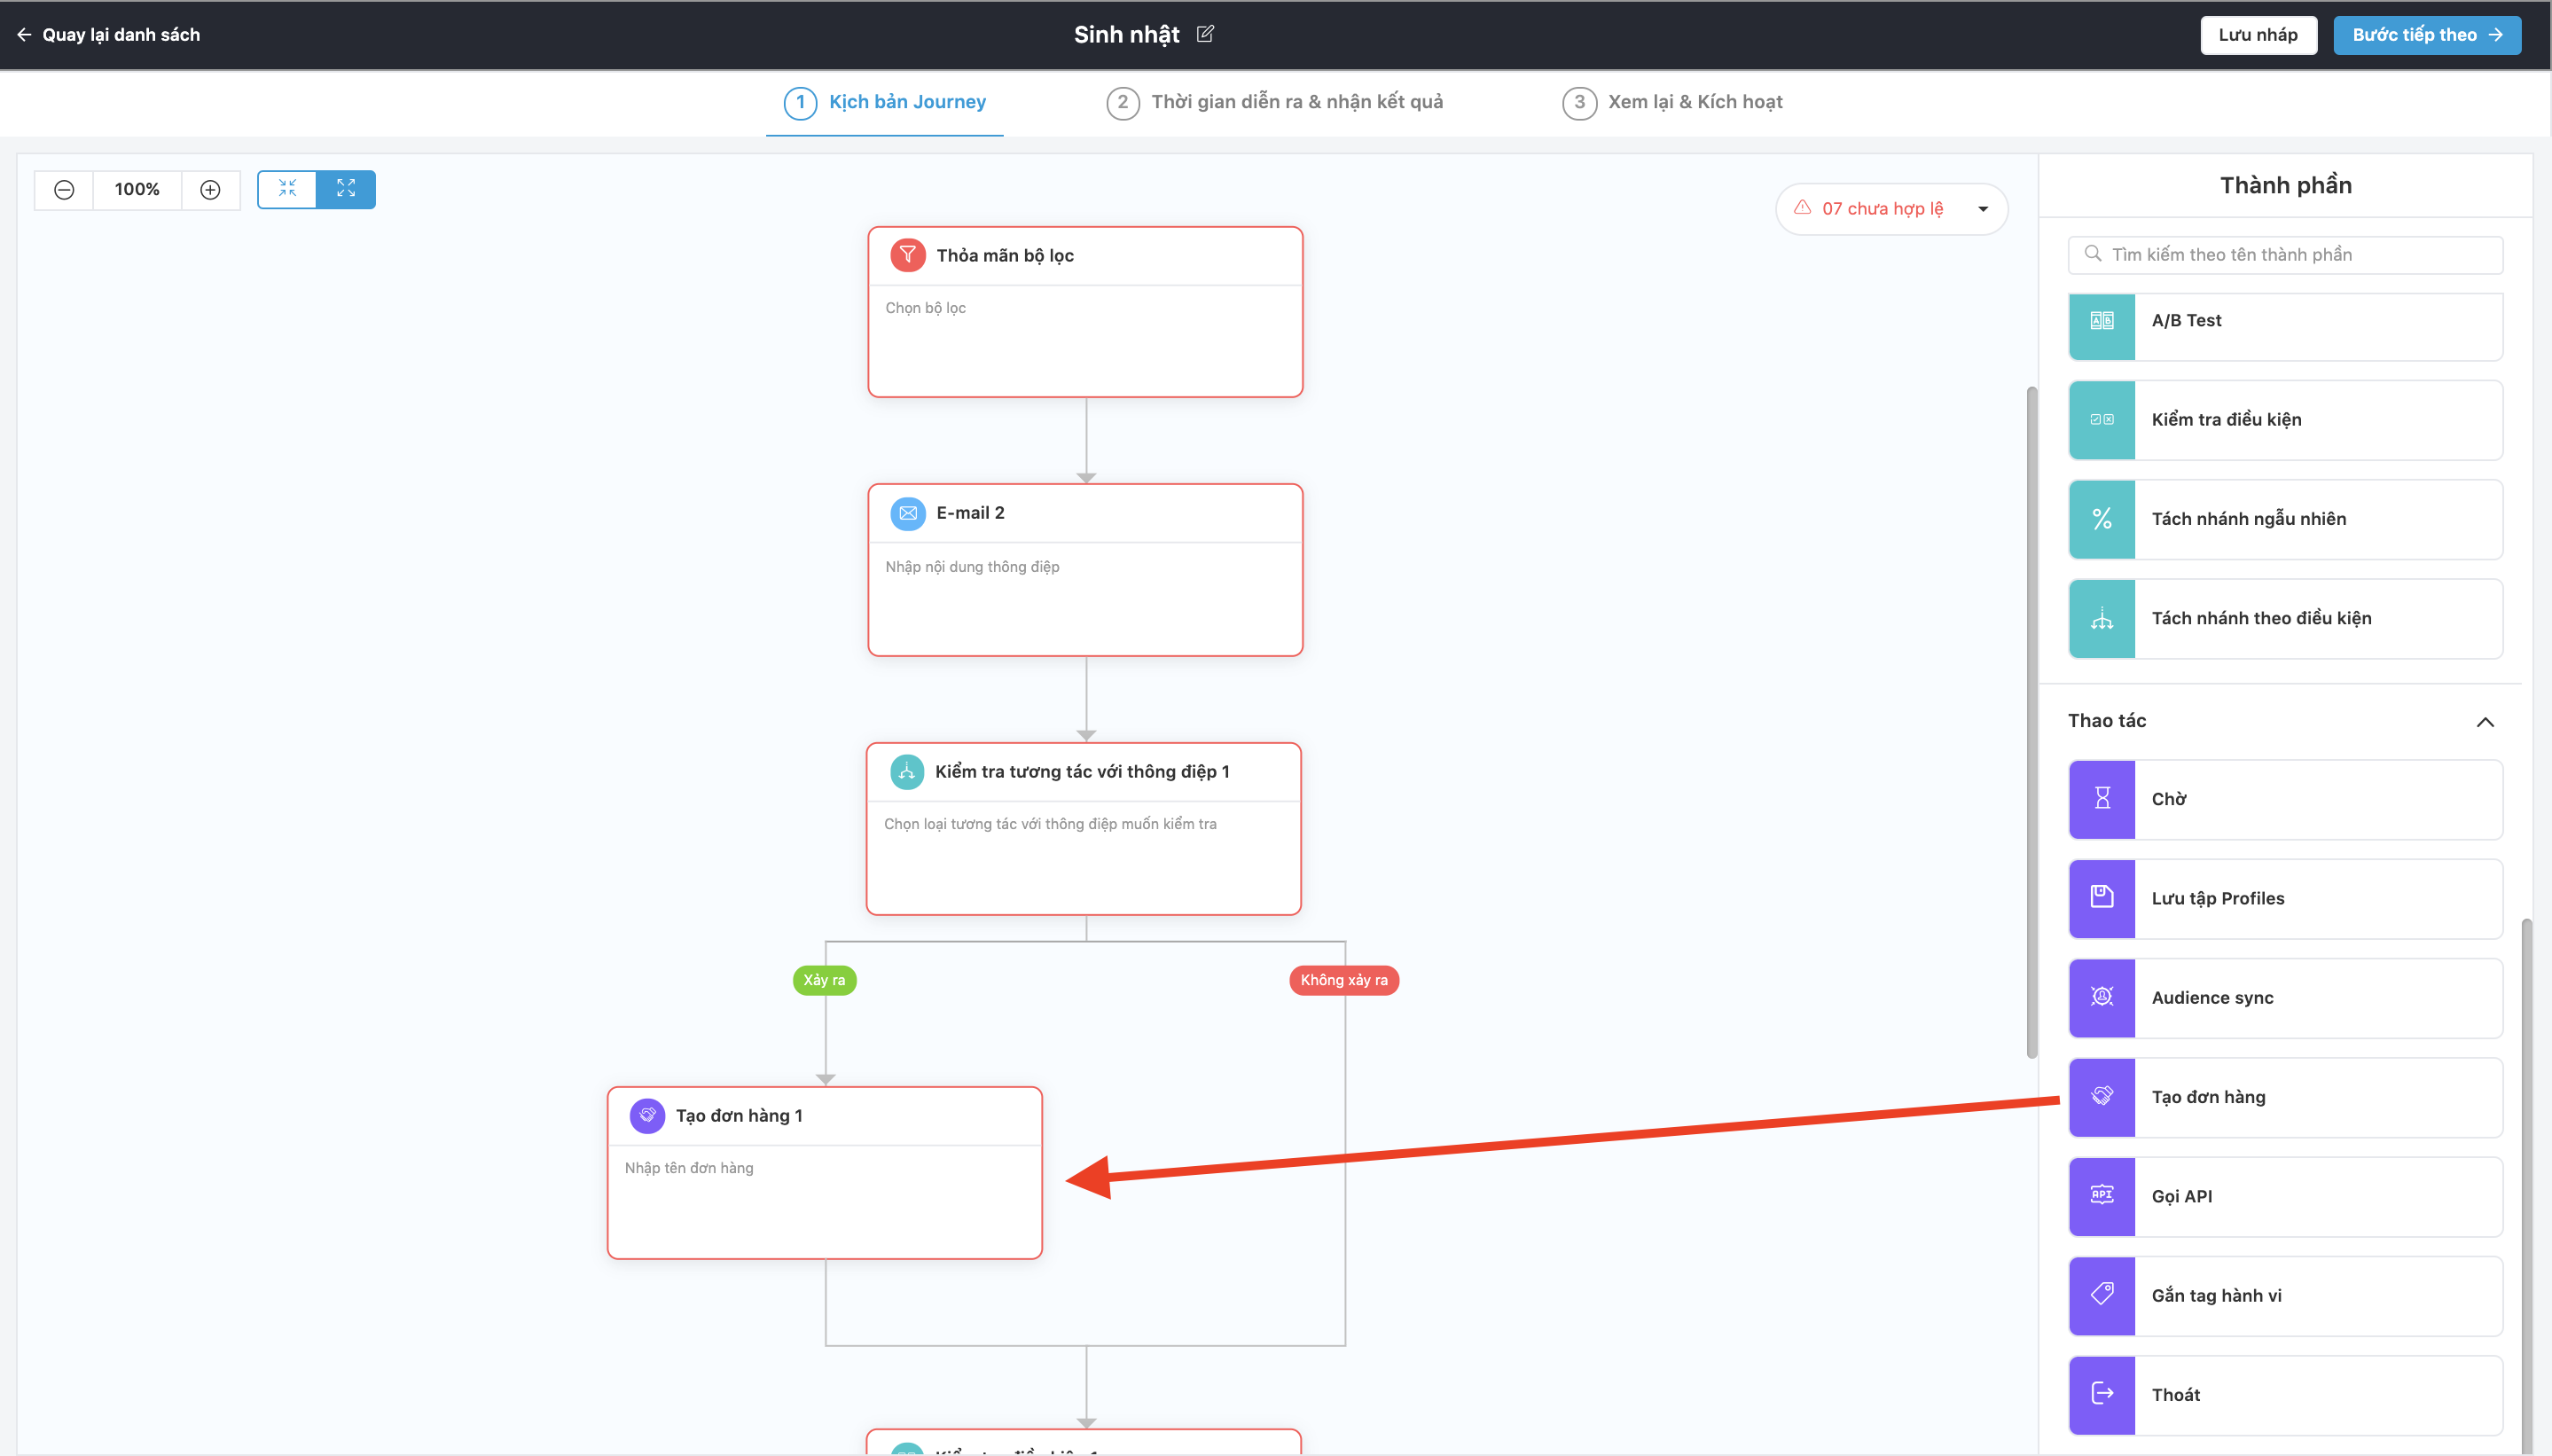
Create new opportunity
Purpose of the Create new opportunity block: when the Profiles enter the block, the Identified Profiles (Email, Phone, Social ID, etc.) will automatically Create new opportunity in the Sales Module according to the configured Sales Pipeline and Status of Oppty configurations.
Step 1: Drag and drop the Create new opportunity block.
Step 2: Configure New Oppty according to Journey goal
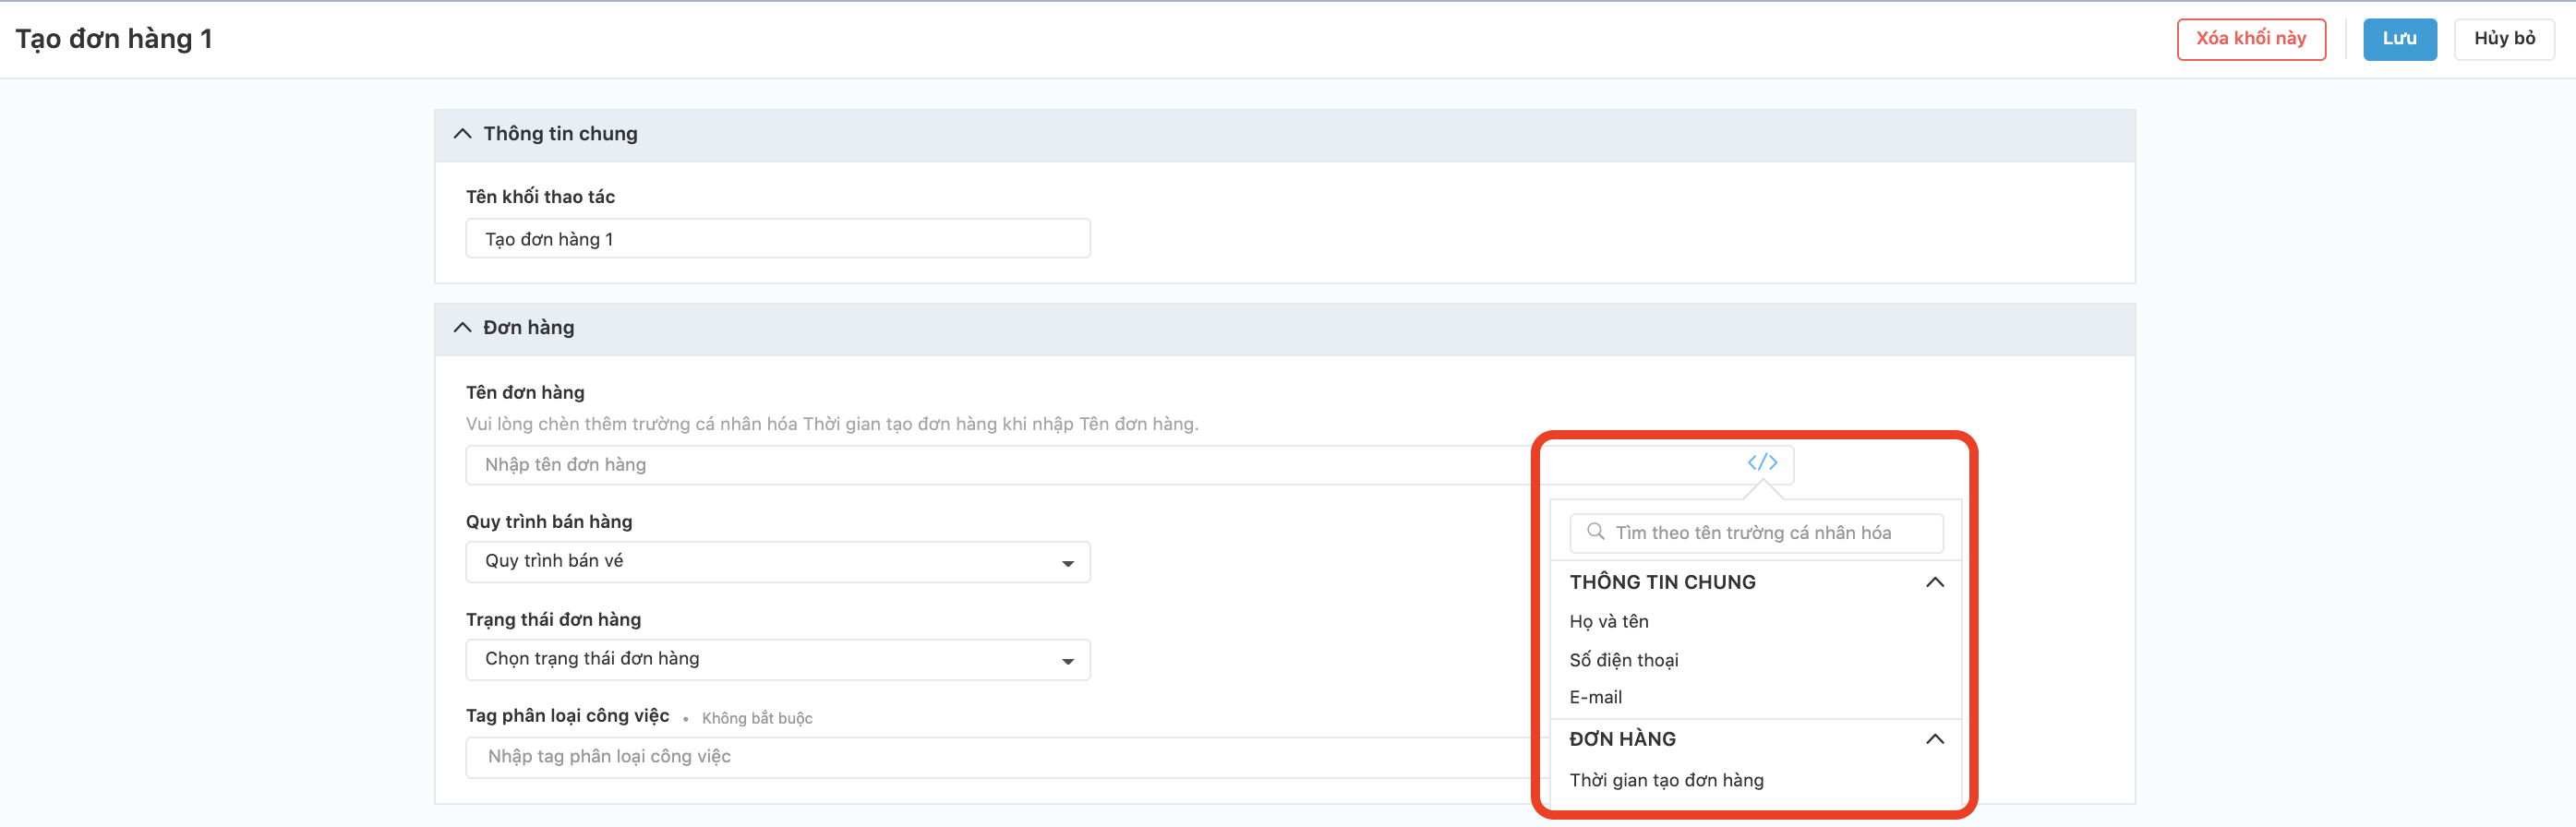
- Name the Create new opportunity Block
- Enter the Oppty name (can be personalized according to the customer’s profile)
- Select the sales pipeline
- Select Oppty status
- Enter the Job classification tag from Module Sales.
Step 3: Click Save.
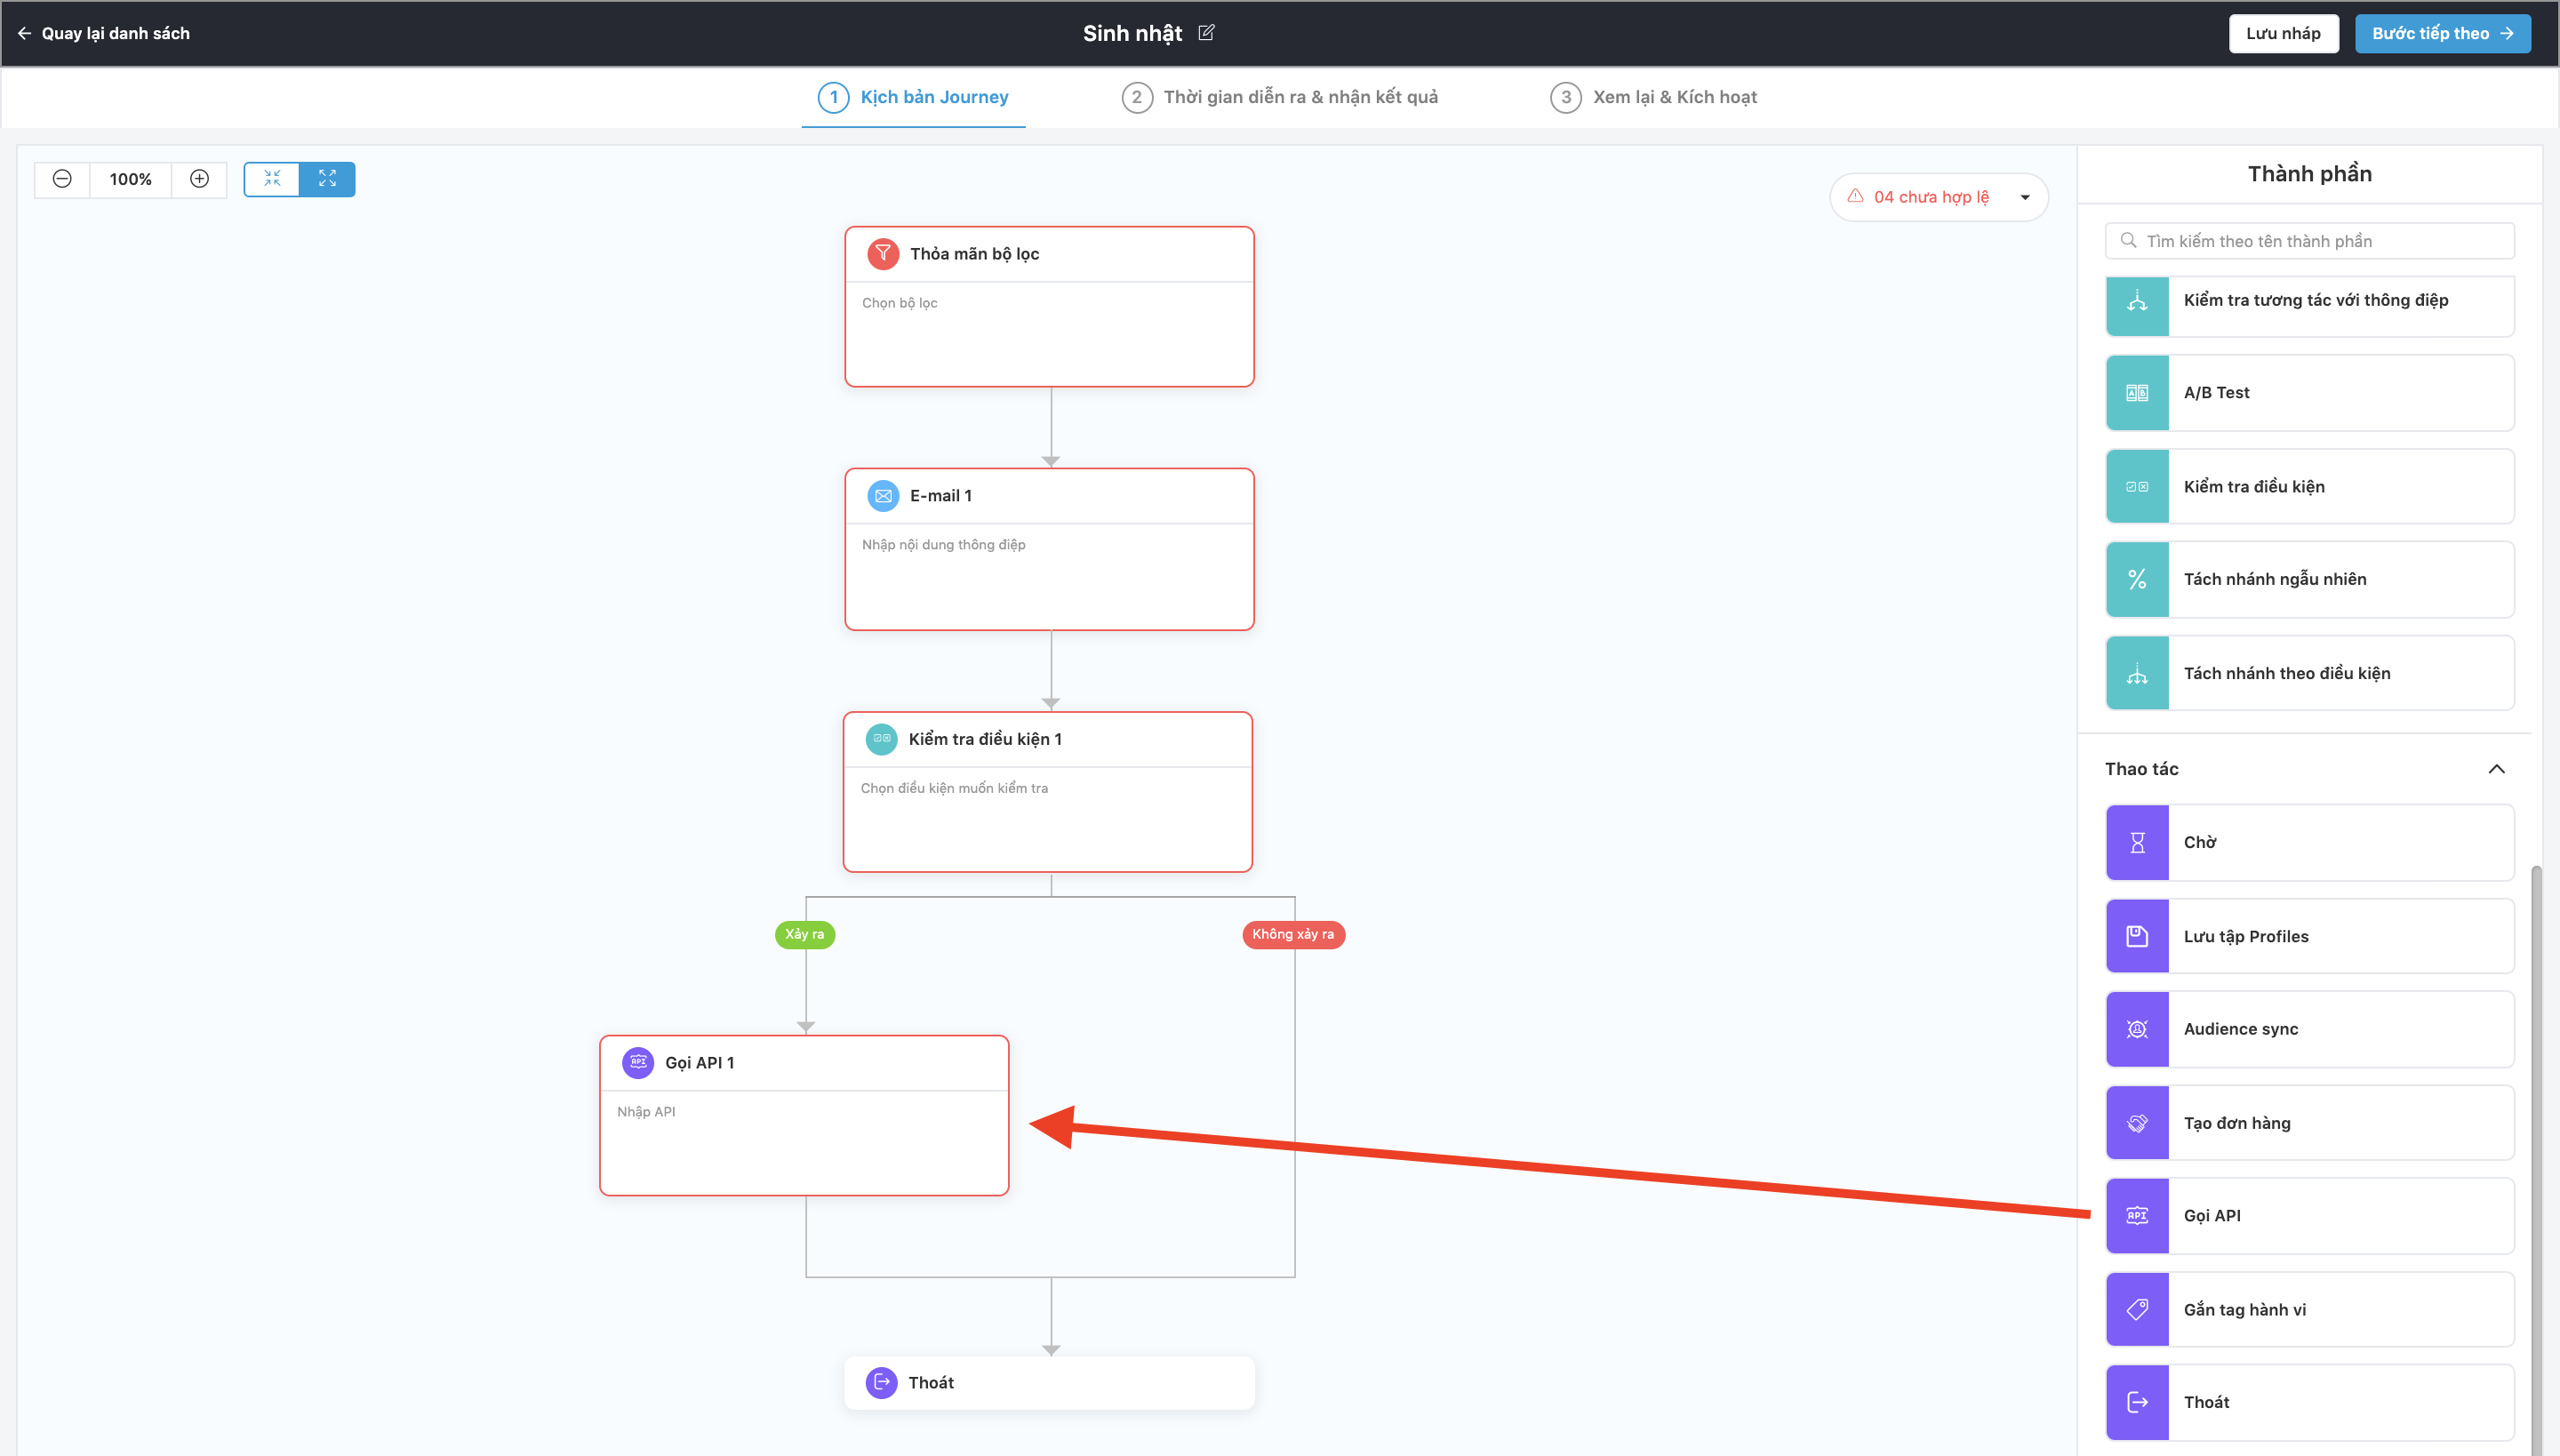
Calling API
The Calling API block allows businesses to synchronize the information and data fields of the end customer collected when running the Journey Builder campaign from Mobio system to the 3rd system using the API method.
Step 1: Drag and drop the Calling API block.
Step 2: Configure Calling API Block
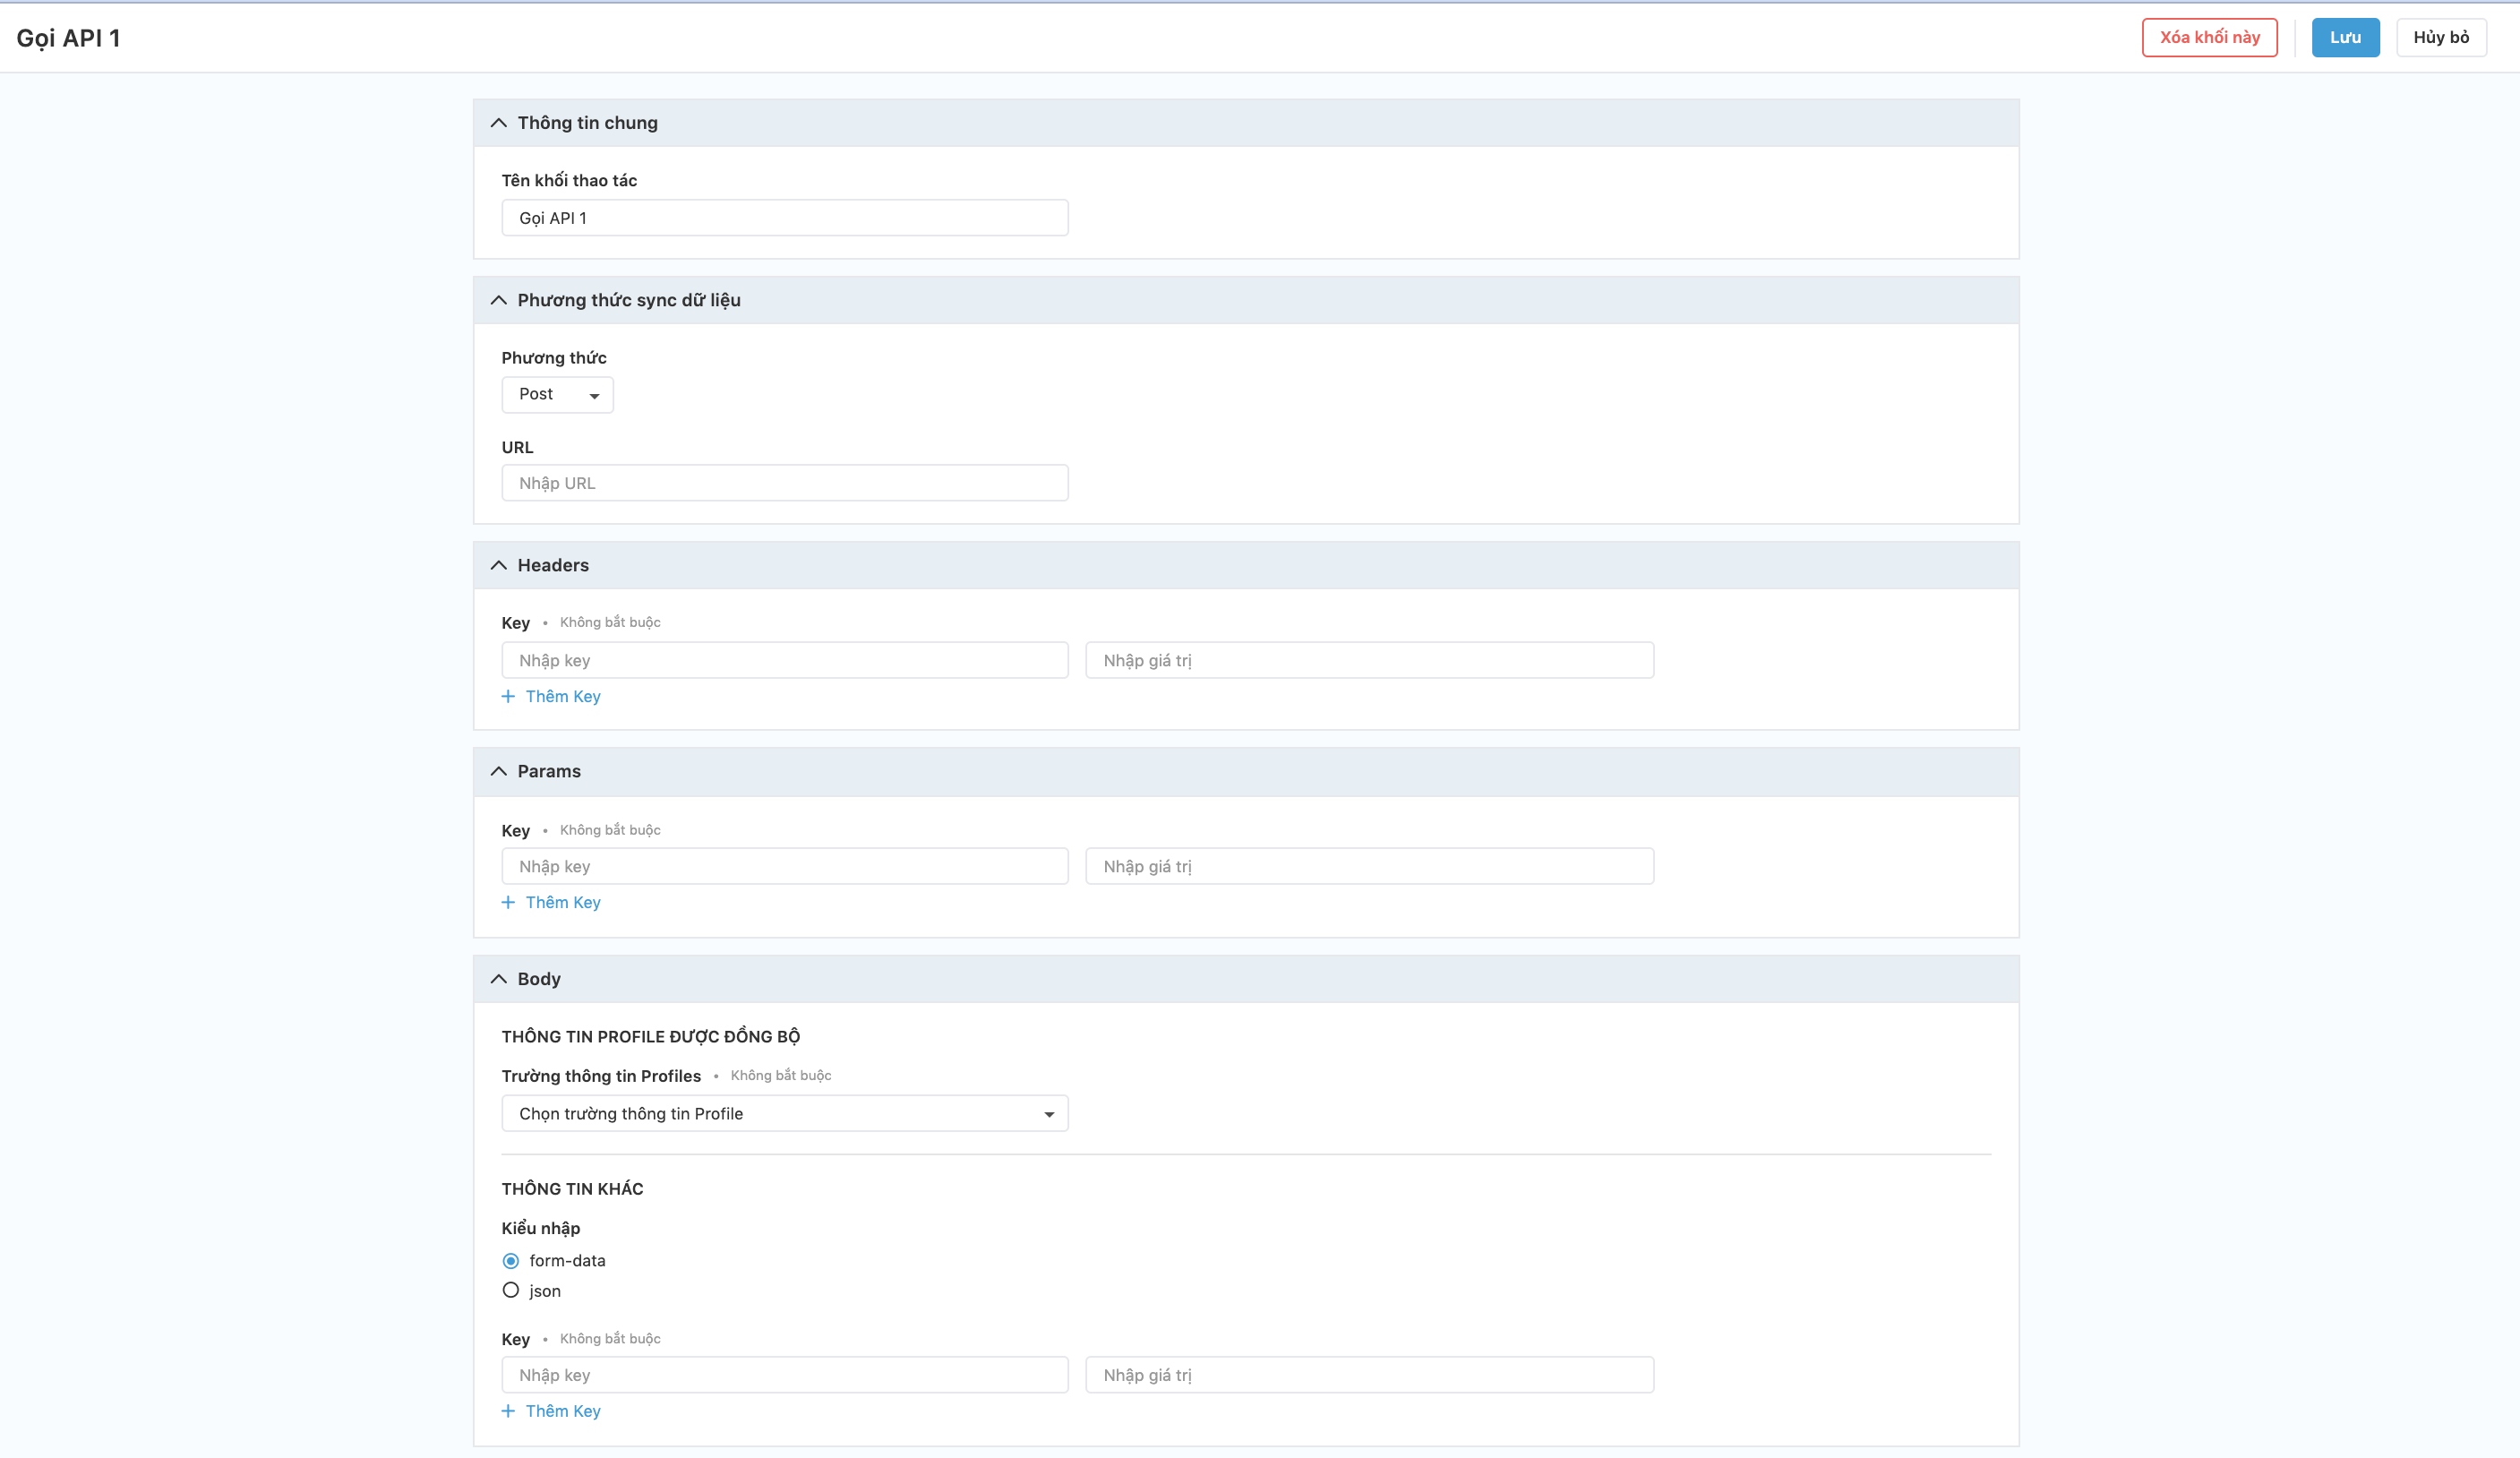
- Operation node name
- Select the data sync method: Post/ Put/ Patch. Then enter the API information.
- Headers, Params: enter the Key value
- Body: Select Profile information field to be synchronized
- Select input type: form-data/json
Note: Configuring the Calling API block requires assistance from the Business’s technical staff.
Step 3: Click Save.