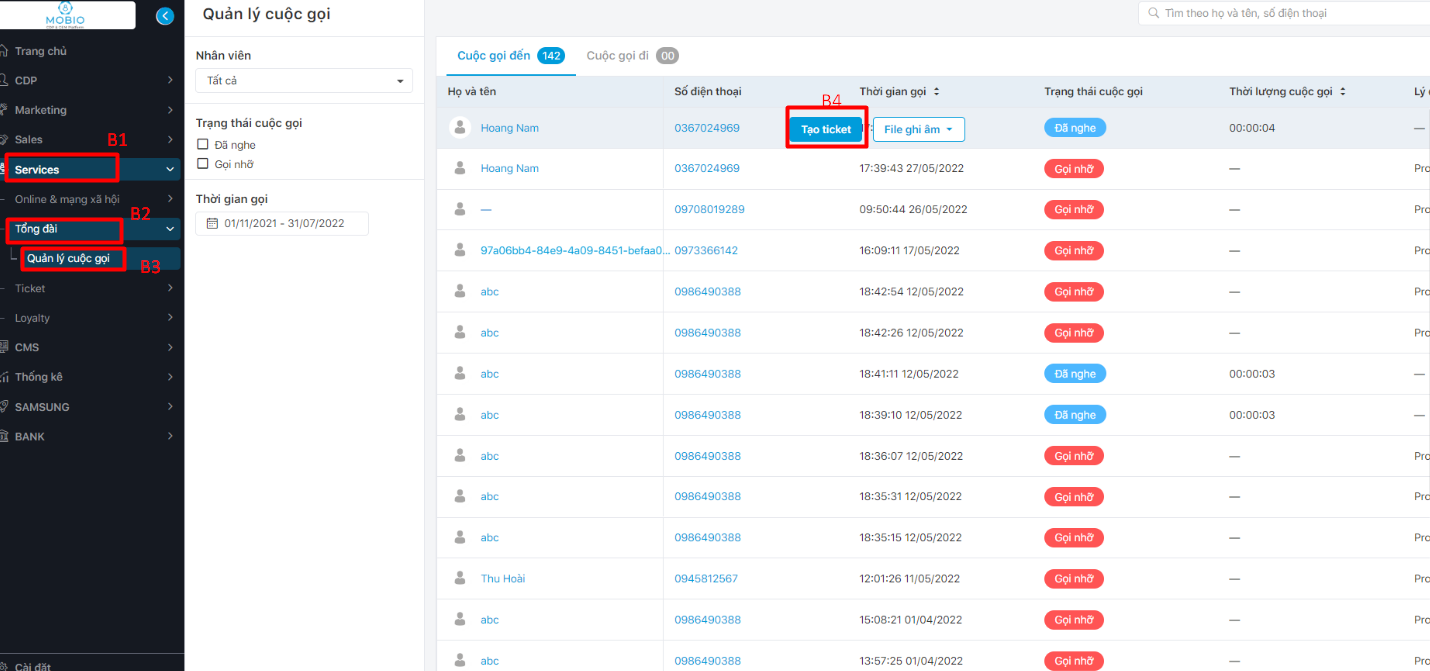
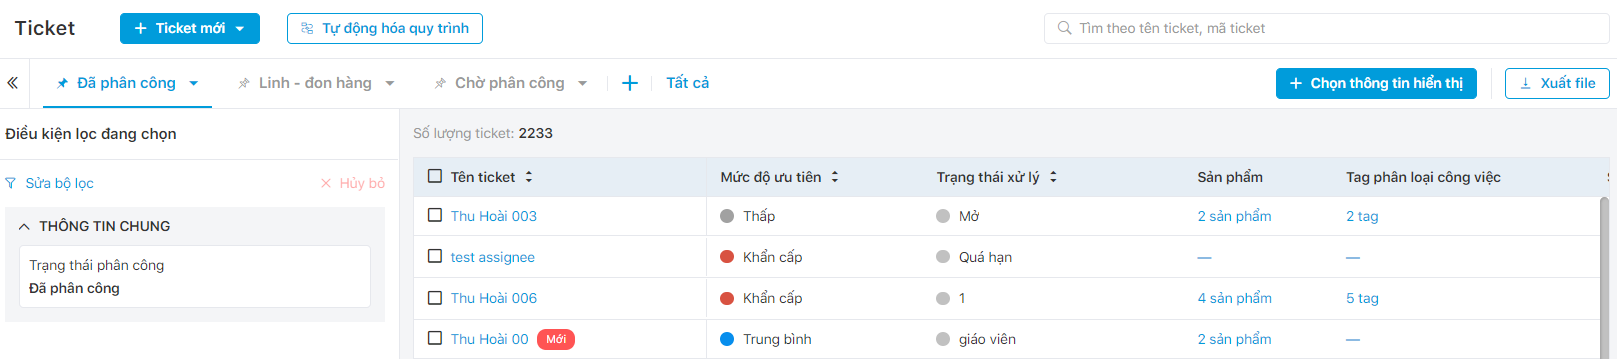
To access the Ticket Interface, select Services → Ticket. The interface displays an overview screen of Ticket information.
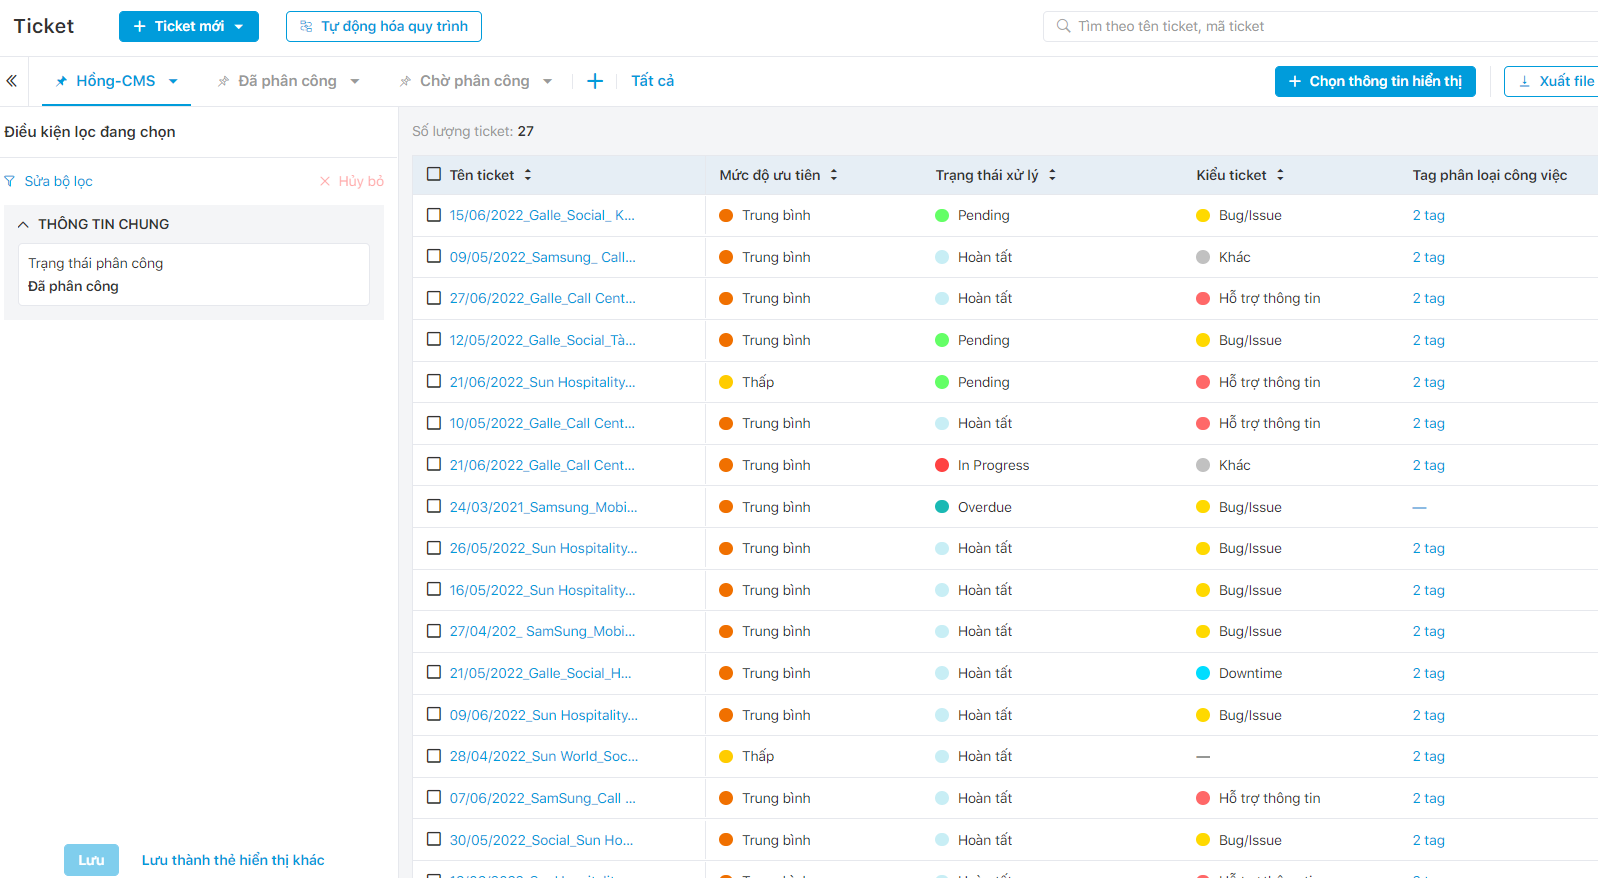
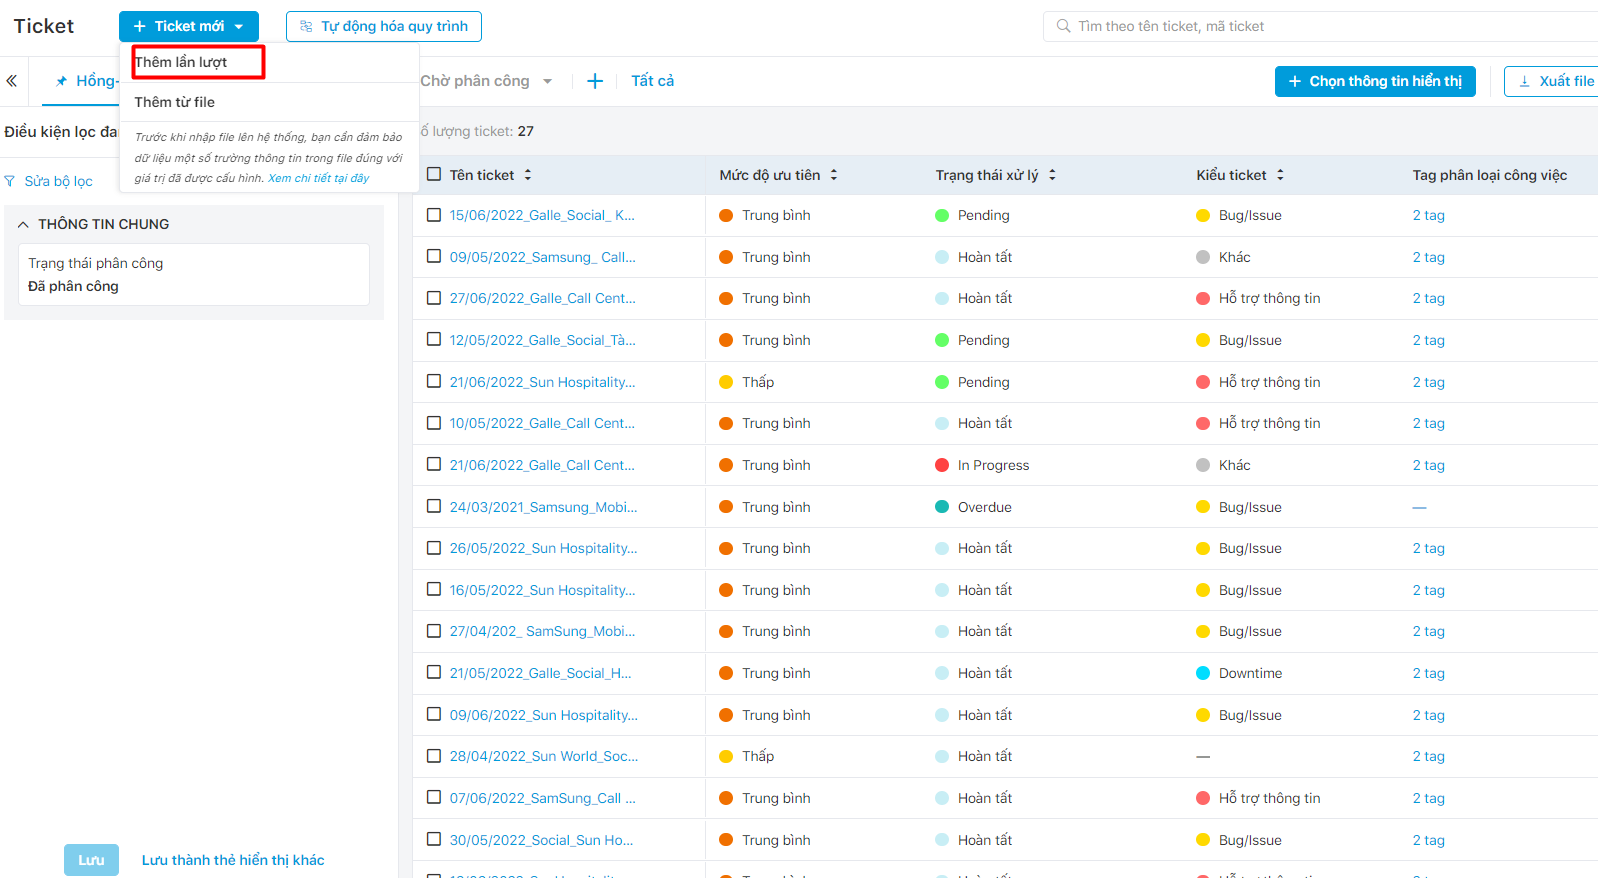
At the top left corner, click on “+ New Ticket” blue button, then choose “Create Individually” or “Add from File.”
Create a new ticket
There are 3 ways to create a new ticket:
- Select “Create new ticket” in the Ticket interface → choose “Create individually.”
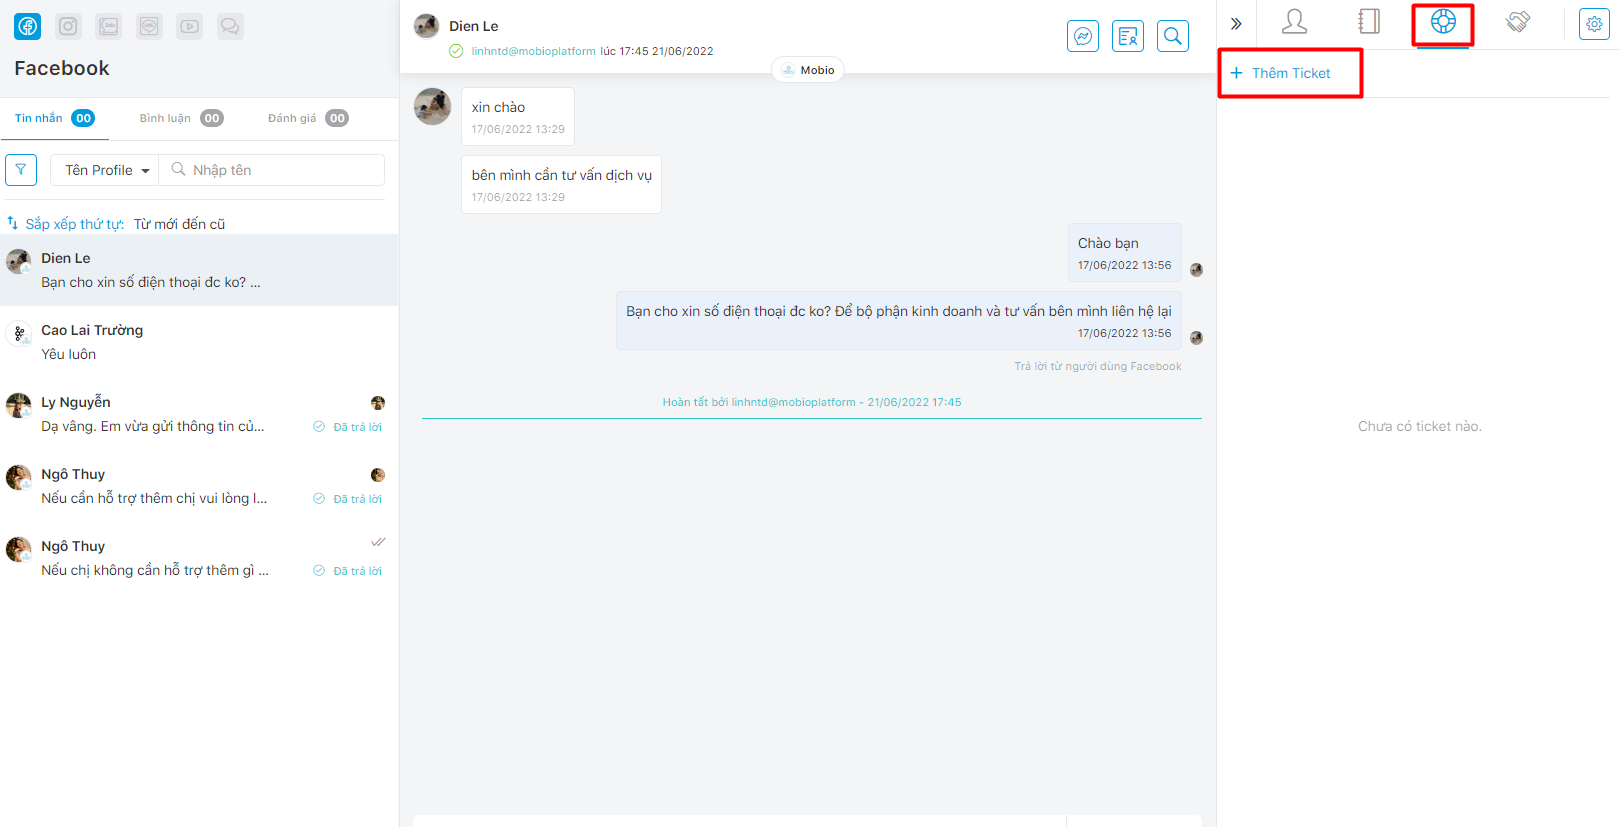
2. On the Online & Social interface, choose Chat and reply to customers → select “+ Add Ticket” at the right corner of the screen.
3. On the Call Center, Call Management Interface, click the vertical thee-dot symbol (next to a phone call on call report) → Choose Create Ticket.
After clicking “+ Add ticket,” please follow these steps:
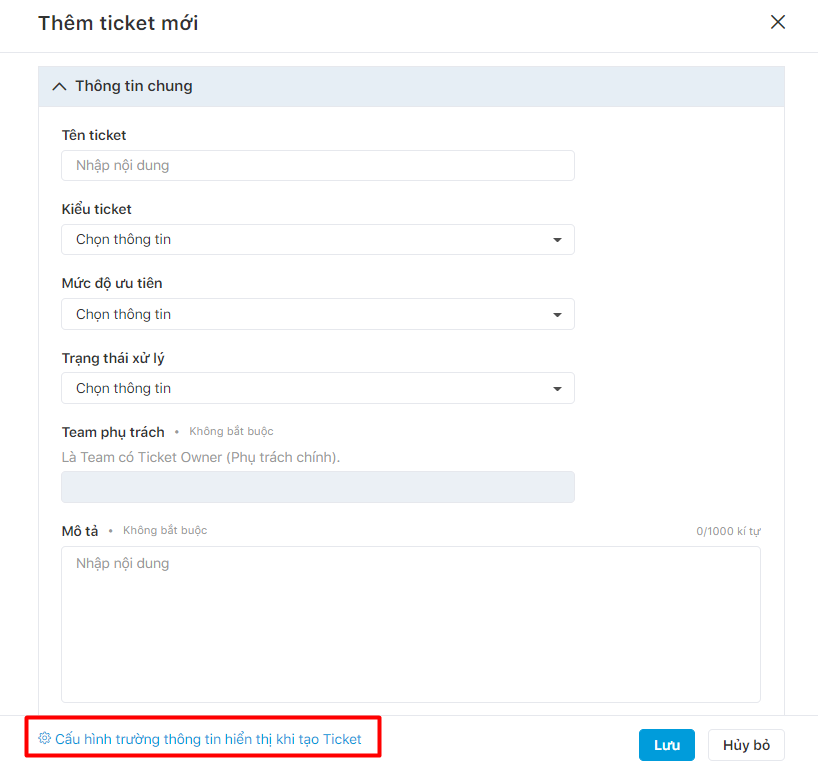
- Step 1: Fill in the ticket information according to the categories: General Information, Ticket Information, Customer Information, and Ticket Association.
General Information includes:
- Ticket name
- Status
- Priority
- Ticket type
Ticket Information
- Assigned team
- Staff in charge
Customer Information
- Profile: profile associated with the ticket
- Company (if any)
Ticket Association
- Product
- Oppty
Step 2: Click “Save” to complete the ticket creation. The newly created ticket will be displayed on the Ticket management interface or the screen where the user just acted.
Configure the displayed fields when creating a Ticket
Step 1: Click Configure this form at the bottom left corner of the Create Ticket pop-up window.
Step 2: On the Configure this form pop-up, users can select more fields from the list in the left corner. Users can also deselect and rearrange selected fields in the right corner and mark them as required.
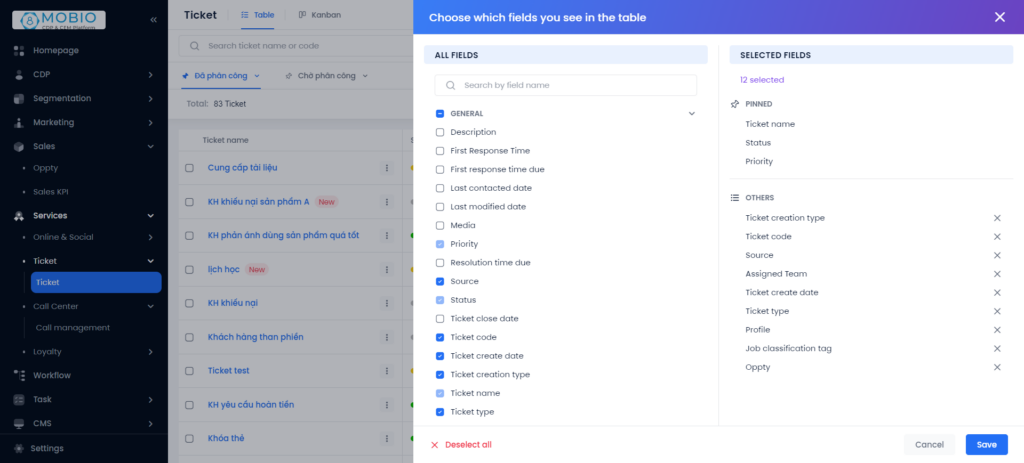
Select display information of Ticket Management Interface
Step 1: Click Select Display Information at the top right corner of the Ticket Management Interface.
Step 2: Users can select more fields to display from the list in the left corner of the Select Display Information pop-up. Users can also deselect and rearrange selected fields in the right corner.
Step 3: Click “Save” to complete the configuration.
Note: The configuration of displayed fields applies individually to each user.
Ticket Dynamic Fields
There are 2 ways to create a new ticket dynamic field:
1. On Create Ticket pop-up window, users can add a new dynamic field by clicking “+Add new” in the Ticket Information category.
2. Go to Settings → Company Account → Dynamic Fields → Ticket → Choose “+ Create a new information field“

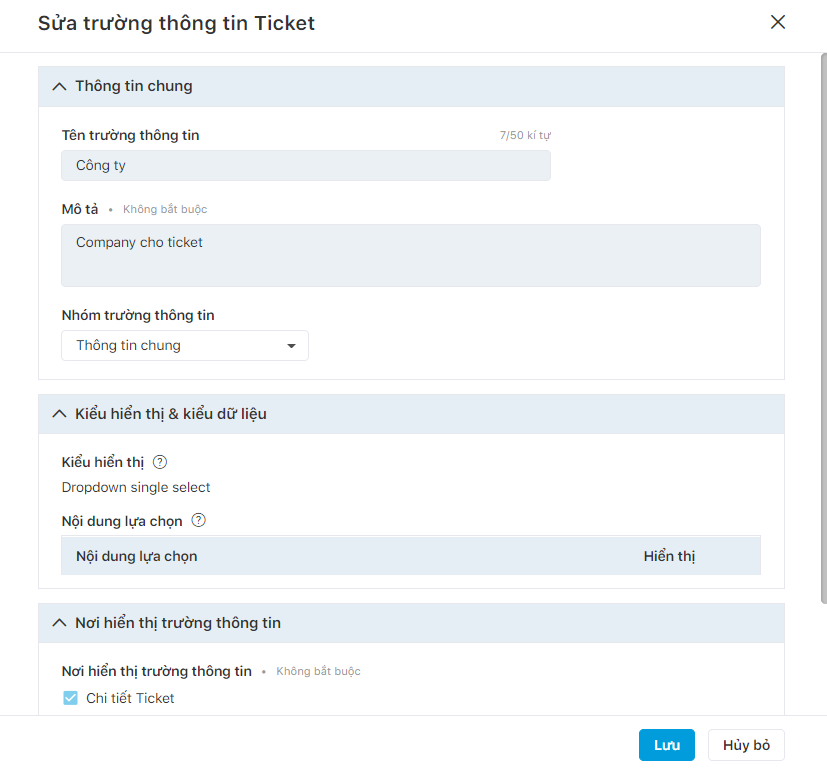
Fill in the information on Create a dynamic field pop-up according to the categories:
Overview information includes:
- Field name
- Subname
- Field group
- Description
Display type & Data type: Choose one of the following types:
- Display type: Single-line text, Multiple-line text, Radio button, Checkboxes, Dropdown single select, Dropdown multiple select, Date picker
- Data type: Typography and Number
Position to display information fields
Note:
- Users can edit and delete dynamic fields they create.
- System default dynamic fields cannot be deleted, but can be edited Subname and Field group.
- In these default dynamic fields: Priority, Status, Ticket Type; users can:
- Change color codes
- Add, delete, or rearrange selections
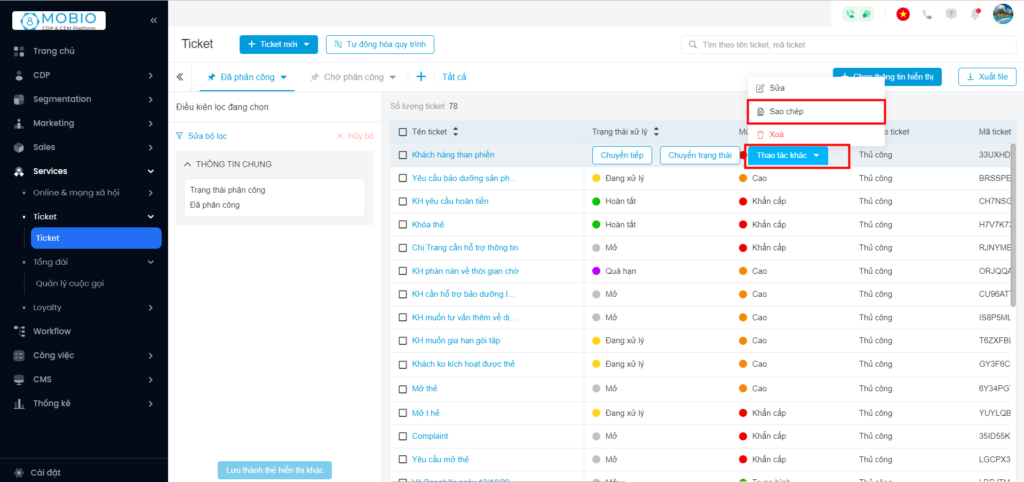
Copy a ticket
When a new ticket with the same content as an existing one is needed, users can quickly create it using the “Copy ticket” feature.
Step 1: On the Ticket Management interface, click the vertical three-dot symbol next to the ticket name → select “Copy ticket.”
Step 2: Edit the information in the Create new ticket pop-up window.
Step 3: Click “Save.”
Import tickets from a file
Step 1: Choose “Create new ticket” → “File upload“

Step 2: Choose either Upload from your computer or Copy and paste data.
If you choose to Upload from your computer, drag and drop the file to the upload area or click on the upload area to choose the file from your computer →. Click “Continue.”
Users can also download the ticket file template on the file upload interface.

Note:
- Ticket name, Priority, Ticket status, and Ticket type are mandatory fields.
- To ensure the system accurately recognizes and identifies each ticket’s Ticket Status, Priority Level, and Ticket Type, users need to fill in the correct values in the fields configured in the system.
Kiểu 2 – Kiểu nhập file: Sao chép & dán dữ liệu.
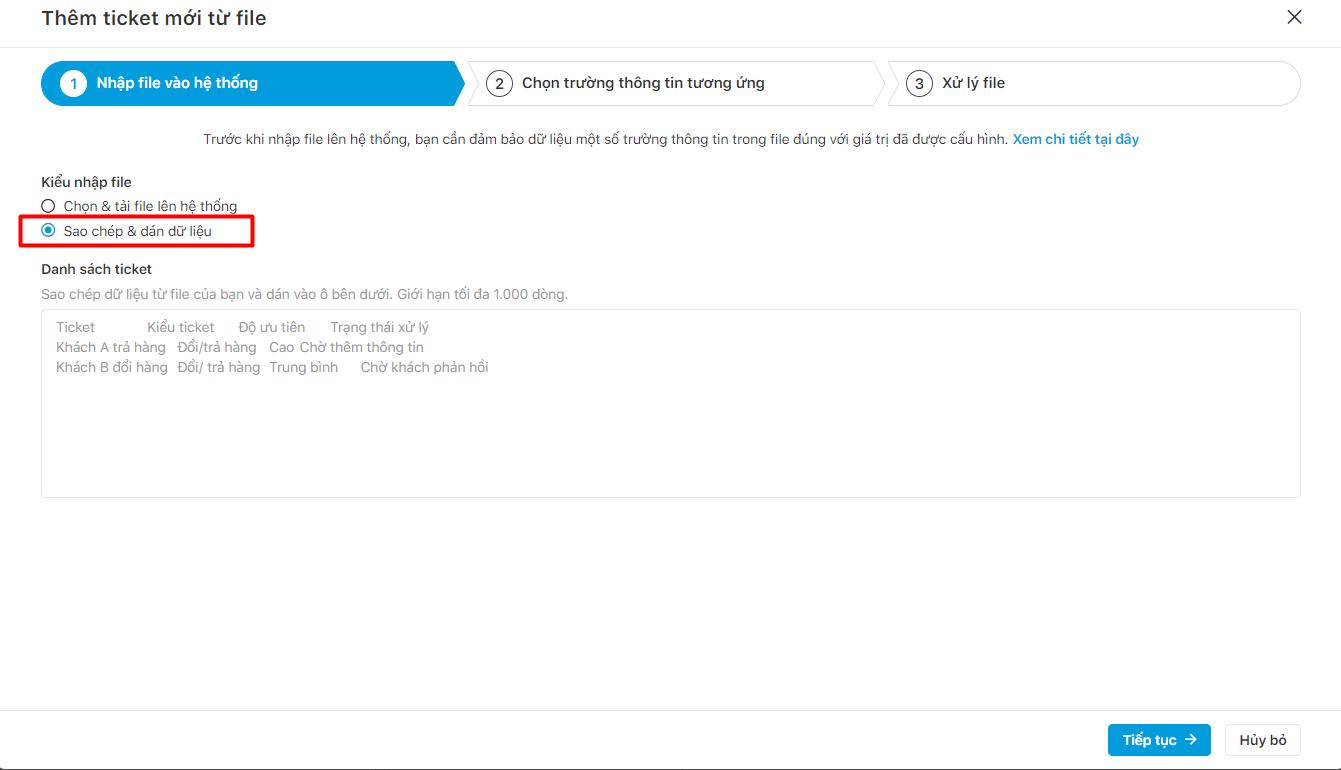
If you choose Copy and paste data, copy it from your file and then paste it into the data box.
Note:
- You can only paste up to 1,000 rows.
- When manually entering data, each field in every line needs to be separated by a tab.
Step 3: Mapping fields
- Choose whether the field is imported as Ticket Information or Profile Information.
- Map Column header from file to the fields
- Choose “Do not fill out these fields” to pass by all the deselected fields.
Step 4: Click “Save” to complete the uploading process.
The system notifies that the file has been successfully uploaded and requires some processing time. After completion, the system sends an email notifying the user of the results. Newly created tickets are displayed on the Ticket Management Interface.