Target audience blocks are the target customers that the campaign aims for.
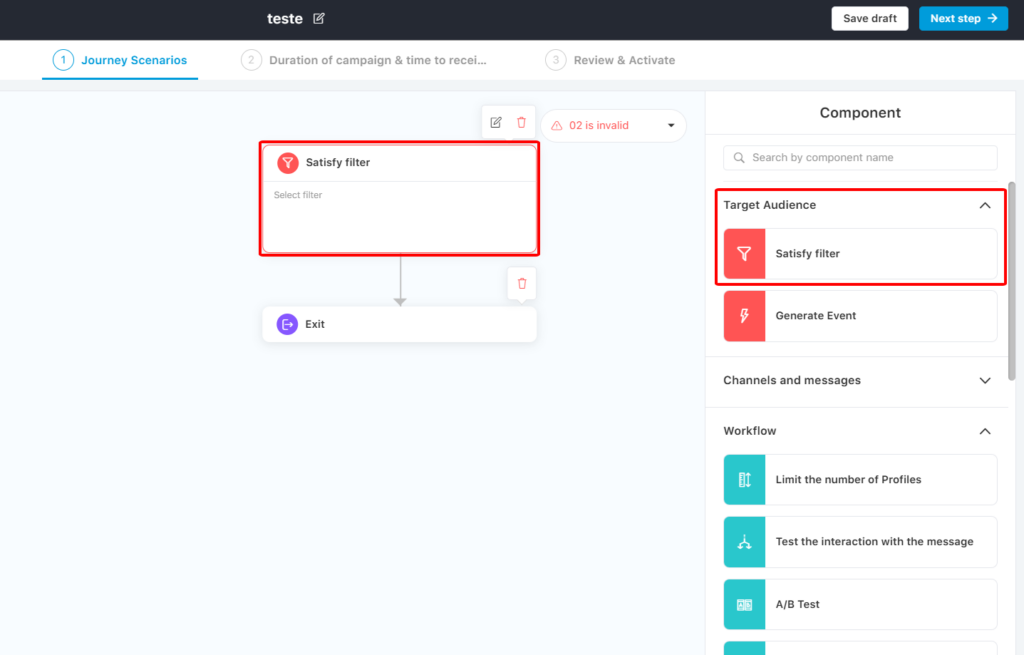
Satisfy filter
Step 1: Drag and drop the target audience block into the Journey.
Step 2: Select the target audience by filter.
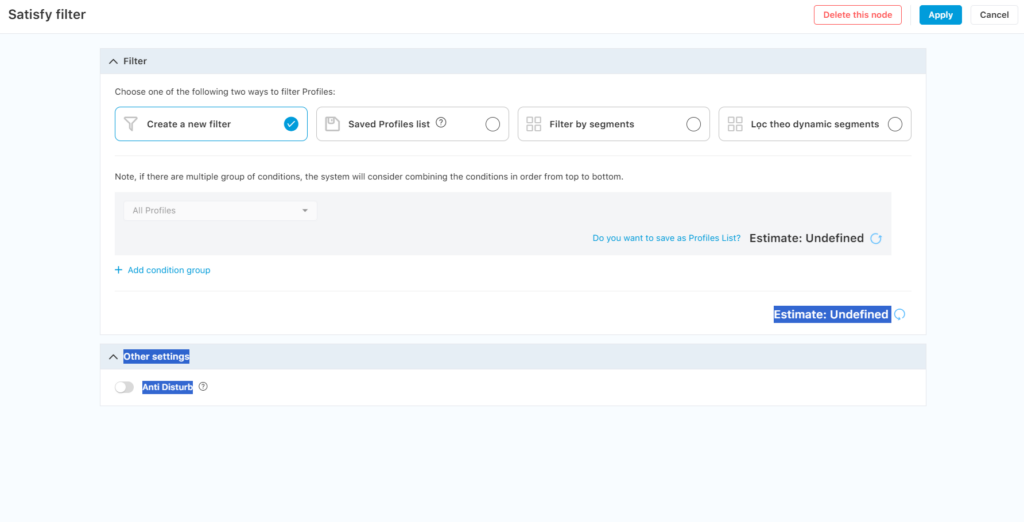
Filter
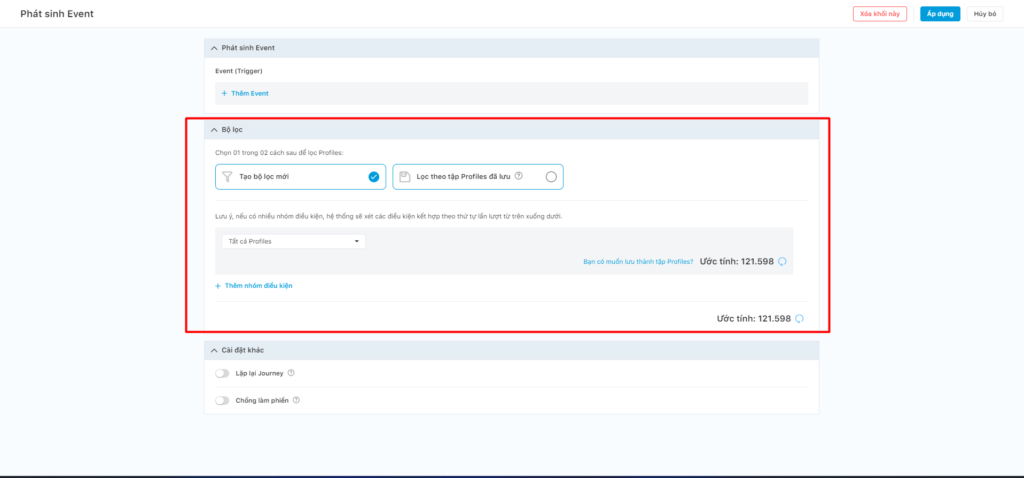
– Choose one of the following 4 ways to filter Profile:
+ Create a new filter.
+ Saved Profiles list
+ Filter by segments
+ Filter by dynamic segments
– Profile filtering conditions:
+ For Create a new filter way: There are 3 options when creating a new filter:
Note:
(1) Note, if there are multiple group of conditions, the system will consider combining the conditions in order from top to bottom.
(2) Filter AND/OR/EXCLUDE can be combined between condition groups.
(3) When filtering Profile, in addition to the filters that generate the desired target object file, the user SHOULD combine the Accessible through channel filter so that the system pre-disqualifies profiles that are not accessible on each channel (no email, phone number, etc.) do not allow receiving notifications on the website,…). This will help optimize the speed of data scanning and sending messages on the system.
–Save: Save the filter you have created.
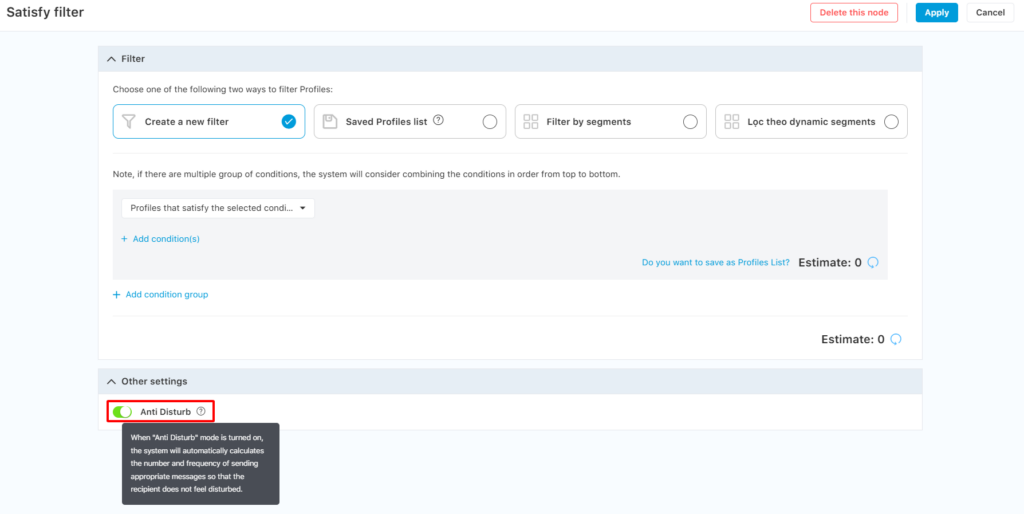
Other Settings
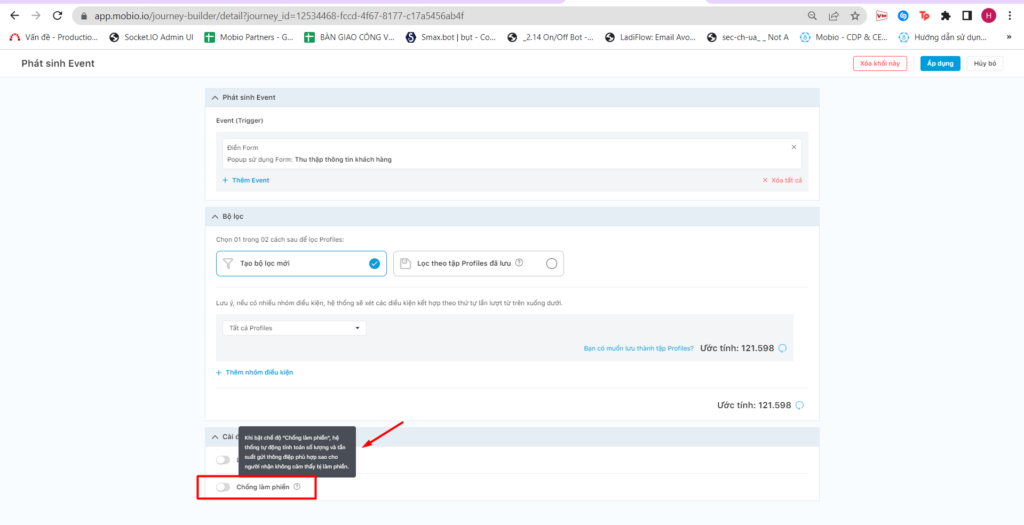
Anti-Disturb
When there are multiple Journey Builder campaigns running at the same time on the system, it is inevitable that users will have to receive multiple messages. In order for the recipient not to feel disturbed, the user should use the Anti-Disturb mode.
When Anti-Disturb mode is enabled, the system automatically calculates the number and frequency of sending appropriate messages (usually each message will be sent 7 hours separately).
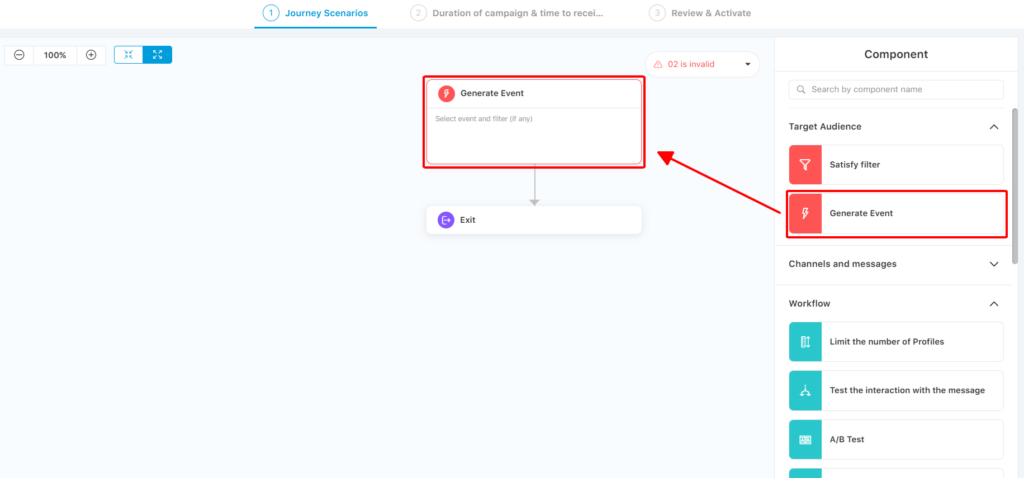
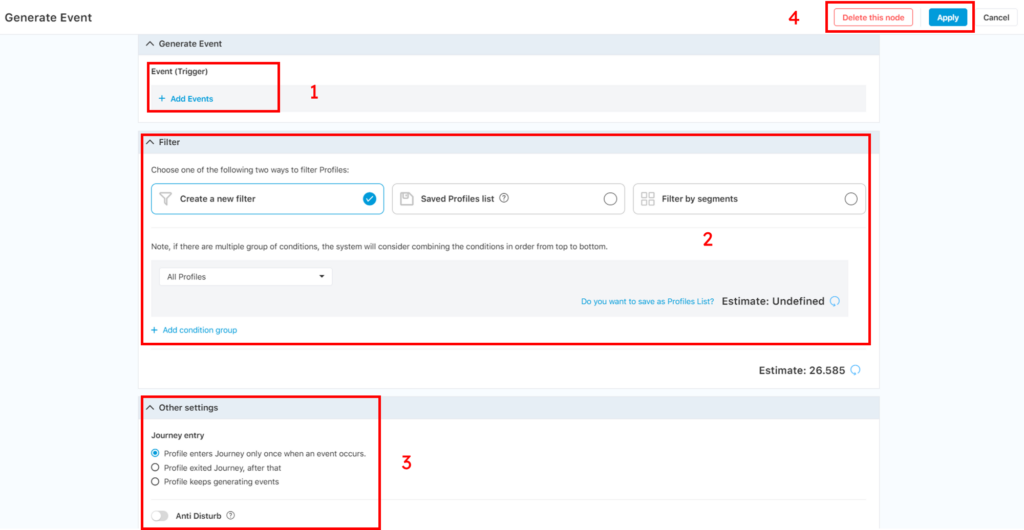
Generate Event
Step 1: Drag and drop the Generate Event block.
Step 2: Configure the Generate Event block.
Even selection and configuration
Generate Event (Trigger)
Step 2.1. Select Event
Event Generation Filter
In the Journey Builder Event Generation filter, there are several other triggers including:
+ Update PROFILE INFORMATION: Update Profile data fields (due to importing data from 3rd parties, importing files, updates from social media, etc.) will be automatically included in Journey Builder.
+ Update OPPTY STATUS: When an Oppty changes status, the Profile associated with the Oppty will automatically be included in Journey Builder.
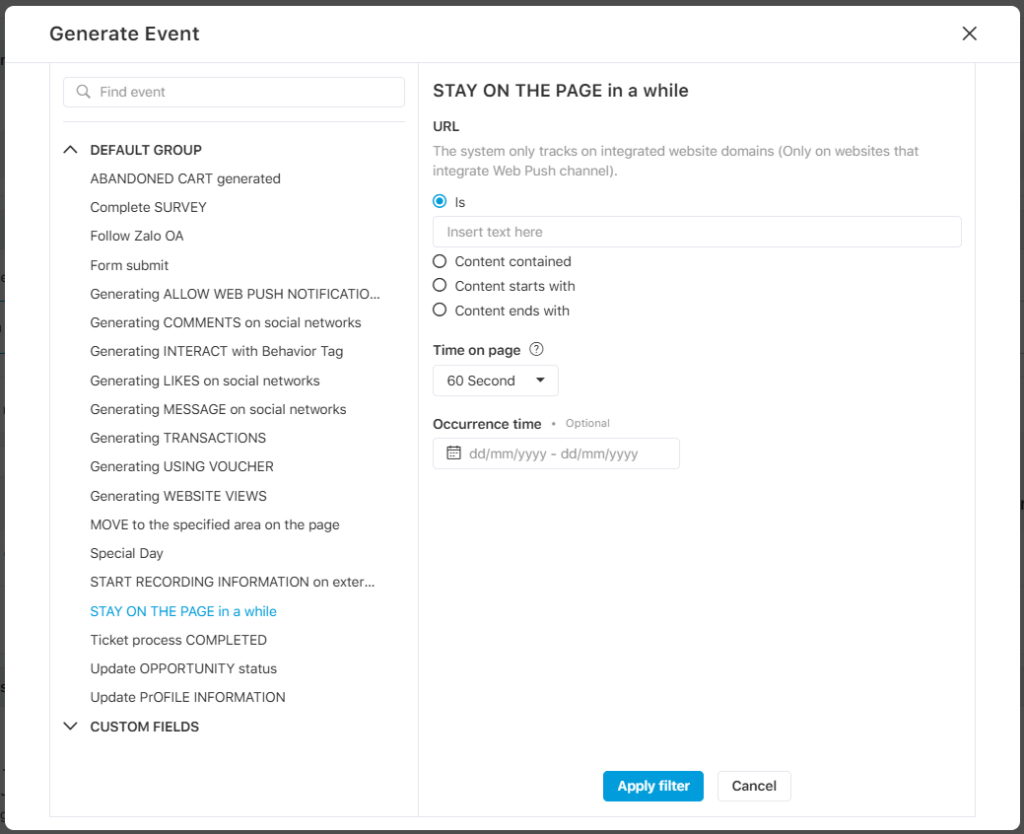
+ STAY ON THE PAGE in a while:
URL: The system only tracks on integrated website domains (Only on websites that integrate Web Push channel).
– “Is”: The system sends a push according to the correct (every character) of the website link that the user enters here. For example, if you type: “https://mobio.io/”, then only customers who access the right link will receive a push.
– “Content contained”: As long as your website link has this content, customers will receive a push. For example, when you type: “sale”, customers who enter the https://mobio.io/sale_thang9 or https://mobio.io/sale1111 link will receive a push
– “Content starts with” and “Content ends with”: Your website link must start/end with this content for customers to receive a push.
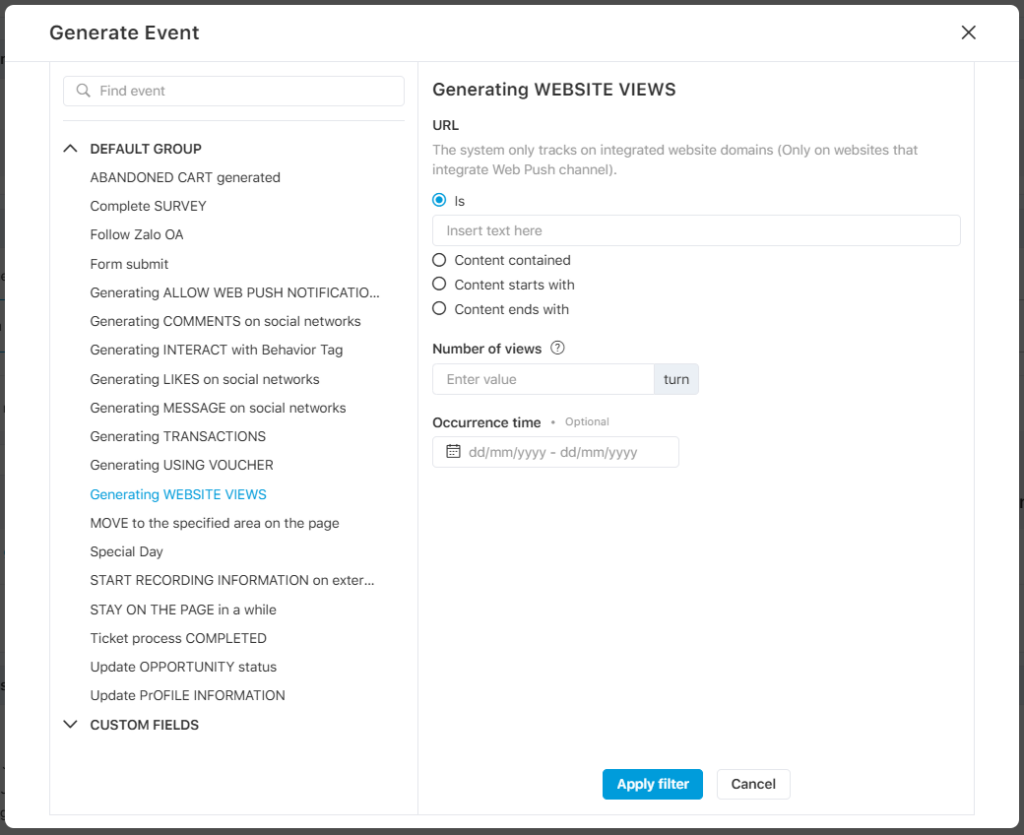
+ Generating WEBSITE VIEWS:
URL: Website link to send web push for customers (The system only tracks on integrated website domains).
URL fill types including “Is”, “Include content”, “Start with content”, and “End with content” have the same meanings as explained in the user manual of the STAY ON PAGE in a while.
+ MOVE to the specified area on the page.
URL: Website link to shoot web push for customers (The system only tracks on integrated website domains).
URL fill types including “Is”, “Include content”, “Start with content”, and “End with content” have the same meanings as explained in the user manual of the STAY ON PAGE event for a period of time.
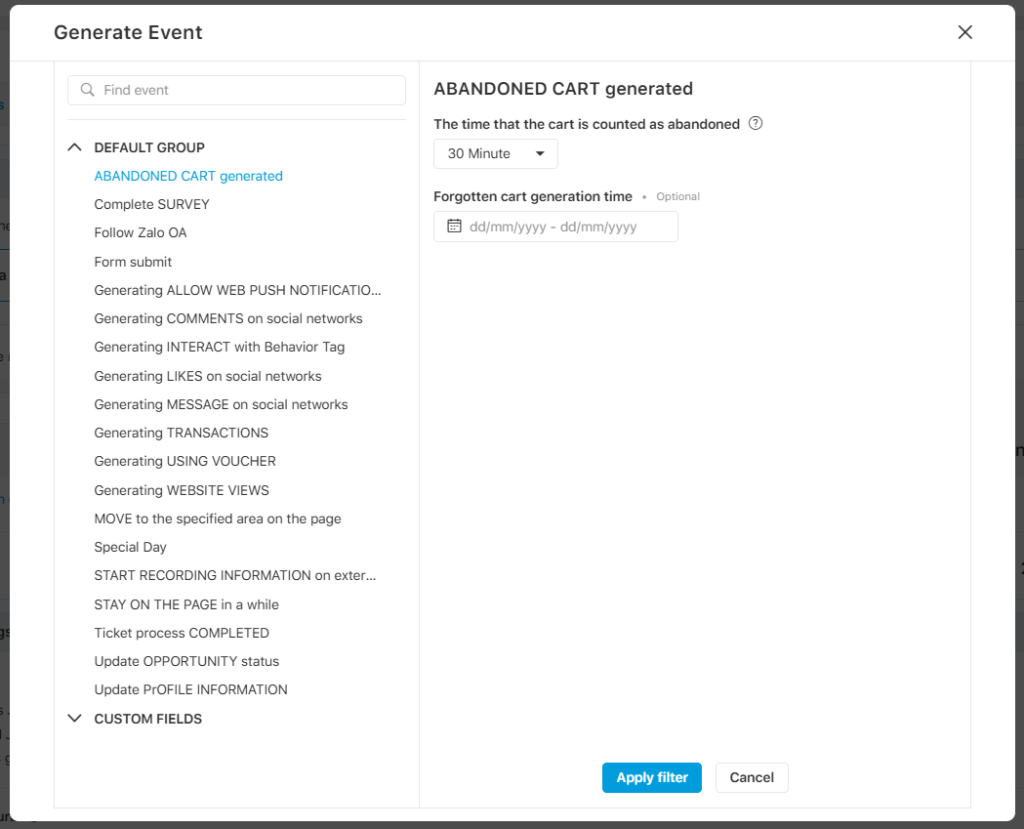
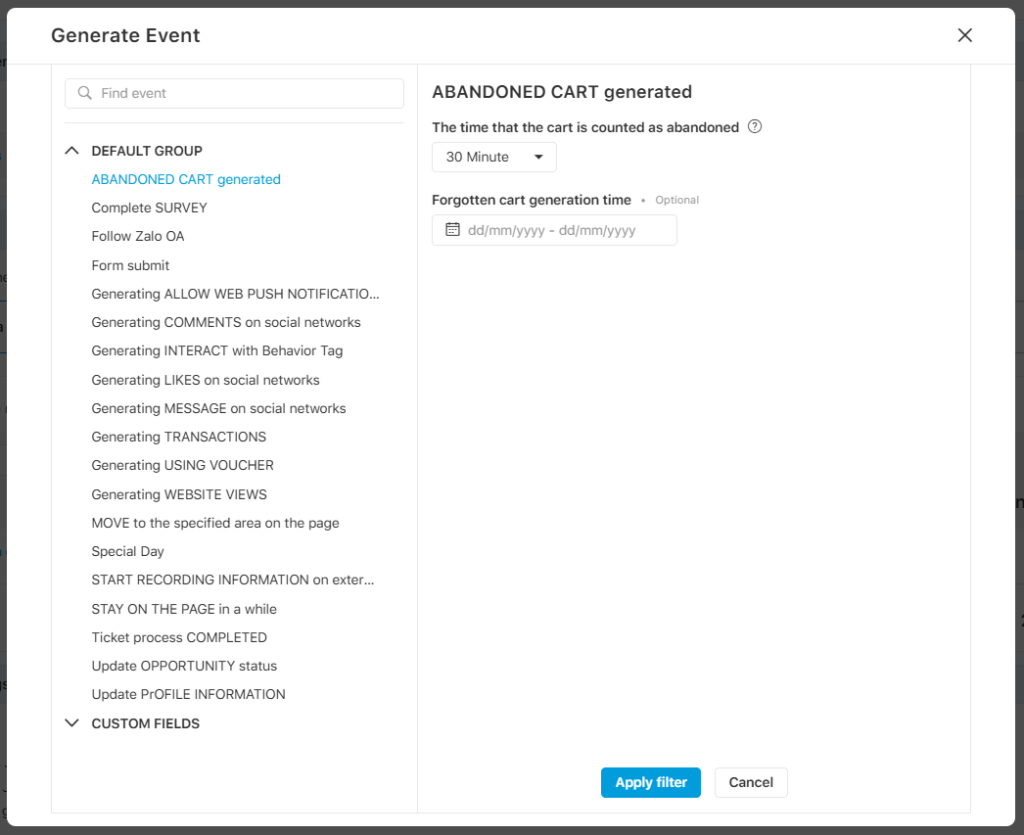
+ ABANDONED CART generated (website).
The time that the cart is counted as abandoned: After creating the cart, if the Profile does not complete the checkout process within a period of time, the cart will be considered abandoned.
Forgotten cart generation time: the time when the event occurs.
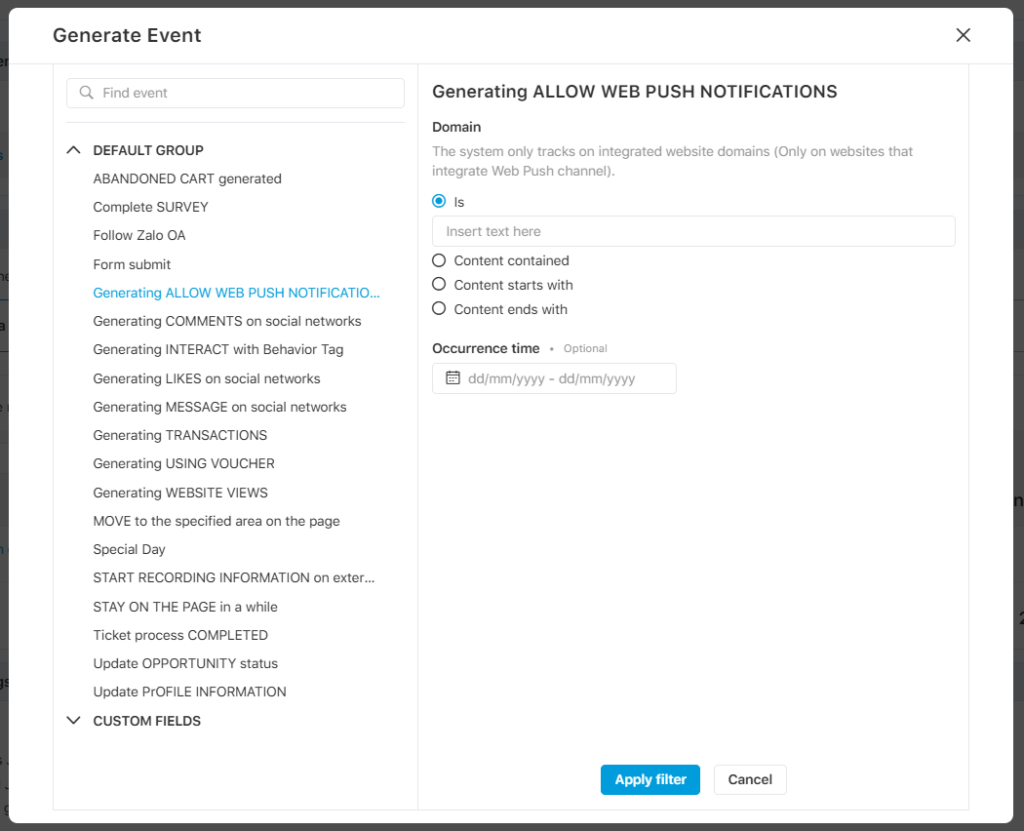
+ Generating ALLOW WEB PUSH NOTIFICATIONS: Triggers are used with customers who Click Allow to receive website notifications.
The popup asks if the user allows to receive website notifications
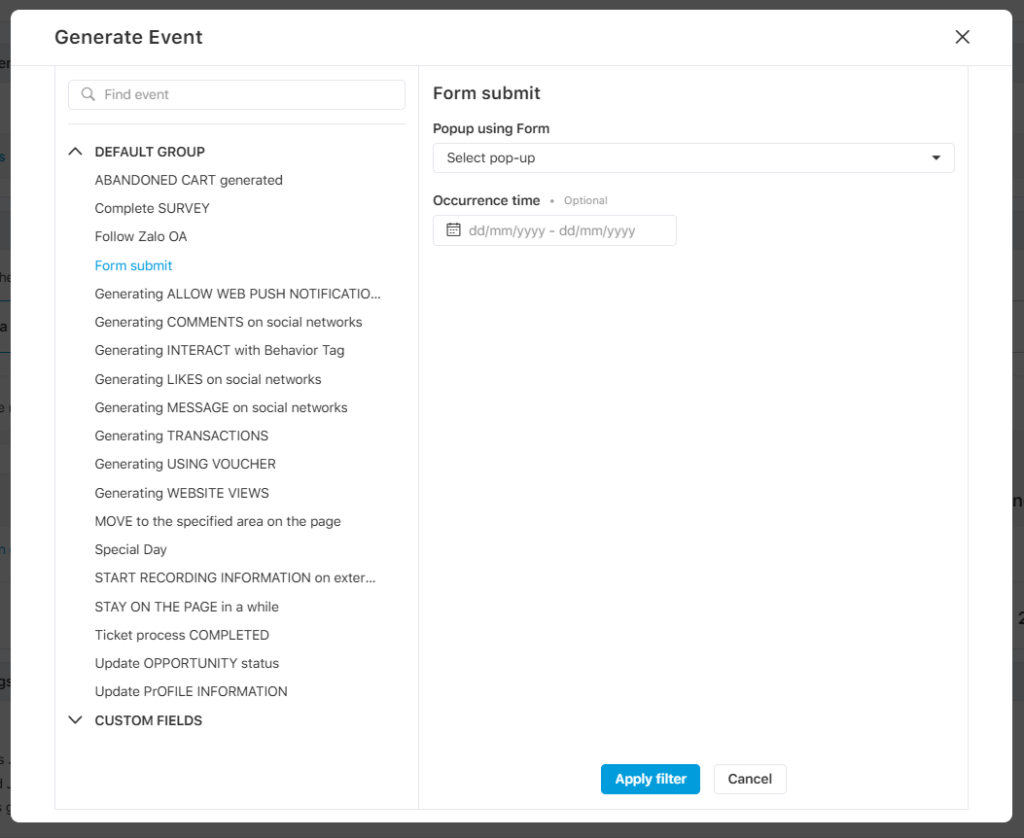
+ Form submit: Forms are created in the Popup Builder module of Mobio. When the user fills out the form and presses submit, the trigger will be recorded.
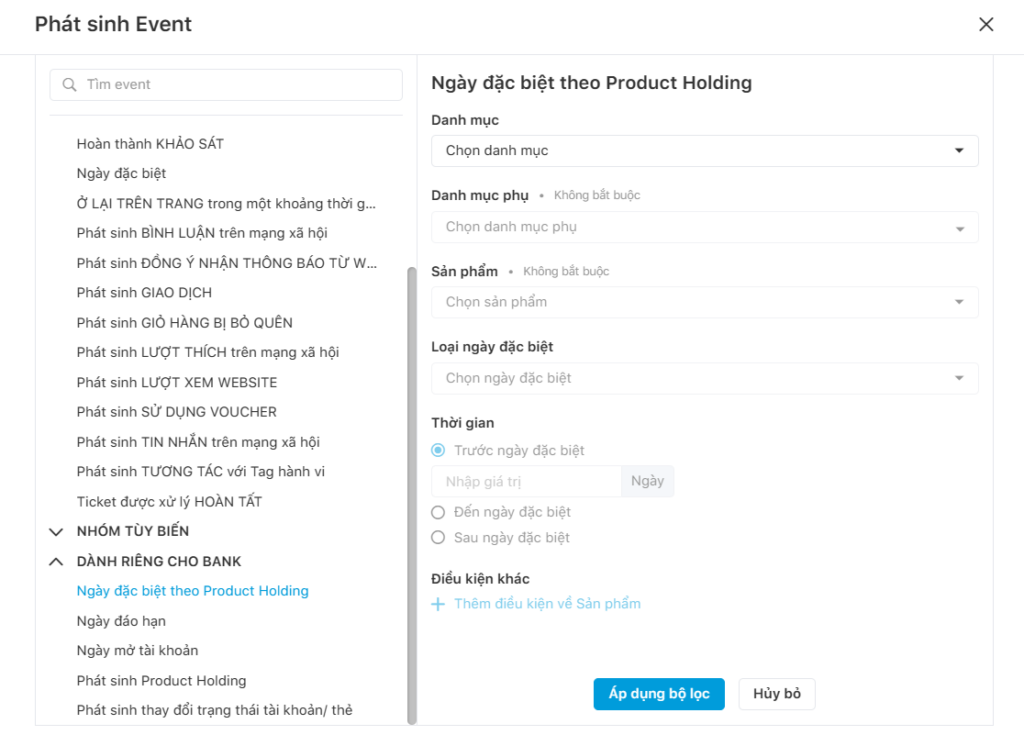
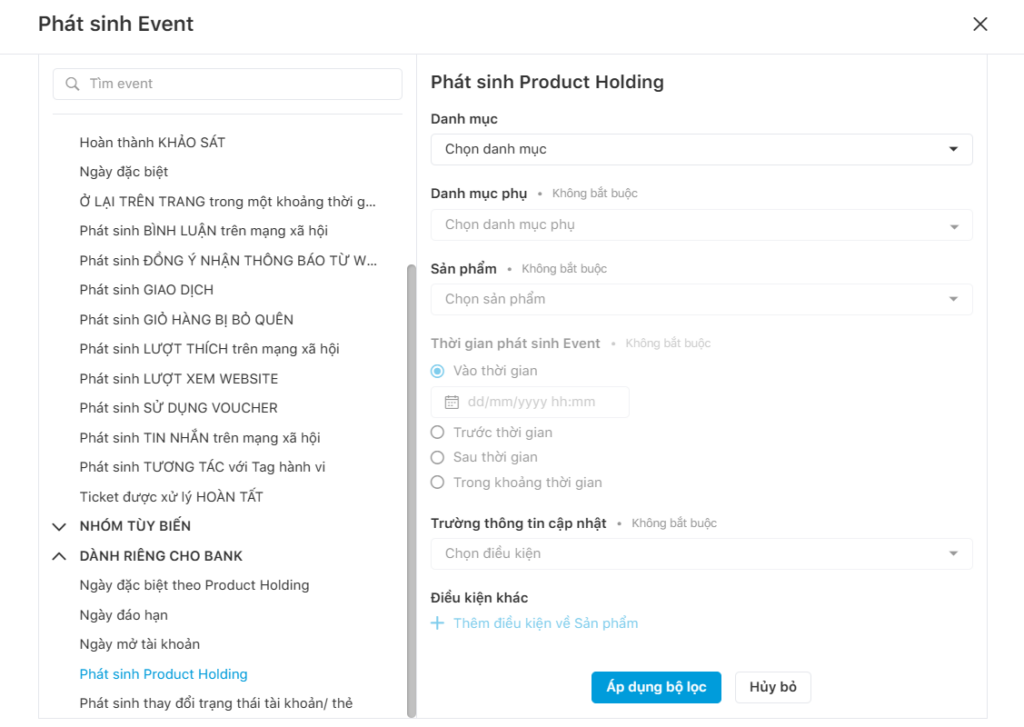
+ SPECIAL DAYS ACCRODING TO PRODUCT HOLDING: When a Profiles triggers related to a Special Date According to Product Holding, the Profiles are automatically included in the Journey.
+ PRODUCT HOLDING GENERATED: When Profiles trigger new Product Holding, Profiles are automatically included in the Journey.
Step 2.2. Save the selected event.
To use triggers, users select the popup template they want to record triggers in the popup templates (the system only displays popups with information forms). Then press Apply filter.
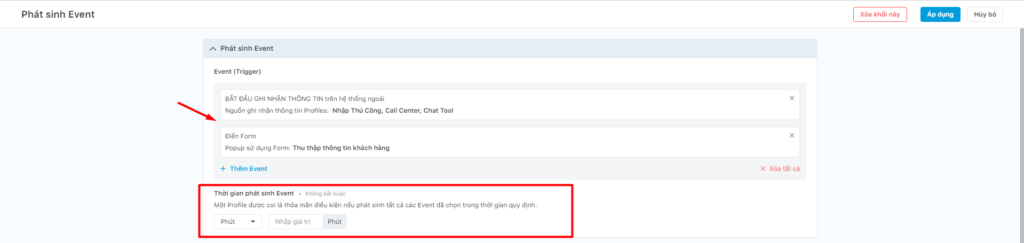
Note: Users can select multiple events in the event generation block.
When selecting 2 or more events, there will be more time for events to be generated. A Profile is considered to be eligible if all events occur within the time period specified by the user. This condition is to help businesses measure the level of customer interest over a certain period of time, thereby sending the right message to stimulate conversions. The profile needs to meet the conditions for the event and the time of the event to receive the message.
Filter
Mobio system allows users to combine filter conditions in the Generate Event block.
The actions of the filter in combination with the trigger are similar to the filter of Satisfy filter block.
Other Settings
When Anti-Disturb mode is enabled, the system automatically calculates the number and frequency of sending appropriate messages (usually each message will be sent 7 hours separately).
Repeat Journey
Setting how often Profile enters a Journey
(1) Profile enters Journey only once when an event occurs.
(2) Profile exited Journey, after that:
Whenever an event generated, go to Journey
Wait for at least 1 period of time and then generate
(3) Profile keeps generating events:
Then go into Journey
And the time of the next event must be at least 1 time away from the time of the previous event to enter the Journey.