To access the feature, select Company Account.

Then, in the General Settings area, select Object Management → Object → Select Oppty.
Here, the system has been divided into components for users to configure, including Field Setup; Field display setup, and Cleansing configuration
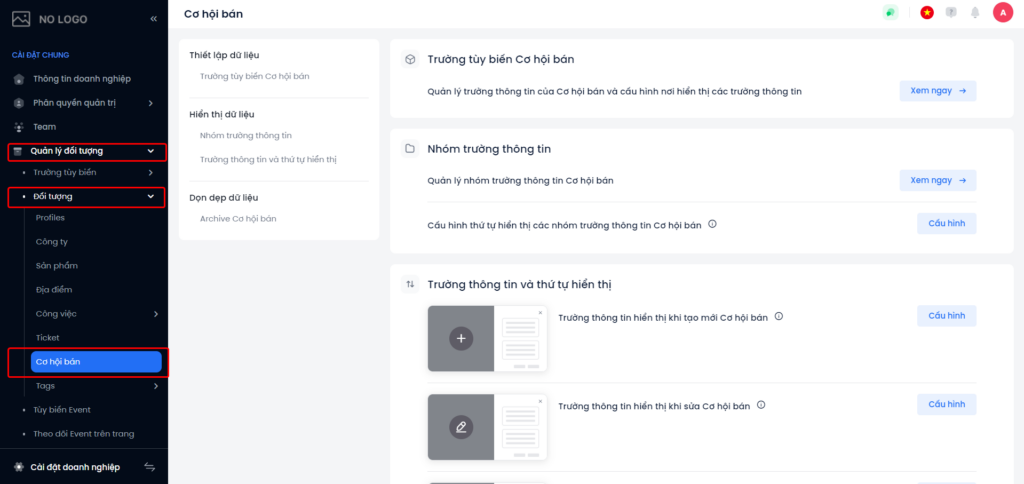
Field Setup
When clicking See Now in the Oppty custom fields, the system will move to the Oppty custom fields feature interface, allowing users to create, edit, and delete Configure information fields for Oppty.
See the Oppty custom fields guide

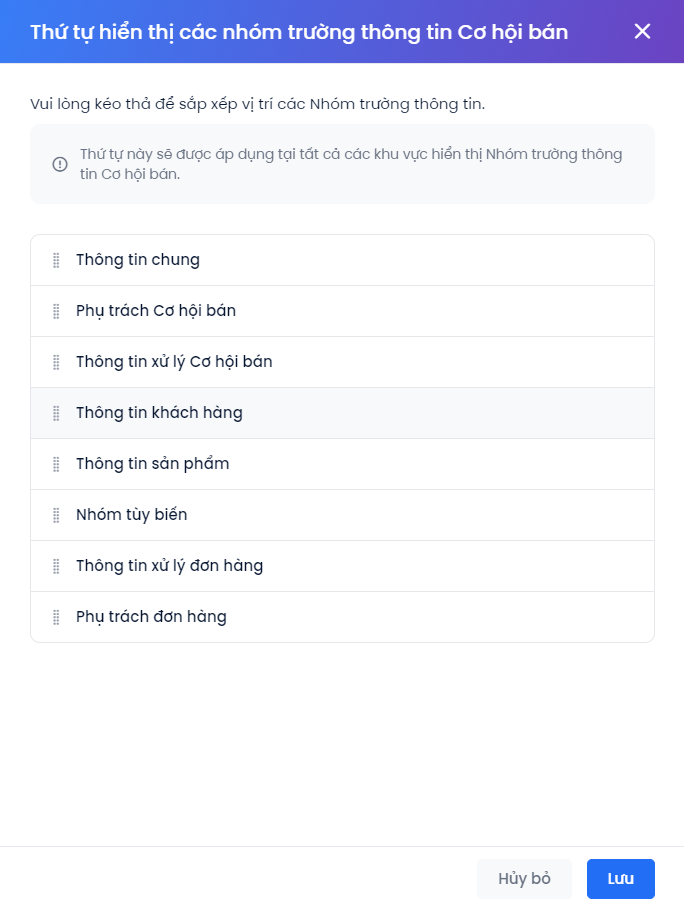
Configure the display order of the Oppty field groups

Click Configure Configure the display order of the Oppty field groups. The pop-up display system allows users to drag and drop the order of groups of information fields as desired. This configuration will be applied to all areas that display the Oppty field groups.
Configure the information fields displayed when creating/editing Oppty

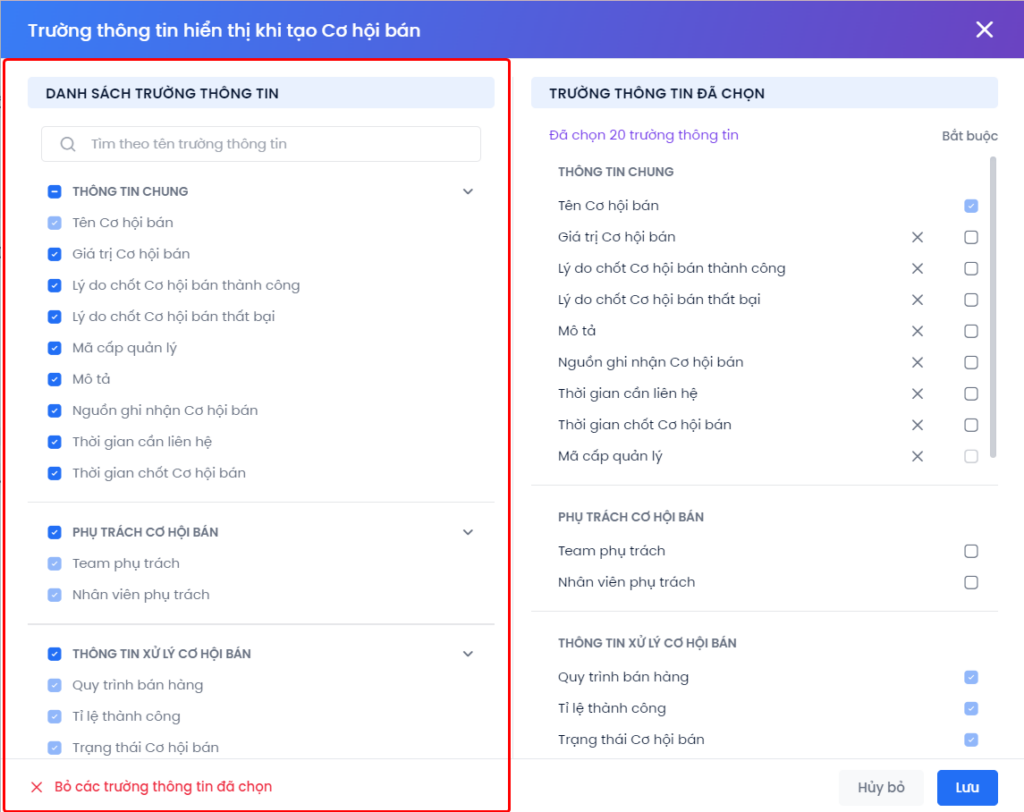
(1) Choose which fields you see when creating Oppty: Specify the information fields required when creating a new Oppty.
Step 1: The user selects the information fields to display when editing the profile in the left-hand column.
Step 2:
- Except for the default fields, the user clicks the X icon to remove some selected information fields or select Deselect all.
- Select required information fields when creating a new Oppty
- Users can drag and drop to change the display order of information fields.
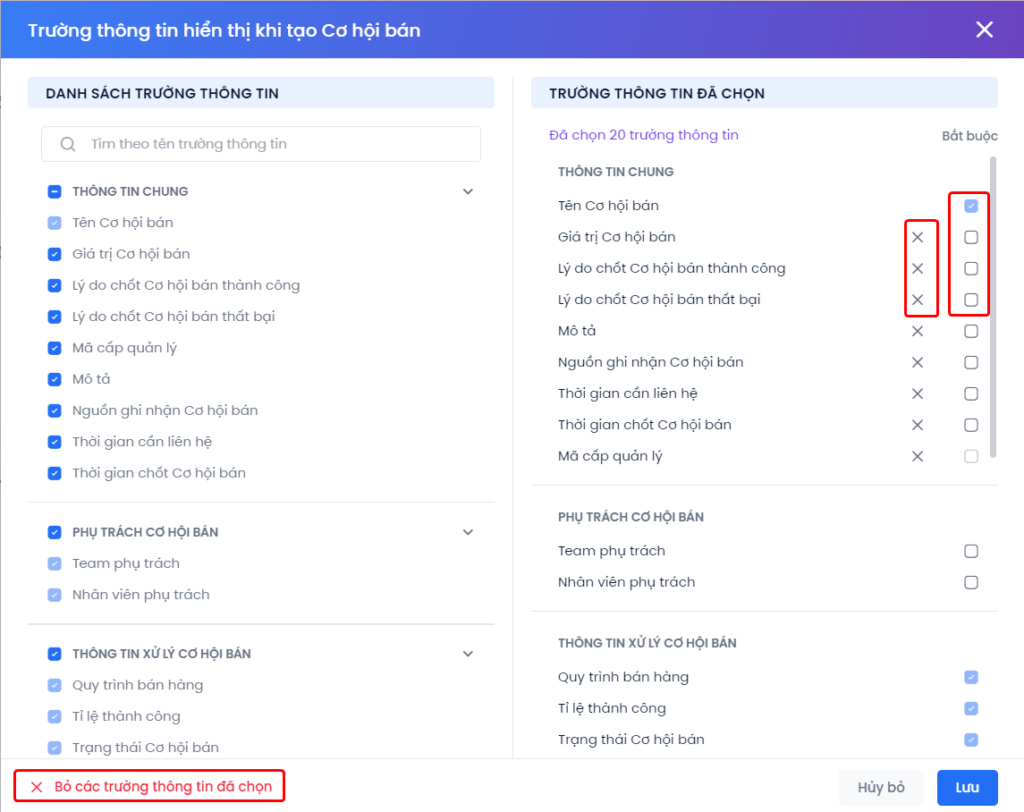
Step 3: Click Save or Cancel to complete the configuration.
(2) Information fields when editing an Oppty: Specify the information fields required when editing an Oppty.
The steps to configure the information field when editing an Oppty are similar to the Information Field displayed when creating a new Oppty
Configure Archive Oppty
To free up operational resources, after a period of time since the Oppty reverts to the selected state, the system will archive the Oppty. Archived Oppty will still be counted on Sales reports, except for the Sales Pipeline report.
Note: After Archived, users will not be able to view detailed information and activities related to the Oppty.
In the default state, the Oppty will be Archived after 180 Days from the time it is moved to Successed or Failed status, however, users can edit this number “180” according to the needs of the business.
Step 1: In the Archive Oppty section , select Configuration .

Step 2: Fill in the number of days the user wants the system to Archive the Oppty. The system allows configuring the Archive date for a minimum of 90 days and a maximum of 2000 days.
Step 3: Select Order Status, when switched to that status, the order will be archived after the time configured above.
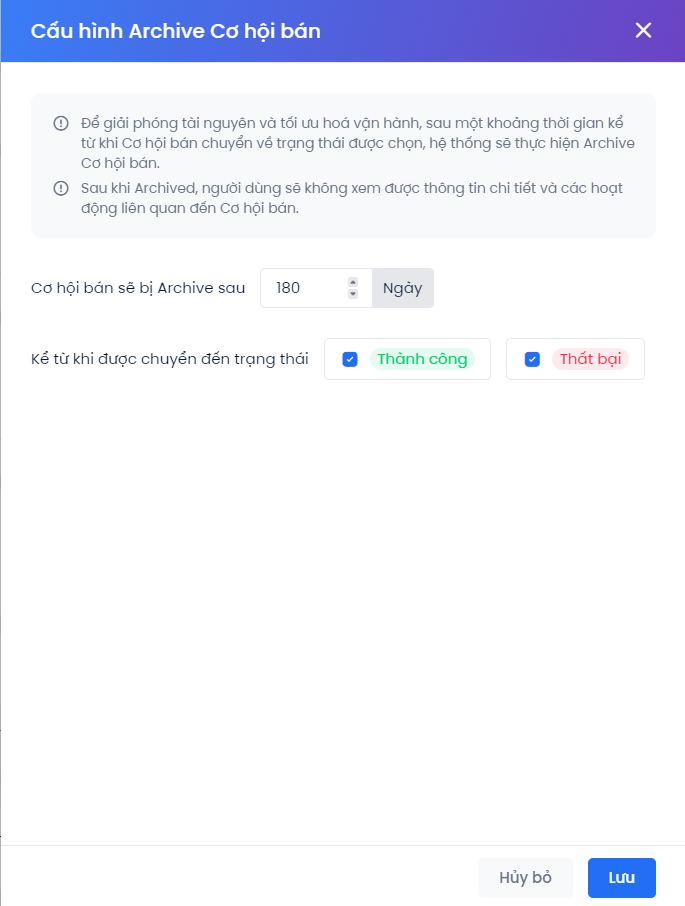
Step 4: Click Save to complete the configuration.
After being archived, orders will no longer be displayed in the Sale module. However, in the details section of related objects such as Profile, Ticket, Account,… these orders will still be displayed in text format for users to look up.

